> ## Documentation Index
> Fetch the complete documentation index at: https://landinglens.docs.landing.ai/llms.txt
> Use this file to discover all available pages before exploring further.
# Tags
export const vp = 'Visual Prompting';
export const smartLabel = 'Smart Labeling';
export const productLL = 'LandingLens';
export const mi = 'Mobile Inference';
export const llsf = 'LandingLens on Snowflake';
export const companyName = 'LandingAI';
*This article applies to these versions of LandingLens:*
LandingLens
LandingLens on Snowflake
✓
✓
You can apply tags to images in your projects. Using tags helps you organize and filter the images in your dataset.
For example, let's say that you have images from Camera A and Camera B. You can create a tag for each camera, and apply the tags to the corresponding images. Then, after you train a model, you can filter by all Camera A images, and see how the model performed on those. You can then do the same for Camera B images.
Tags are project-specific; creating a tag in one project doesn't add it to other projects. You can apply multiple tags to each image.
## Apply Tags at Upload
You can add tags to images when you upload them. If you're uploading multiple images at once, the selected tags are applied to all images. To add tags at upload:
1. Open the Upload window. (There are several ways to start the upload process. For more information, go to [Upload Images](./upload-images).)
2. Select the images to upload.
3. Click **Add Tag**.
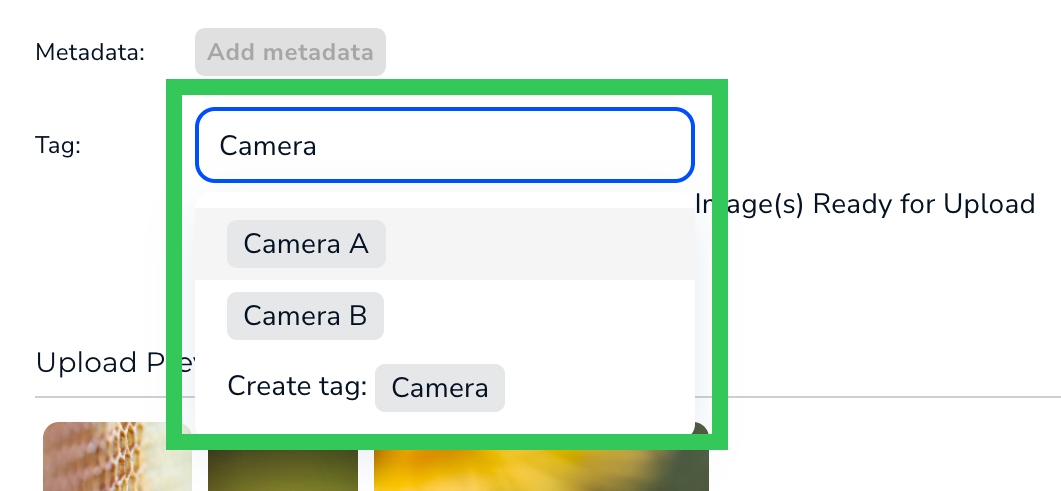
4. Select or create the tags you want to apply.
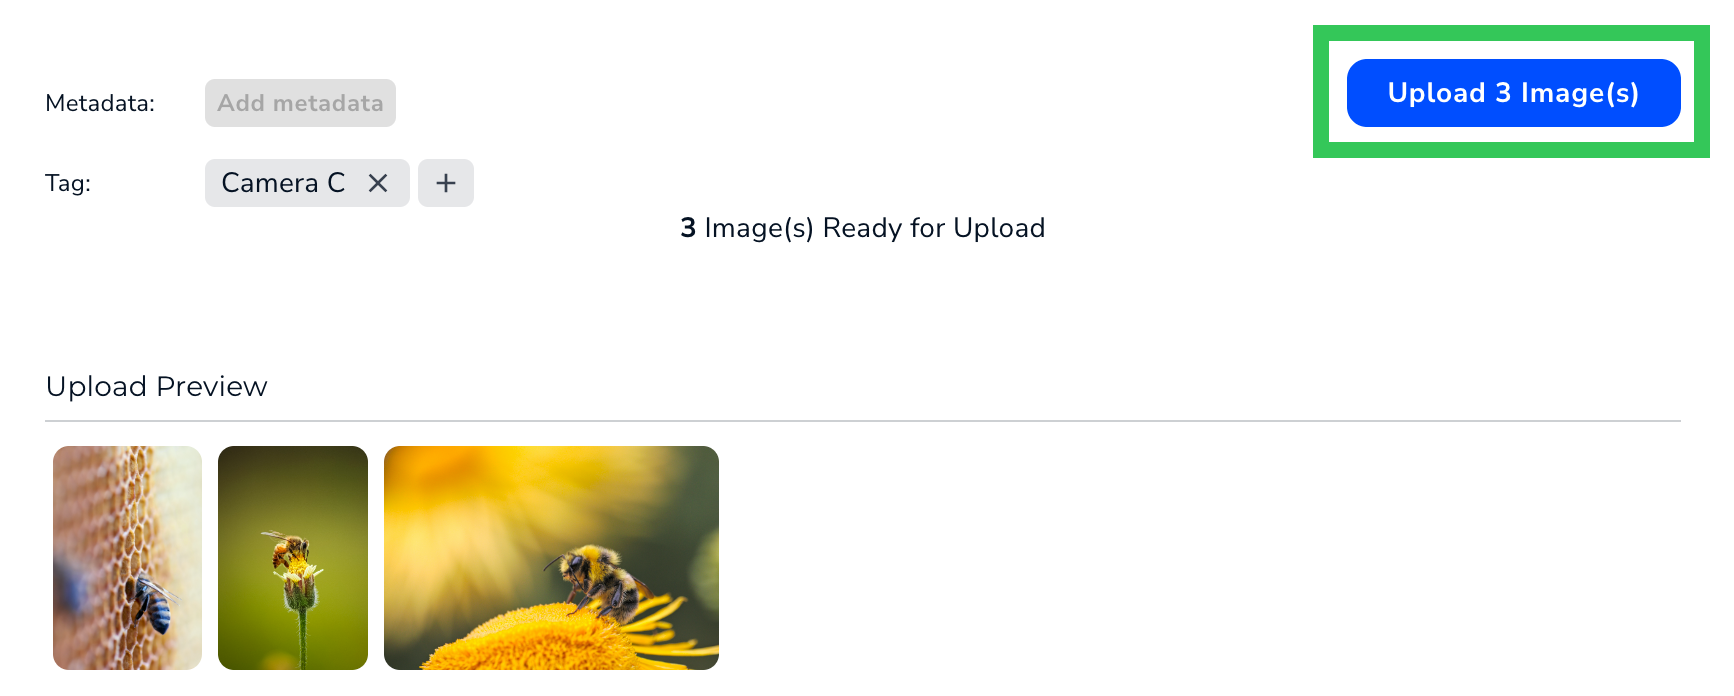
5. Click **Upload Images**.
6. LandingLens applies the tags to the uploaded images.
## Apply Tags to Individual Images
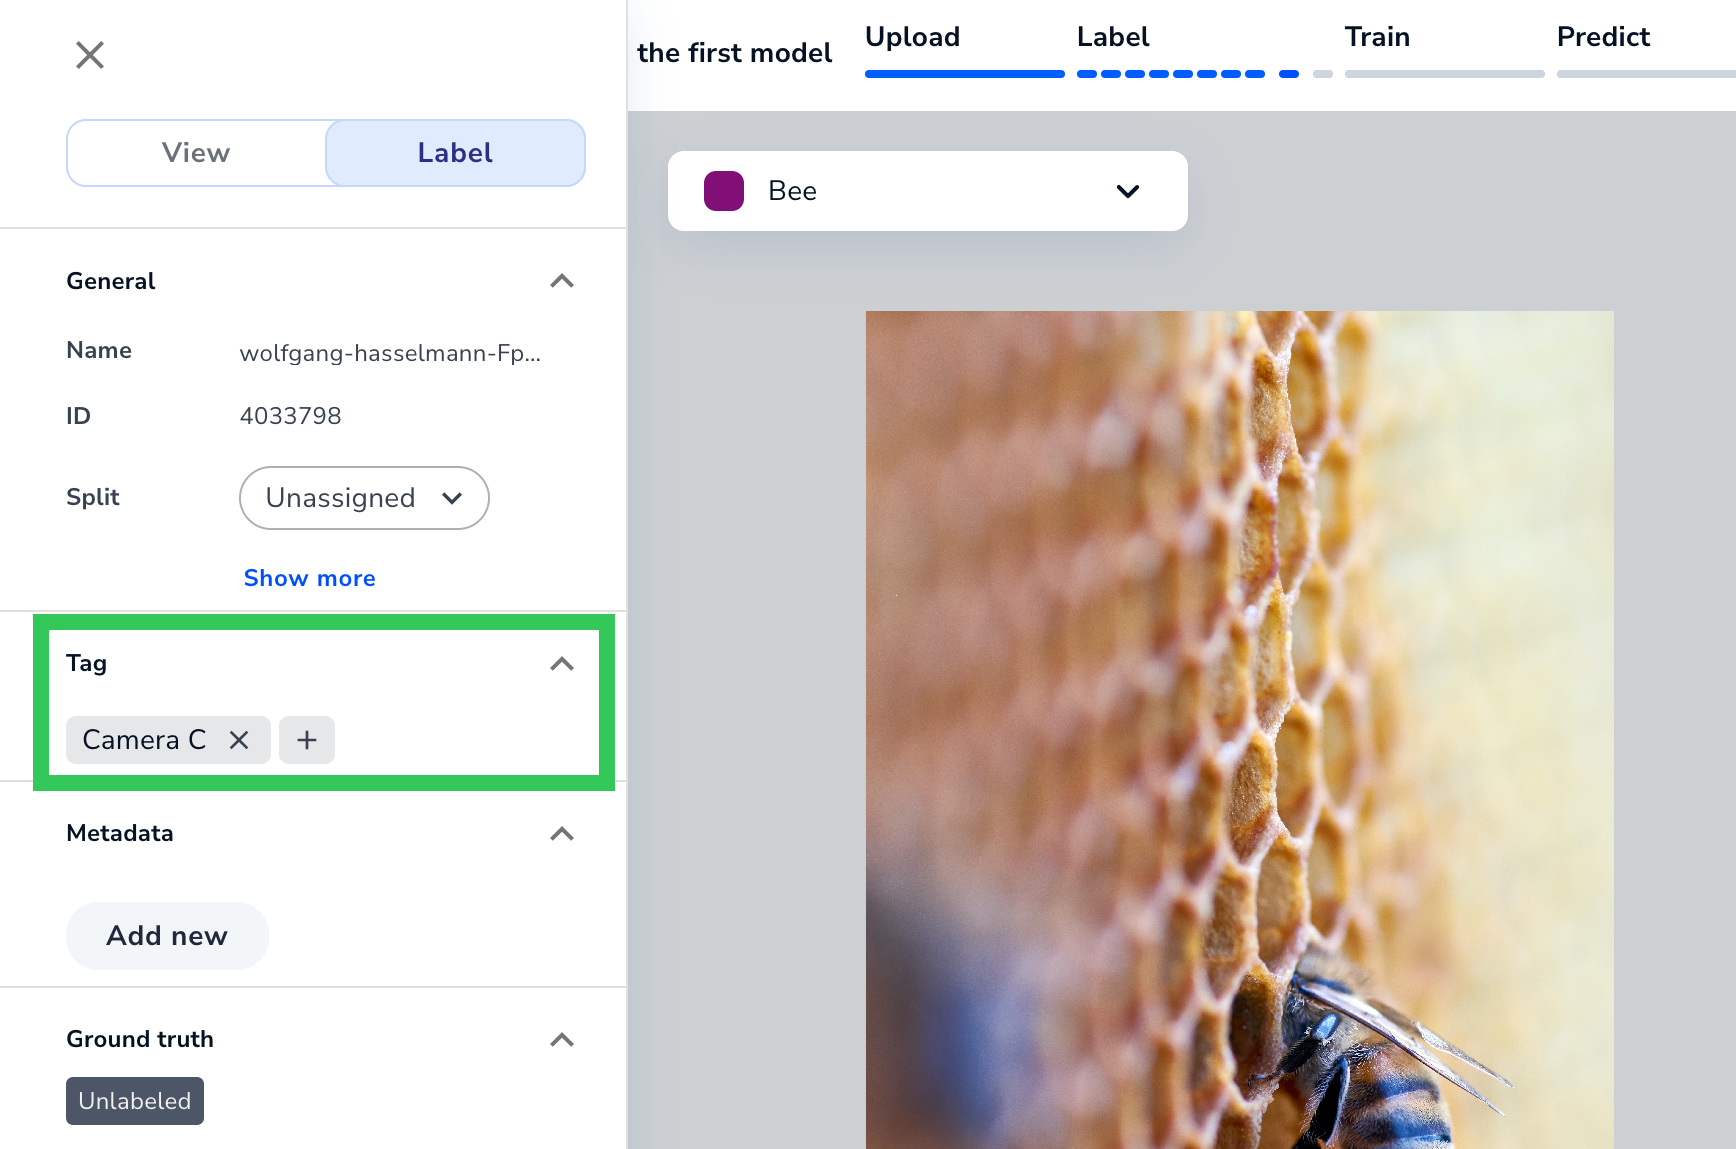
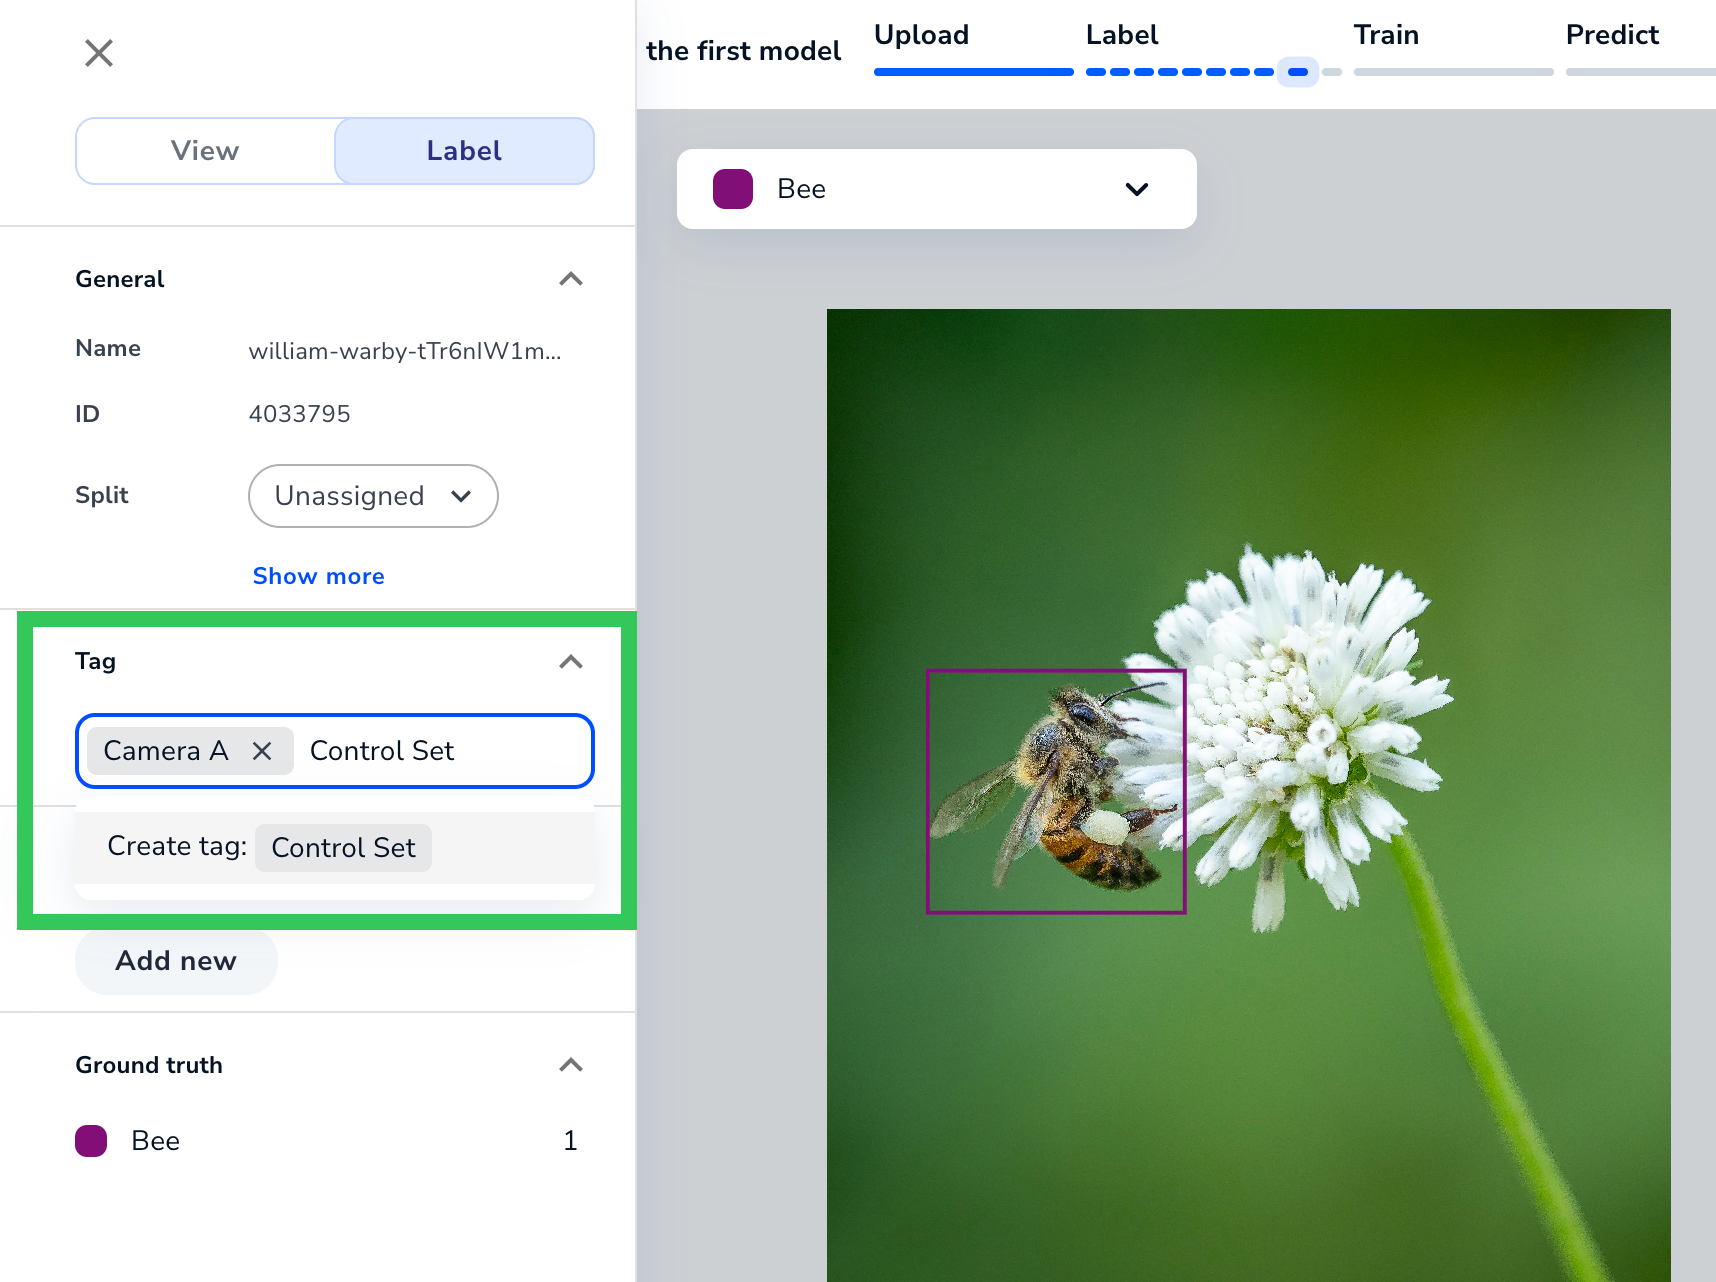
To apply a tag to an individual image, or to see the tags already applied to it, click the image. The **Tag** panel displays in both the **View** and **Label** tabs. In the **Tag** panel, you can apply, create, and remove tags.
## Apply Tags to Multiple Images at Once
You can apply tags to multiple images at once. To do this:
1. Open the project with the images you want to tag.
2. Select the images you want to tag.
3. Click **Options** and select **Add Tags**.
4. Select or create the tags you want to apply.
5. Click **Apply**.
LandingLens applies the tags to the selected images.
## Remove Tags from Images
There are two ways to remove tags from images:
* **To remove a tag from a specific image**: Open an image and remove the tag from the Tags panel. (This is the same place where you [apply tags to individual images](./tags#apply-tags-to-individual-images).)
* **To remove tags from all images**: You can [delete the tag](./tags#delete-tags). This removes the tag from all images.
## Manage Tags
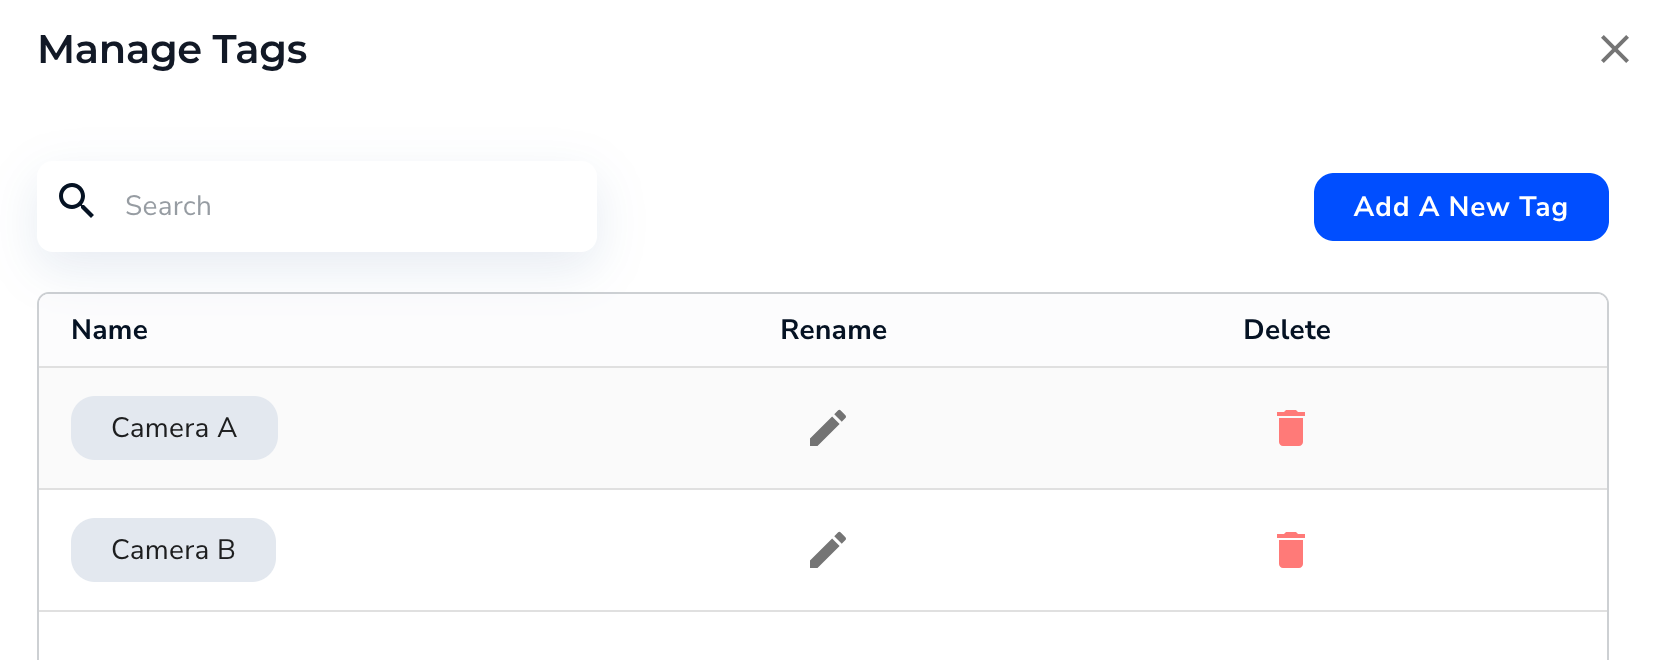
You can update the tags for a project on the Manage Tags page. To access this page, click the **Actions** button (ellipses) and select **Manage Tags**.
On the **Manage Tags** page, you can:
* [Create tags](./tags#create-tags)
* [Rename tags](./tags#rename-tags)
* [Delete tags](./tags#delete-tags)
### Create Tags
1. Open the project you want to add tags to.
2. Click the **Actions** button (ellipses) and select **Manage Tags**.
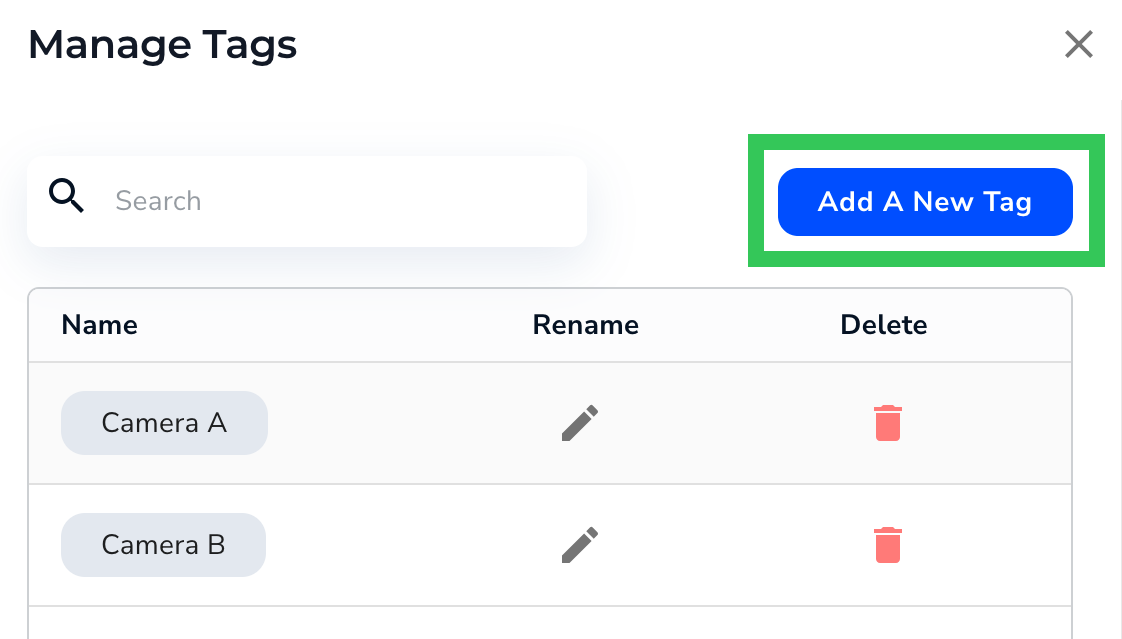
3. Click **Add a New Tag**.
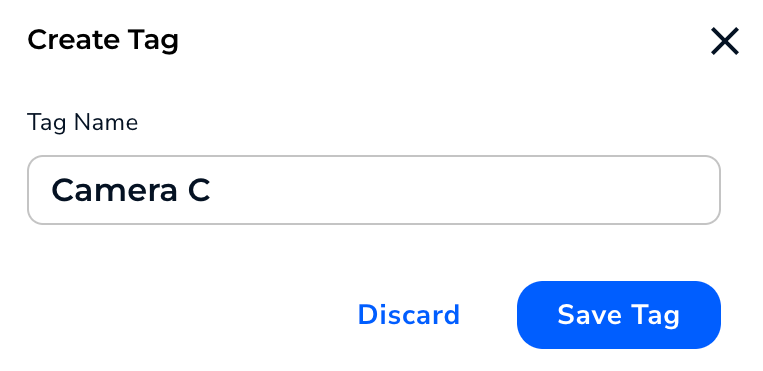
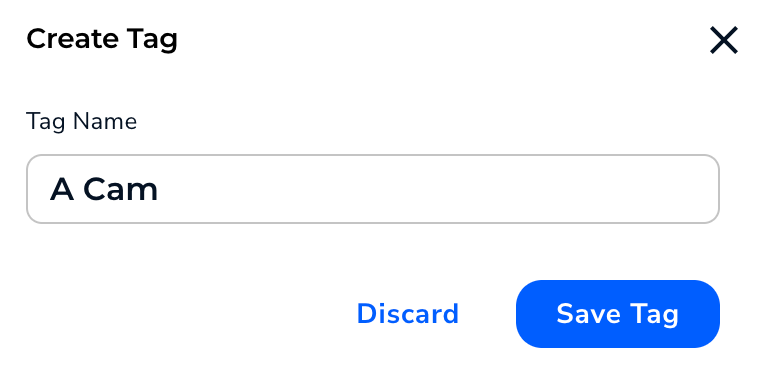
4. Enter the tag in the **Tag Name** field.
5. Click **Save Tag**.
### Rename Tags
1. Open the project with the tag you want to rename.
2. Click the **Actions** button (ellipses) and select **Manage Tags**.
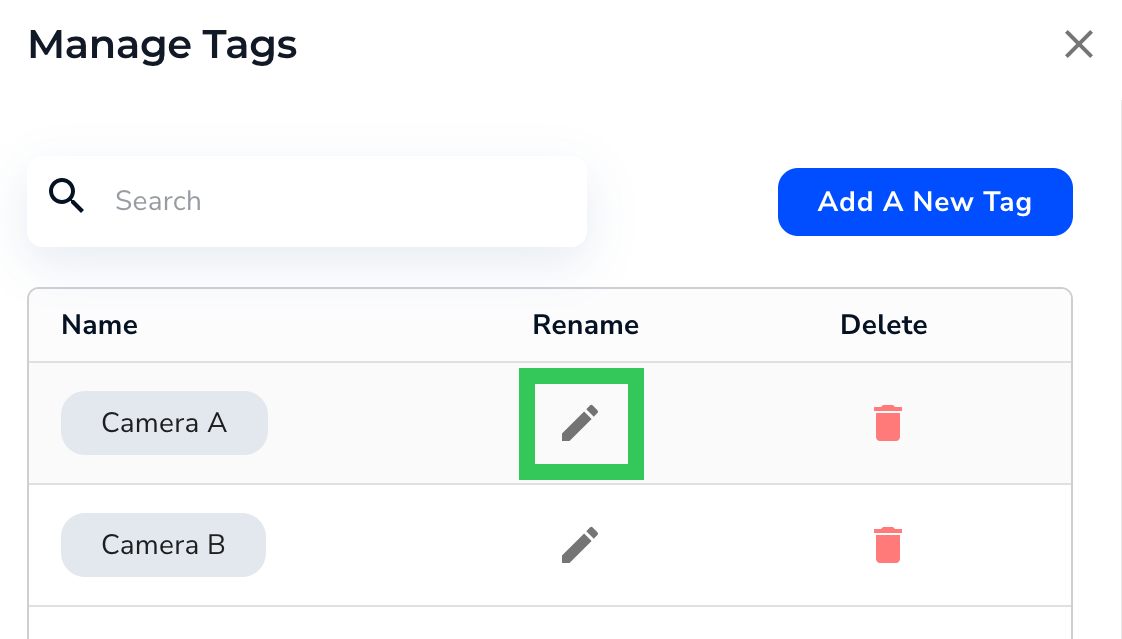
3. Click the **Edit** icon for the tag you want to rename.
4. Enter the tag in the **Tag Name** field.
5. Click **Save Tag**.
### Delete Tags
Deleting a tag automatically removes the tag from all images it's applied to.
1. Open the project with the tag you want to delete.
2. Click the **Actions** button (ellipses) and select **Manage Tags**.
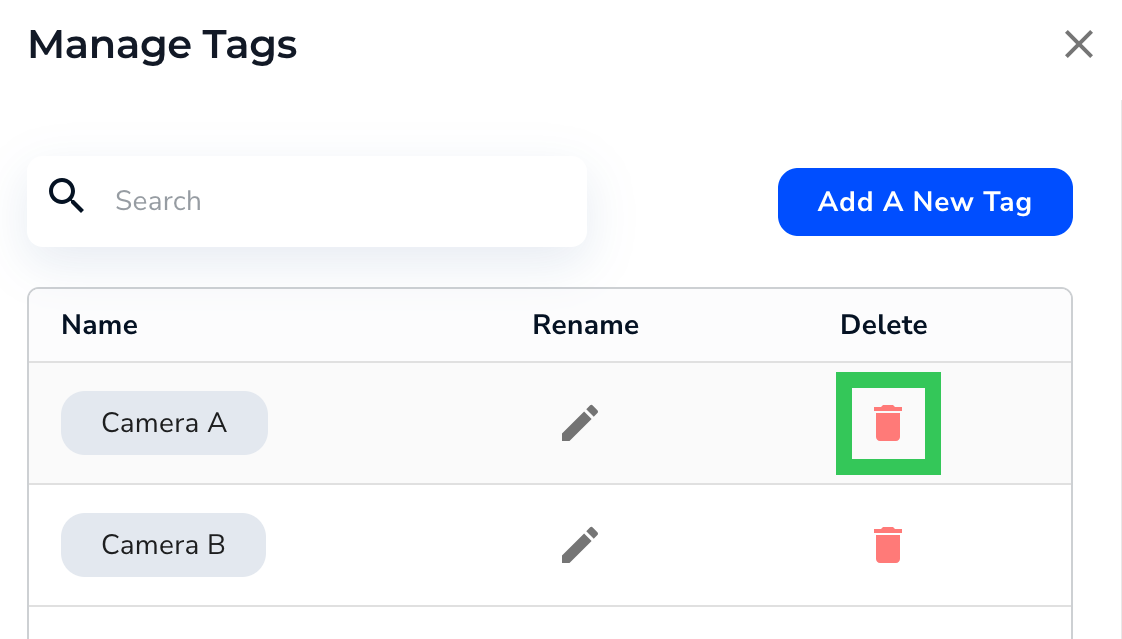
3. Click the **Delete** icon for the tag you want to delete.
4. Click **Yes, delete**.
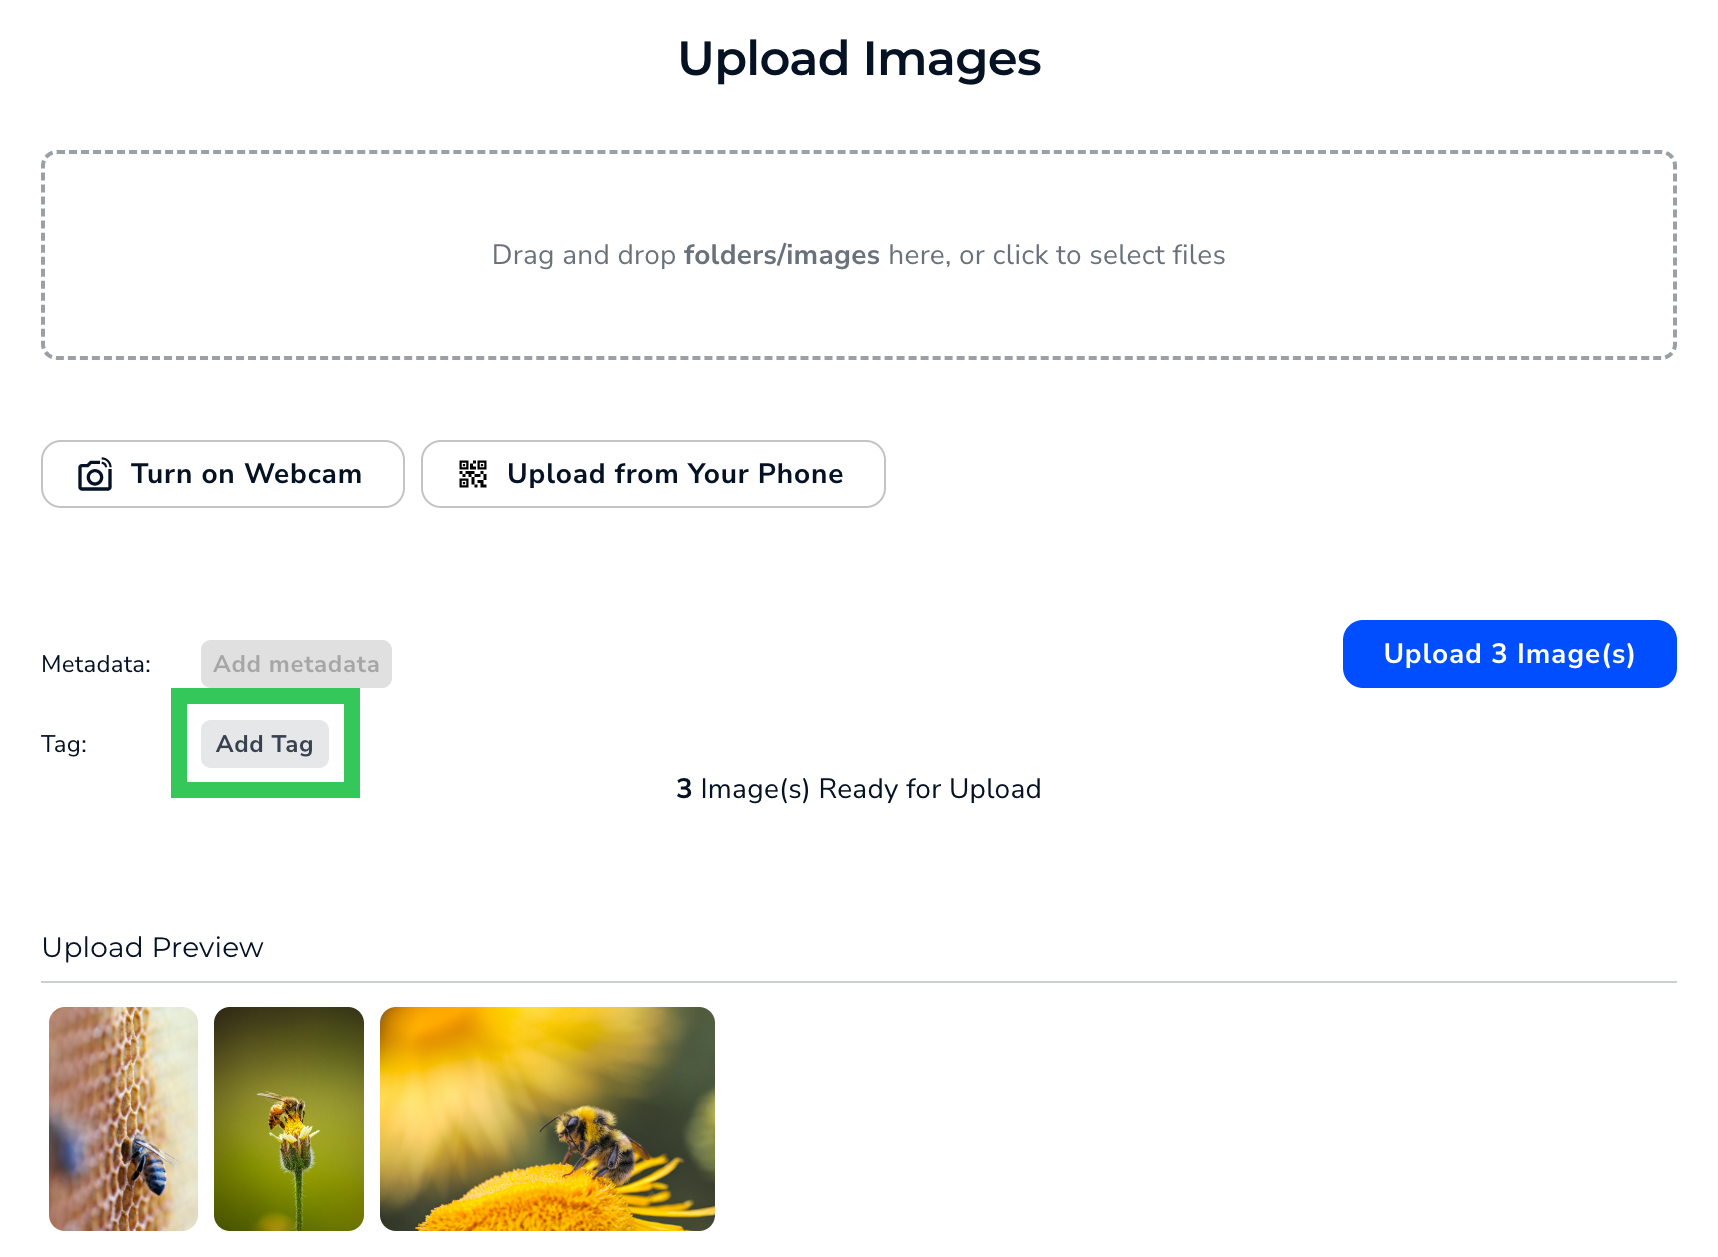 4. Select or create the tags you want to apply.
 5. Click **Upload Images**.
 6. LandingLens applies the tags to the uploaded images.
 ## Apply Tags to Individual Images
To apply a tag to an individual image, or to see the tags already applied to it, click the image. The **Tag** panel displays in both the **View** and **Label** tabs. In the **Tag** panel, you can apply, create, and remove tags.
## Apply Tags to Individual Images
To apply a tag to an individual image, or to see the tags already applied to it, click the image. The **Tag** panel displays in both the **View** and **Label** tabs. In the **Tag** panel, you can apply, create, and remove tags.
 ## Apply Tags to Multiple Images at Once
You can apply tags to multiple images at once. To do this:
1. Open the project with the images you want to tag.
2. Select the images you want to tag.
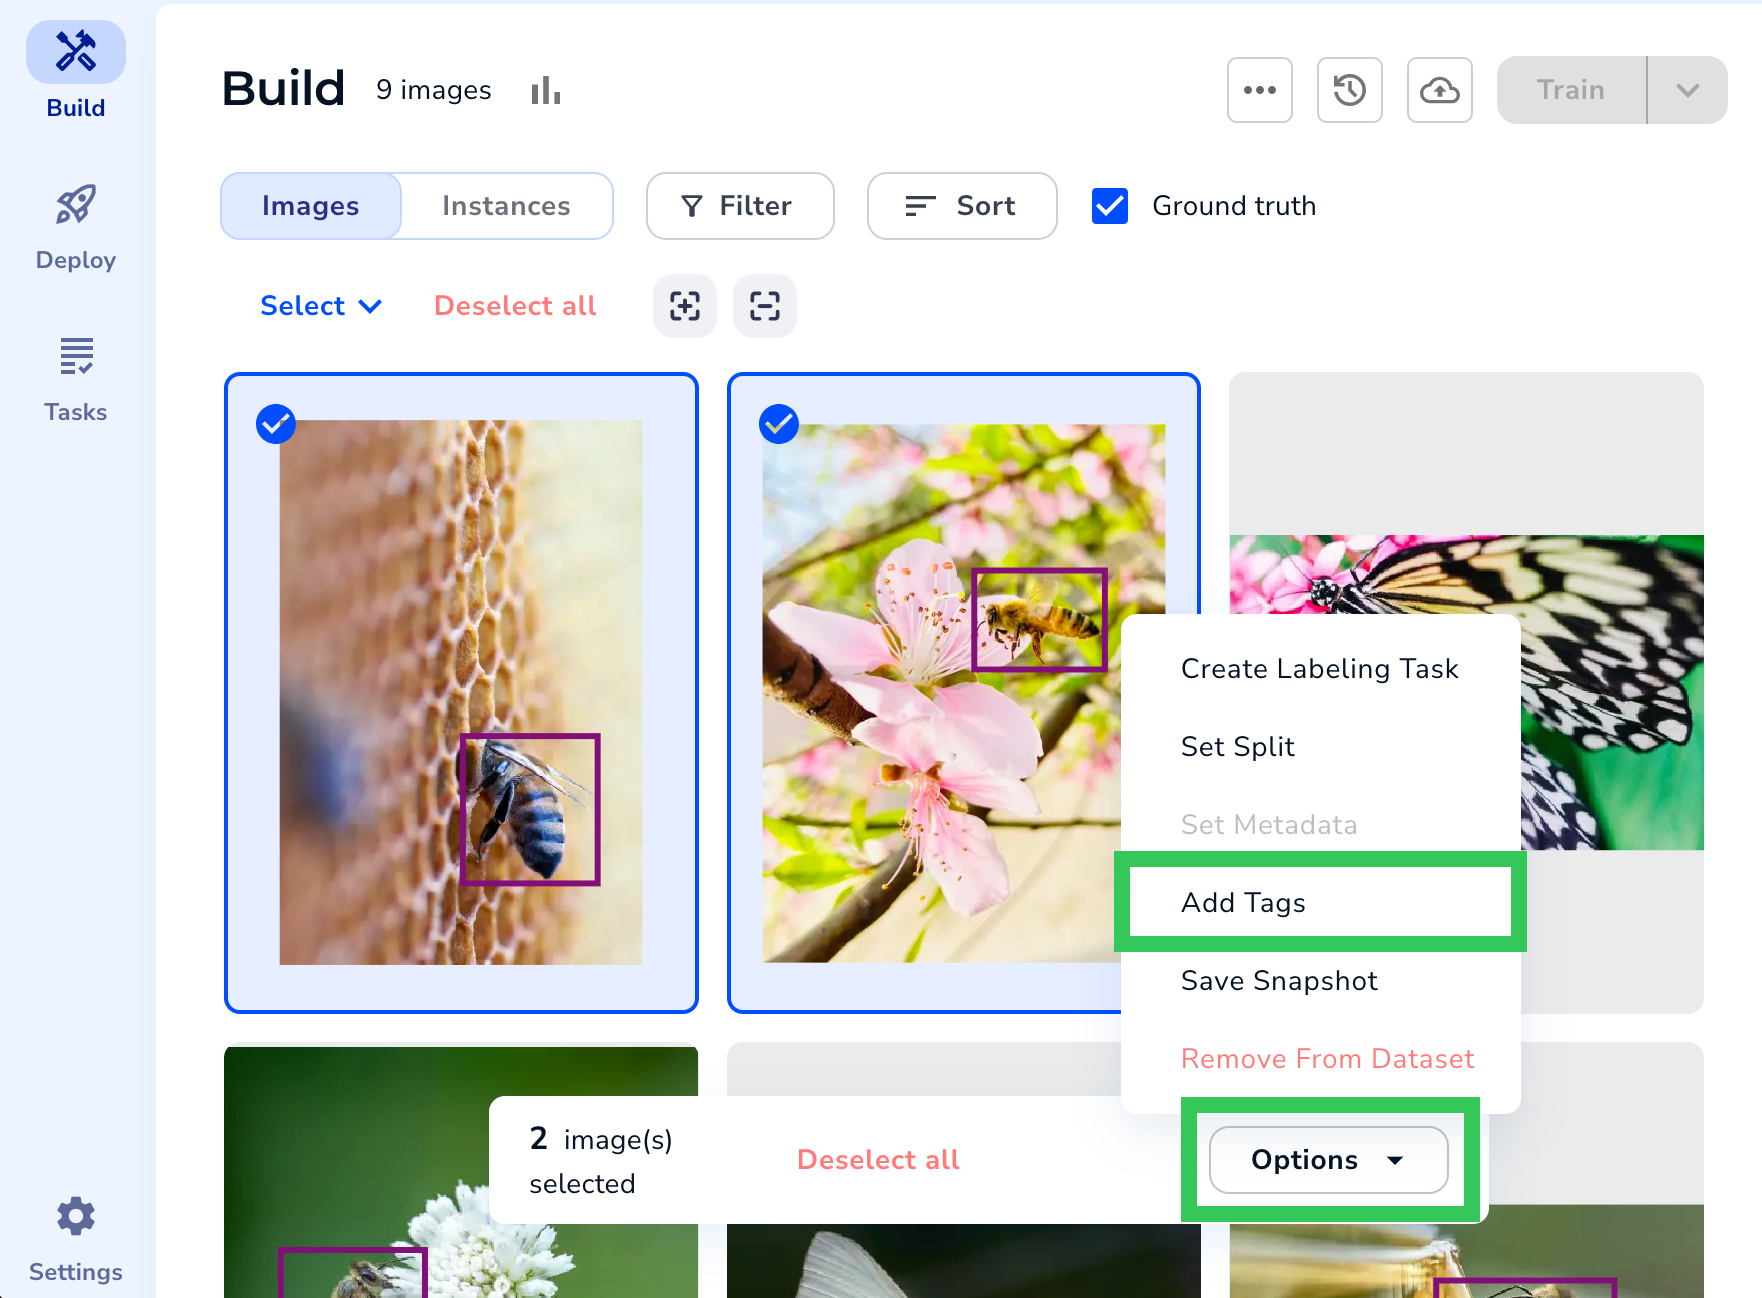
3. Click **Options** and select **Add Tags**.
## Apply Tags to Multiple Images at Once
You can apply tags to multiple images at once. To do this:
1. Open the project with the images you want to tag.
2. Select the images you want to tag.
3. Click **Options** and select **Add Tags**.
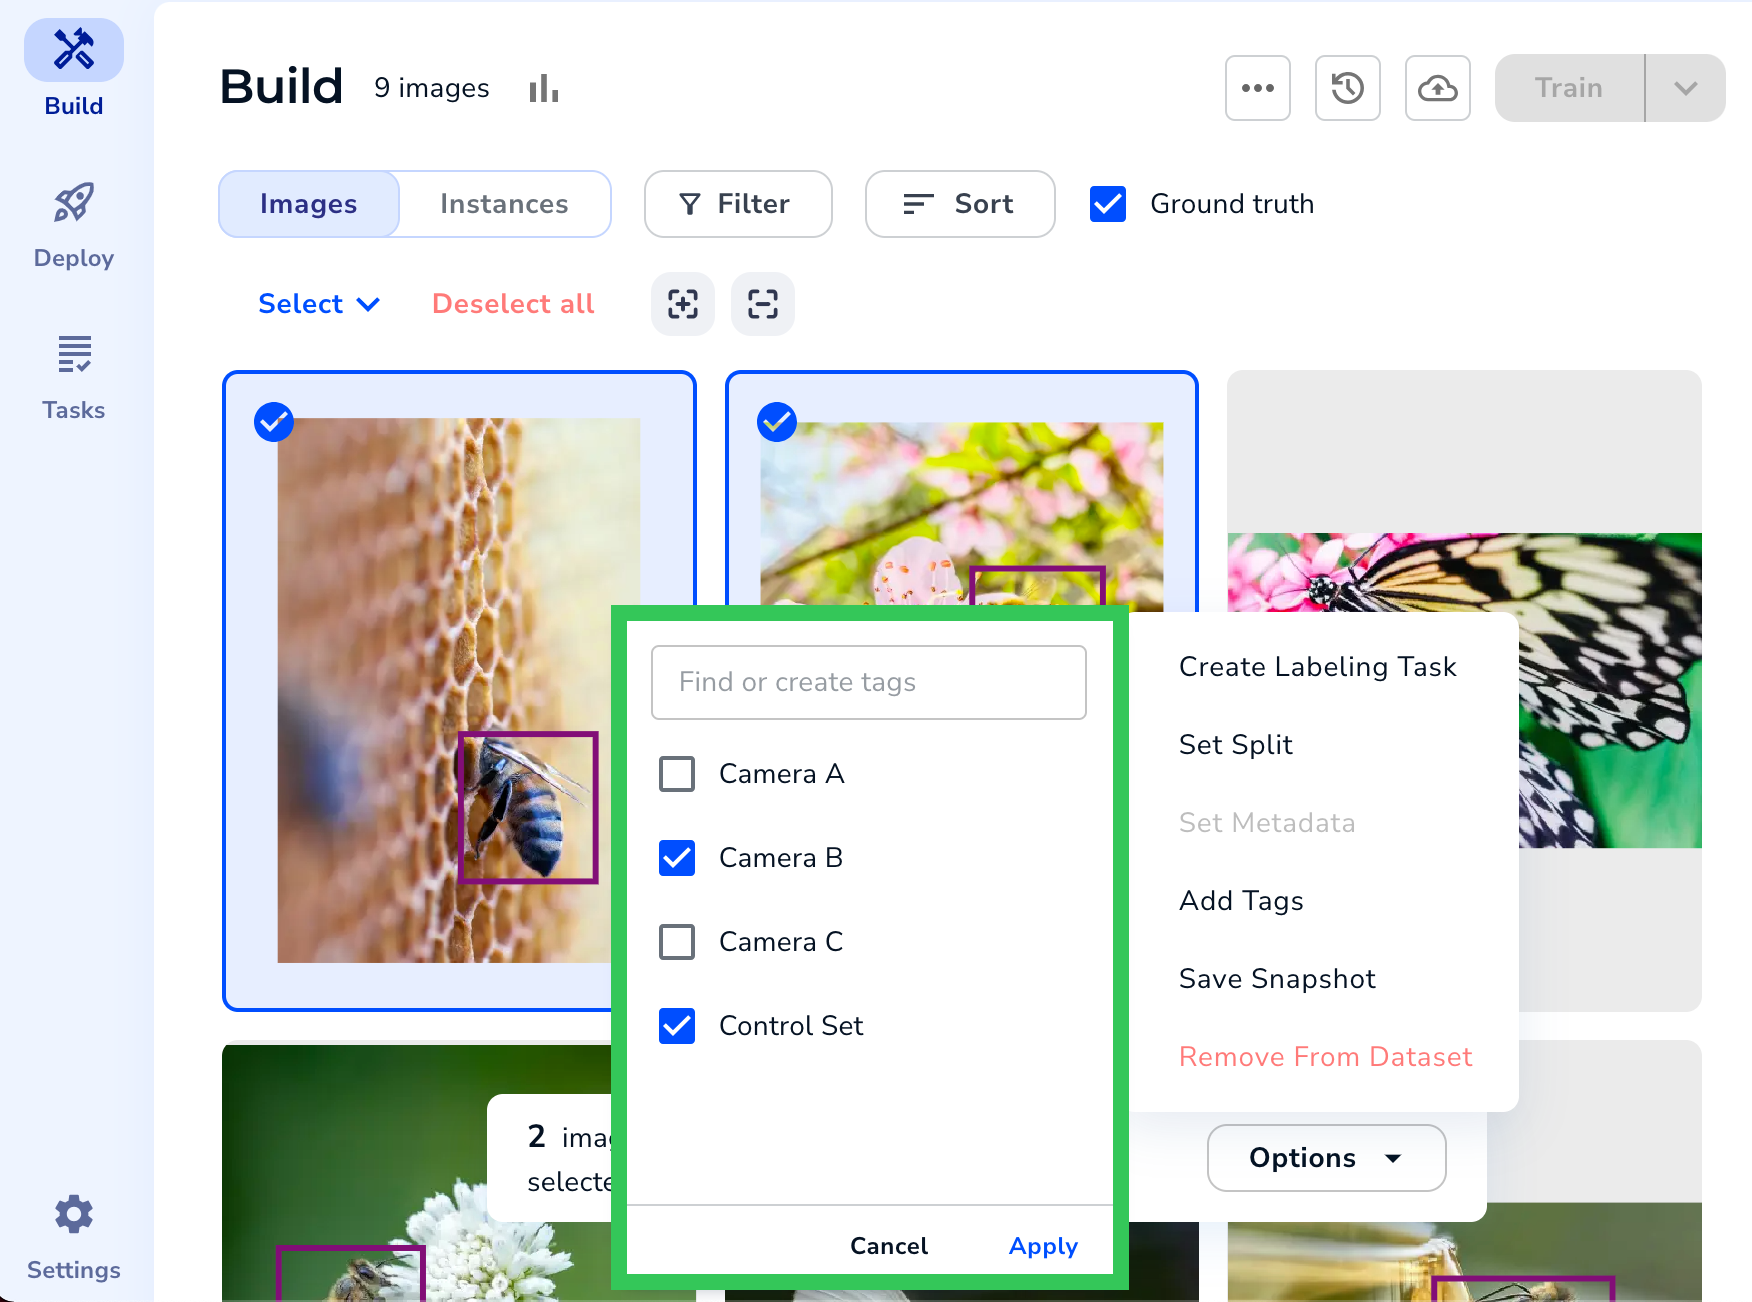
 4. Select or create the tags you want to apply.
5. Click **Apply**.
4. Select or create the tags you want to apply.
5. Click **Apply**.
 LandingLens applies the tags to the selected images.
## Remove Tags from Images
There are two ways to remove tags from images:
* **To remove a tag from a specific image**: Open an image and remove the tag from the Tags panel. (This is the same place where you [apply tags to individual images](./tags#apply-tags-to-individual-images).)
* **To remove tags from all images**: You can [delete the tag](./tags#delete-tags). This removes the tag from all images.
## Manage Tags
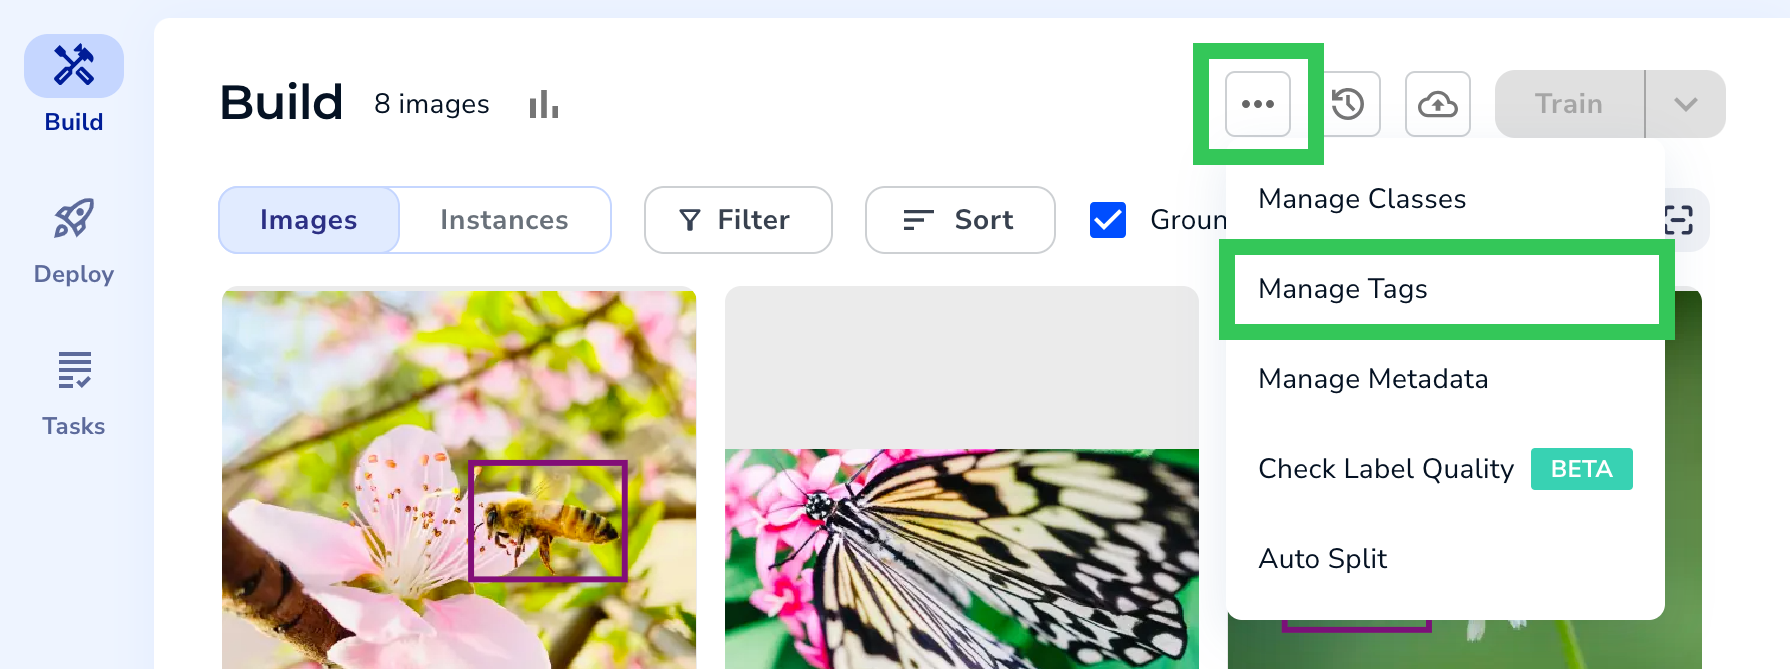
You can update the tags for a project on the Manage Tags page. To access this page, click the **Actions** button (ellipses) and select **Manage Tags**.
LandingLens applies the tags to the selected images.
## Remove Tags from Images
There are two ways to remove tags from images:
* **To remove a tag from a specific image**: Open an image and remove the tag from the Tags panel. (This is the same place where you [apply tags to individual images](./tags#apply-tags-to-individual-images).)
* **To remove tags from all images**: You can [delete the tag](./tags#delete-tags). This removes the tag from all images.
## Manage Tags
You can update the tags for a project on the Manage Tags page. To access this page, click the **Actions** button (ellipses) and select **Manage Tags**.
 On the **Manage Tags** page, you can:
* [Create tags](./tags#create-tags)
* [Rename tags](./tags#rename-tags)
* [Delete tags](./tags#delete-tags)
On the **Manage Tags** page, you can:
* [Create tags](./tags#create-tags)
* [Rename tags](./tags#rename-tags)
* [Delete tags](./tags#delete-tags)
 ### Create Tags
1. Open the project you want to add tags to.
2. Click the **Actions** button (ellipses) and select **Manage Tags**.
### Create Tags
1. Open the project you want to add tags to.
2. Click the **Actions** button (ellipses) and select **Manage Tags**.
 4. Enter the tag in the **Tag Name** field.
5. Click **Save Tag**.
4. Enter the tag in the **Tag Name** field.
5. Click **Save Tag**.
 ### Rename Tags
1. Open the project with the tag you want to rename.
2. Click the **Actions** button (ellipses) and select **Manage Tags**.
### Rename Tags
1. Open the project with the tag you want to rename.
2. Click the **Actions** button (ellipses) and select **Manage Tags**.
 4. Enter the tag in the **Tag Name** field.
5. Click **Save Tag**.
4. Enter the tag in the **Tag Name** field.
5. Click **Save Tag**.
 ### Delete Tags
Deleting a tag automatically removes the tag from all images it's applied to.
1. Open the project with the tag you want to delete.
2. Click the **Actions** button (ellipses) and select **Manage Tags**.
### Delete Tags
Deleting a tag automatically removes the tag from all images it's applied to.
1. Open the project with the tag you want to delete.
2. Click the **Actions** button (ellipses) and select **Manage Tags**.
 4. Click **Yes, delete**.