> ## Documentation Index
> Fetch the complete documentation index at: https://landinglens.docs.landing.ai/llms.txt
> Use this file to discover all available pages before exploring further.
# Add Members
export const vp = 'Visual Prompting';
export const smartLabel = 'Smart Labeling';
export const productLL = 'LandingLens';
export const mi = 'Mobile Inference';
export const llsf = 'LandingLens on Snowflake';
export const companyName = 'LandingAI';
*This article applies to these versions of LandingLens:*
LandingLens
LandingLens on Snowflake
✓
✖
To add a user (member) to LandingLens, an Owner or Admin first [invites](#invite-members-to-landinglens) that person. That person then receives an automated email and is prompted to [complete the registration process](#complete-your-registration). Watch the following video to learn more.
## Maximum Number of Members
Your [LandingLens plan](https://landing.ai/pricing/) determines how many members your organization can have. All members that have the status Active or Pending count toward the number of users.
* **Free**: Up to 3 members
* **Visionary**: Up to 15 members
* **Enterprise**: Unlimited
## Invite Members to LandingLens
Only Owners and Admins can invite people to become members. To do this:
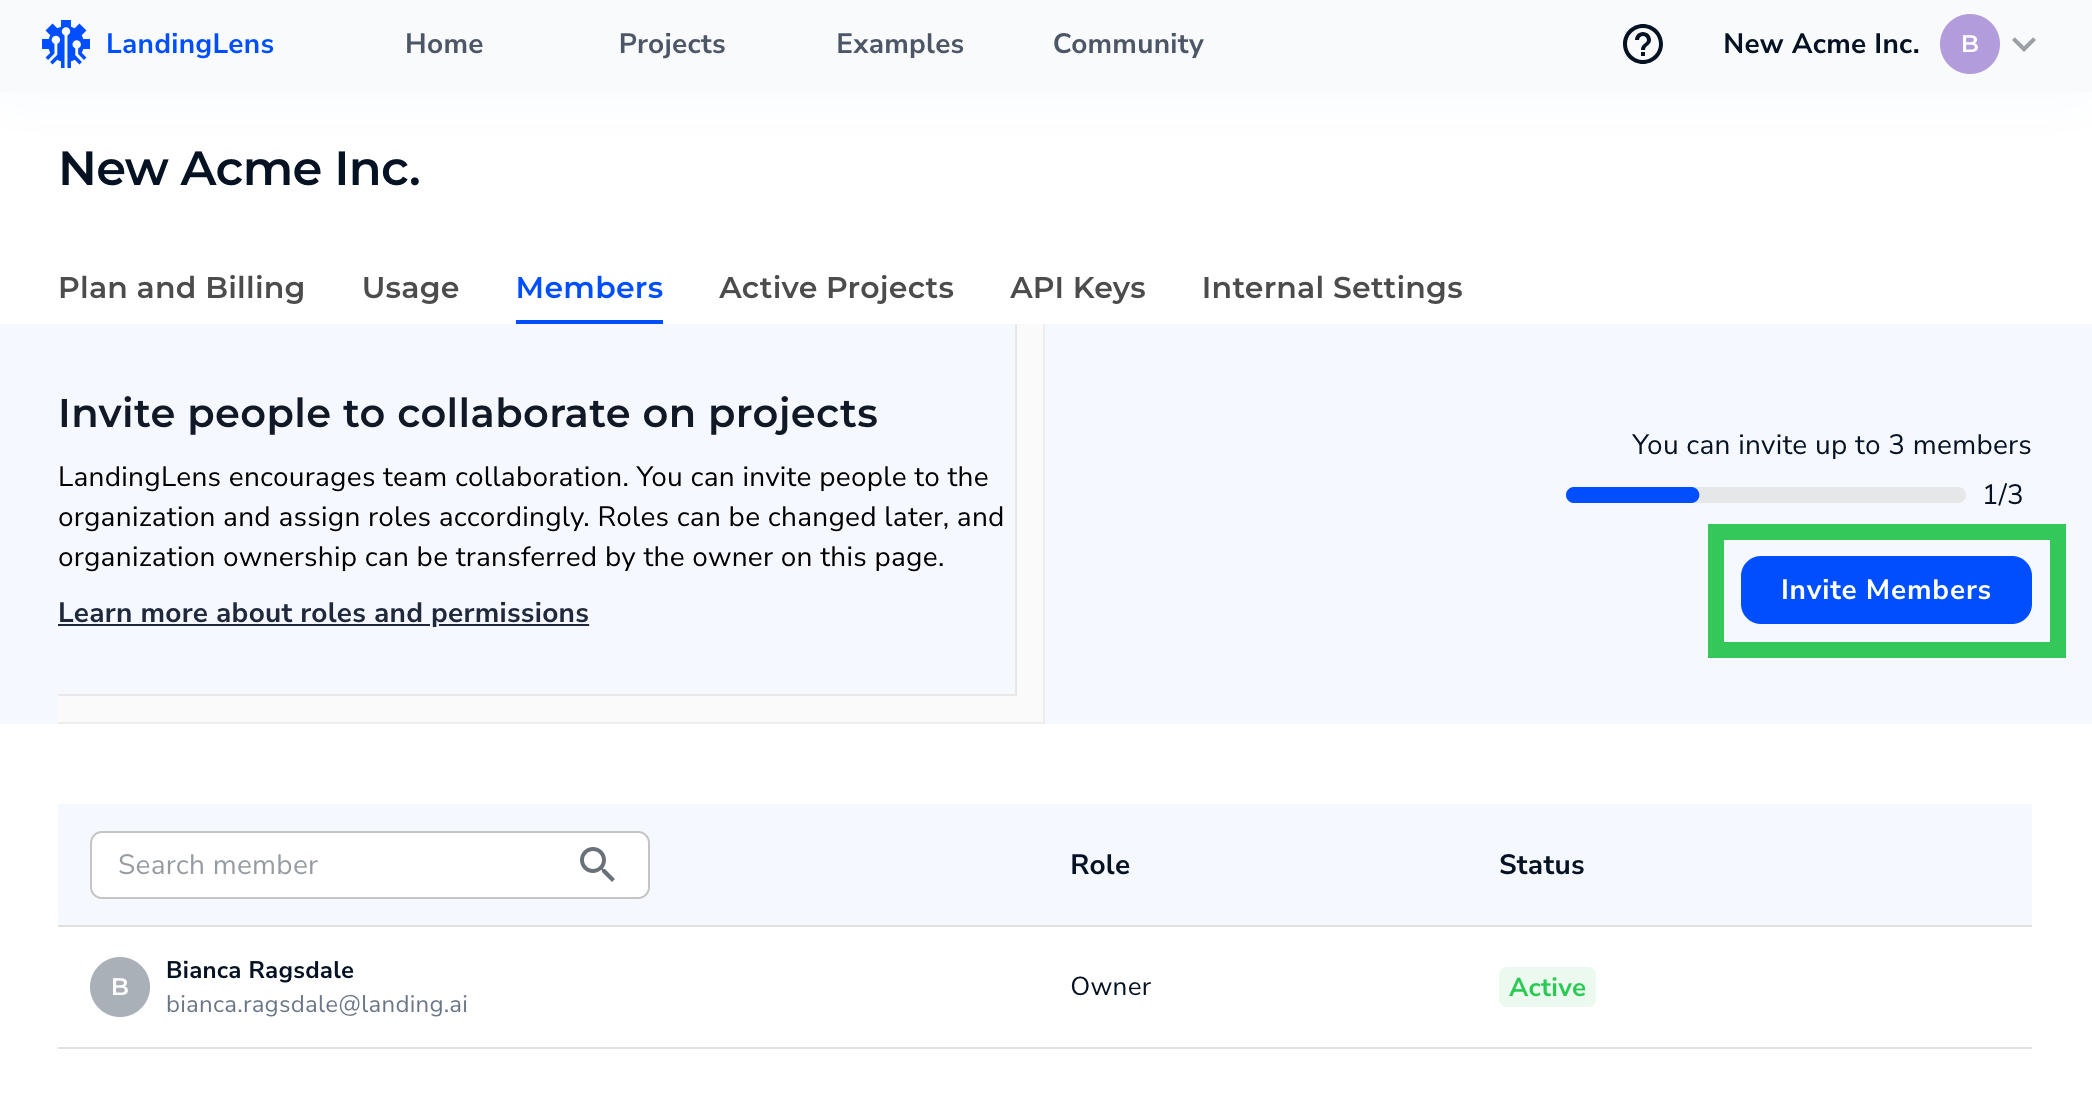
1. Go to the **Members** page.
2. Click **Invite Members**.
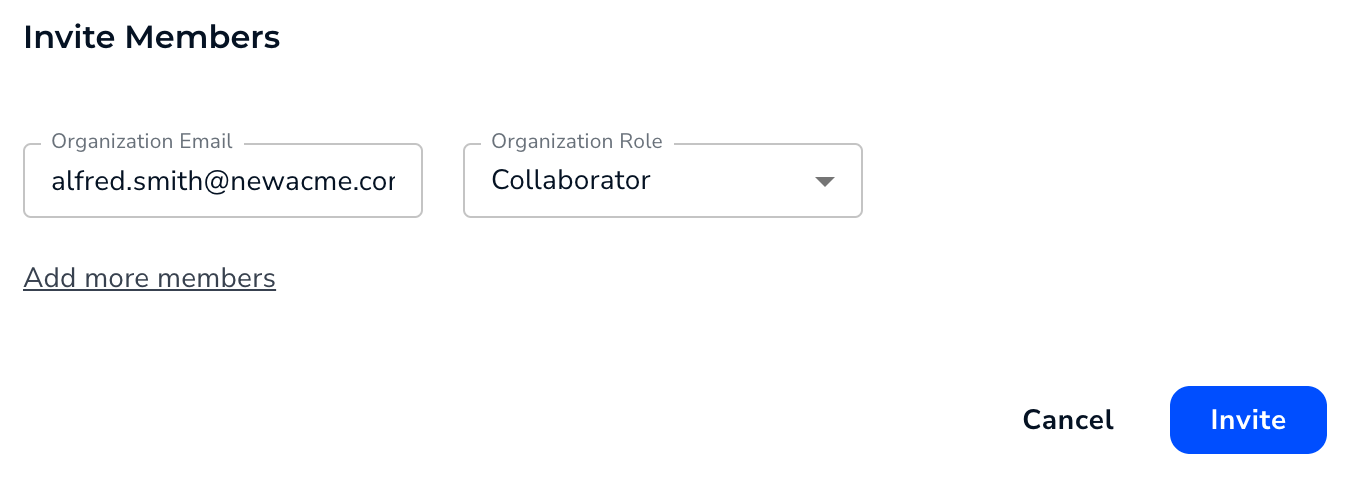
3. The **Invite Members** pop-up window displays. Enter the email address of the person you want to invite in the **Organization Email** field. Email addresses must be lowercase.
4. Select the [Role](./members) you want to give the user from th **Organization Role** drop-down menu.
5. To invite multiple people, click **Add more members**.
6. Click **Invite**. An invitation to join LandingLens is emailed to the listed people.
To invite multiple users at once, click **Add more members** before sending the invitation.
## Complete Your Registration
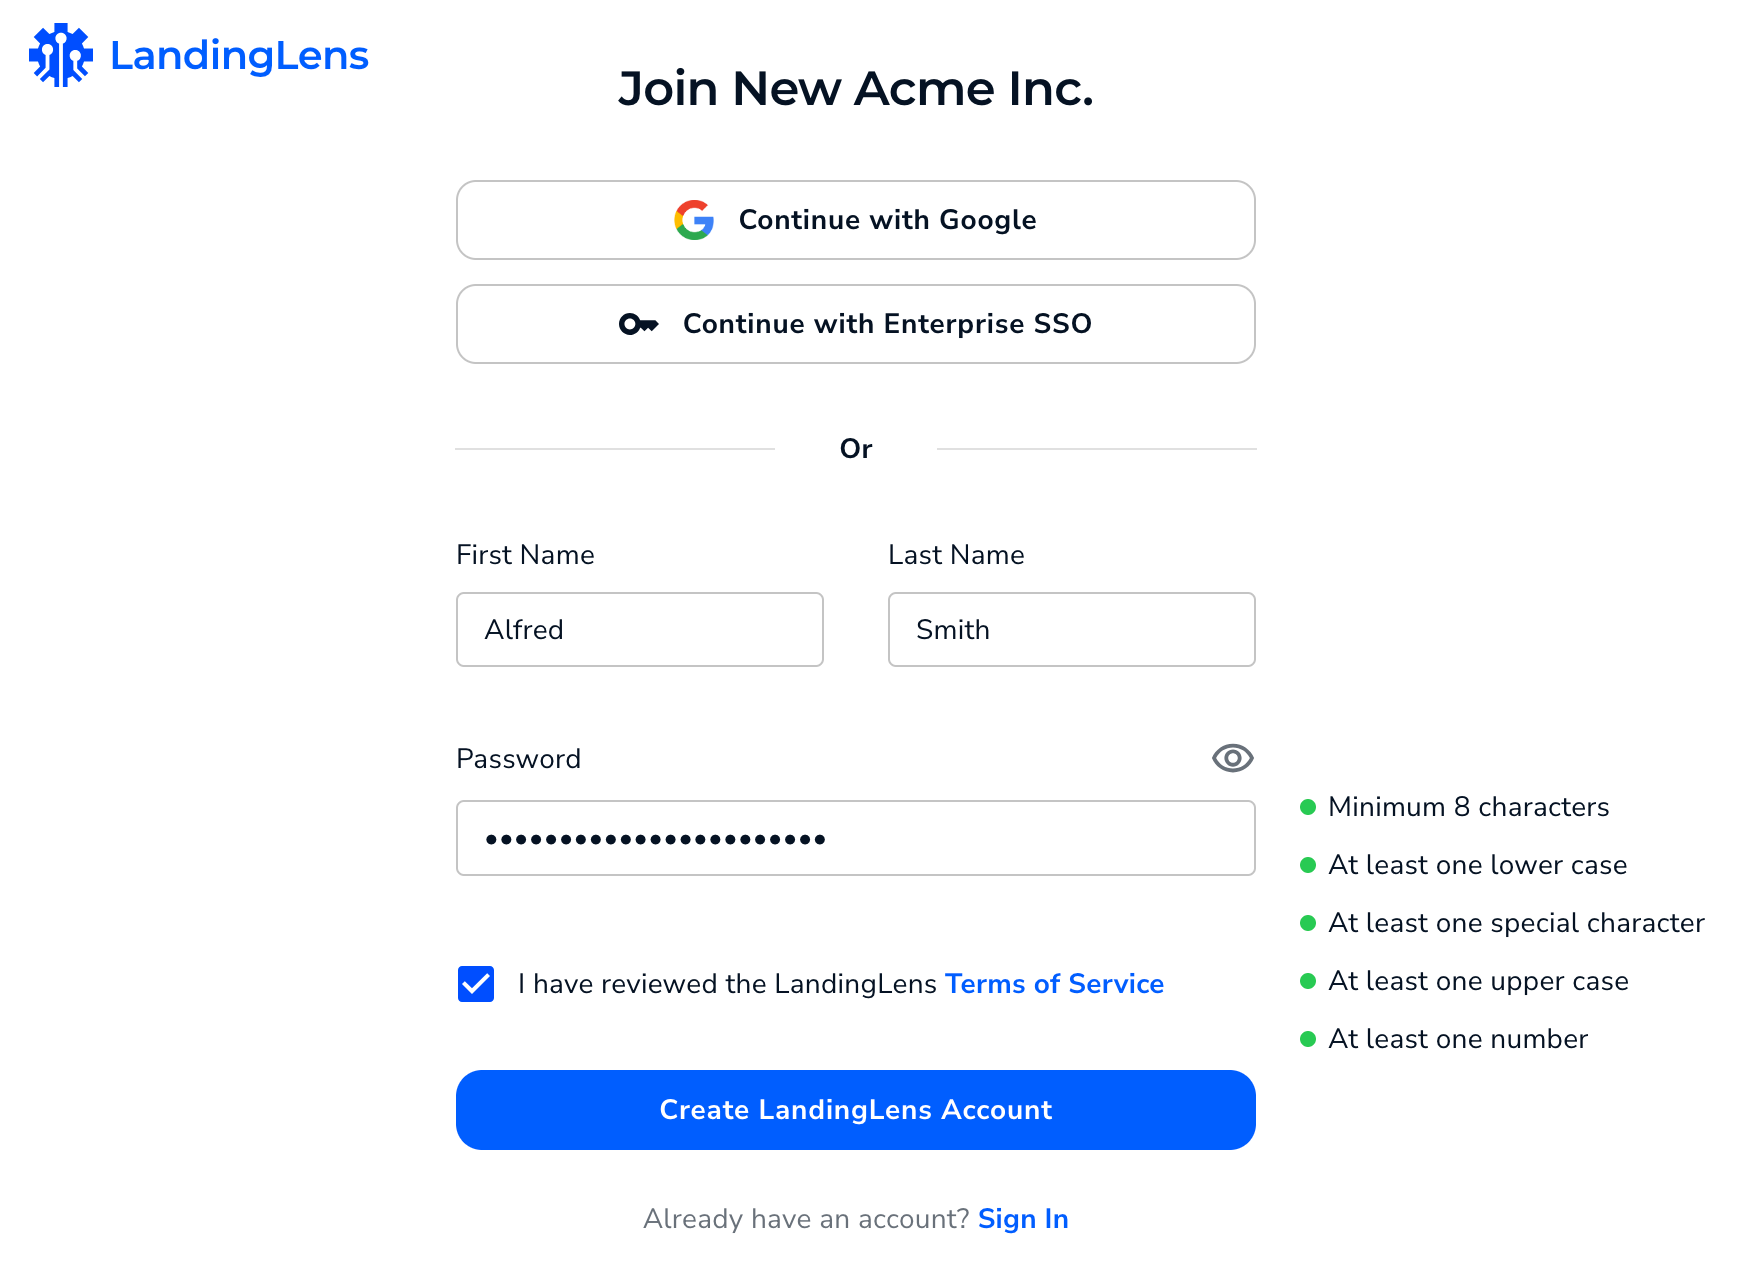
After you've been invited to LandingLens, you will receive an automated email prompting you to complete your registration. Your LandingLens account will be linked to the email address this email was sent to. If you want your account to be linked to a different email address, ask the user who invited you to send a new invitation to that address.
To complete your LandingLens registration:
1. Open the automated email from LandingLens.
2. Click the button that prompts you to register. A new window or tab opens.
3. If applicable, you can log in with a Google or Enterprise account.
4. Or, create a new account by entering your name and a new password (see the [password requirements](./passwords)).
5. Accept the Terms of Service.
6. Click **Create LandingLens Account**. The registration process is complete, and you can now log in to LandingLens.
 3. The **Invite Members** pop-up window displays. Enter the email address of the person you want to invite in the **Organization Email** field. Email addresses must be lowercase.
4. Select the [Role](./members) you want to give the user from th **Organization Role** drop-down menu.
5. To invite multiple people, click **Add more members**.
6. Click **Invite**. An invitation to join LandingLens is emailed to the listed people.
3. The **Invite Members** pop-up window displays. Enter the email address of the person you want to invite in the **Organization Email** field. Email addresses must be lowercase.
4. Select the [Role](./members) you want to give the user from th **Organization Role** drop-down menu.
5. To invite multiple people, click **Add more members**.
6. Click **Invite**. An invitation to join LandingLens is emailed to the listed people.