> ## Documentation Index
> Fetch the complete documentation index at: https://landinglens.docs.landing.ai/llms.txt
> Use this file to discover all available pages before exploring further.
# Manage Label Books
export const vp = 'Visual Prompting';
export const smartLabel = 'Smart Labeling';
export const productLL = 'LandingLens';
export const mi = 'Mobile Inference';
export const llsf = 'LandingLens on Snowflake';
export const companyName = 'LandingAI';
*This article applies to these versions of LandingLens:*
LandingLens
LandingLens on Snowflake
✓
✓
Images need to be labeled consistently. To help Labelers understand how to label images, it is best practice to create a Label Book. A\*\* Label Book\*\* is a living document that allows you to define how to label various categories of Classes clearly.
## Classes Must Be Descriptive
To help Labelers understand how to label images, it is best practice to be as descriptive as possible in the Label Book. The following points are a few examples of information that you can include in a Class description:
* What does the object to be identified look like?
* What parts of the object should be labeled?
* How do you label objects that overlap?
* If you're labeling with bounding boxes, how close should you keep the box to the object?
Let's take a look at the example of washers below.
Since Labelers will be looking at two types of washers, it's important to describe each type thoroughly. For instance:
* (Left) Circular hardware with 8 grooves on the inner circle. Keep the bounding box as close as possible to the object without touching it.
* (Right) Circular hardware with 6 grooves on the inner circle. Keep the bounding box as close as possible to the object without touching it.
## Add Descriptions and Images to Classes
It's important to add descriptions and images to Classes. This information will be a reference point to ensure that all users label data similarly.
To add descriptions and images to Classes:
1. Open the Project you want to edit.
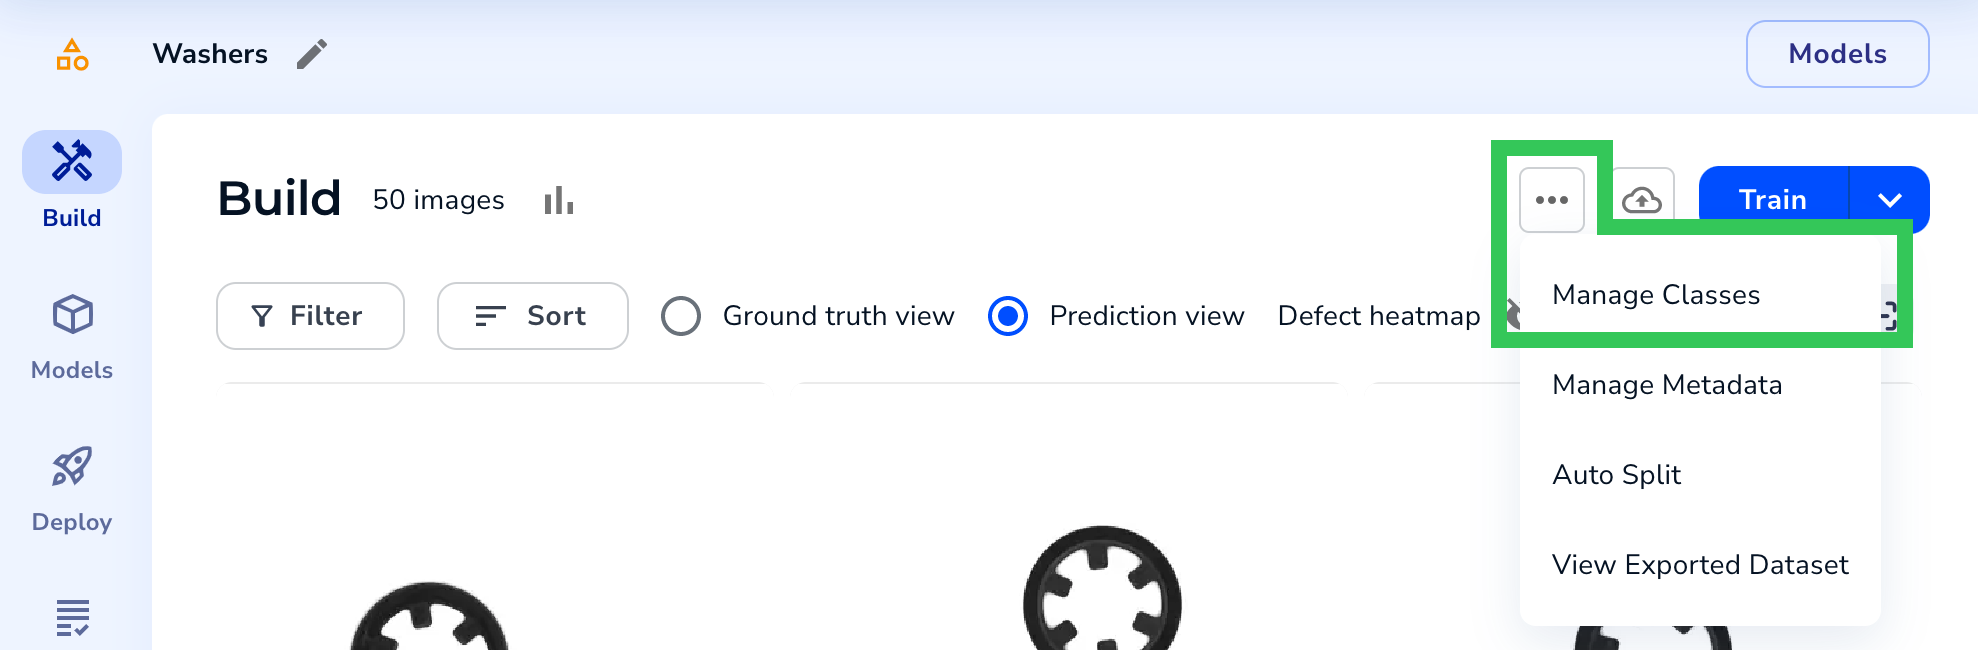
2. Click the **Actions** button (ellipses) and select **Manage Classes**.
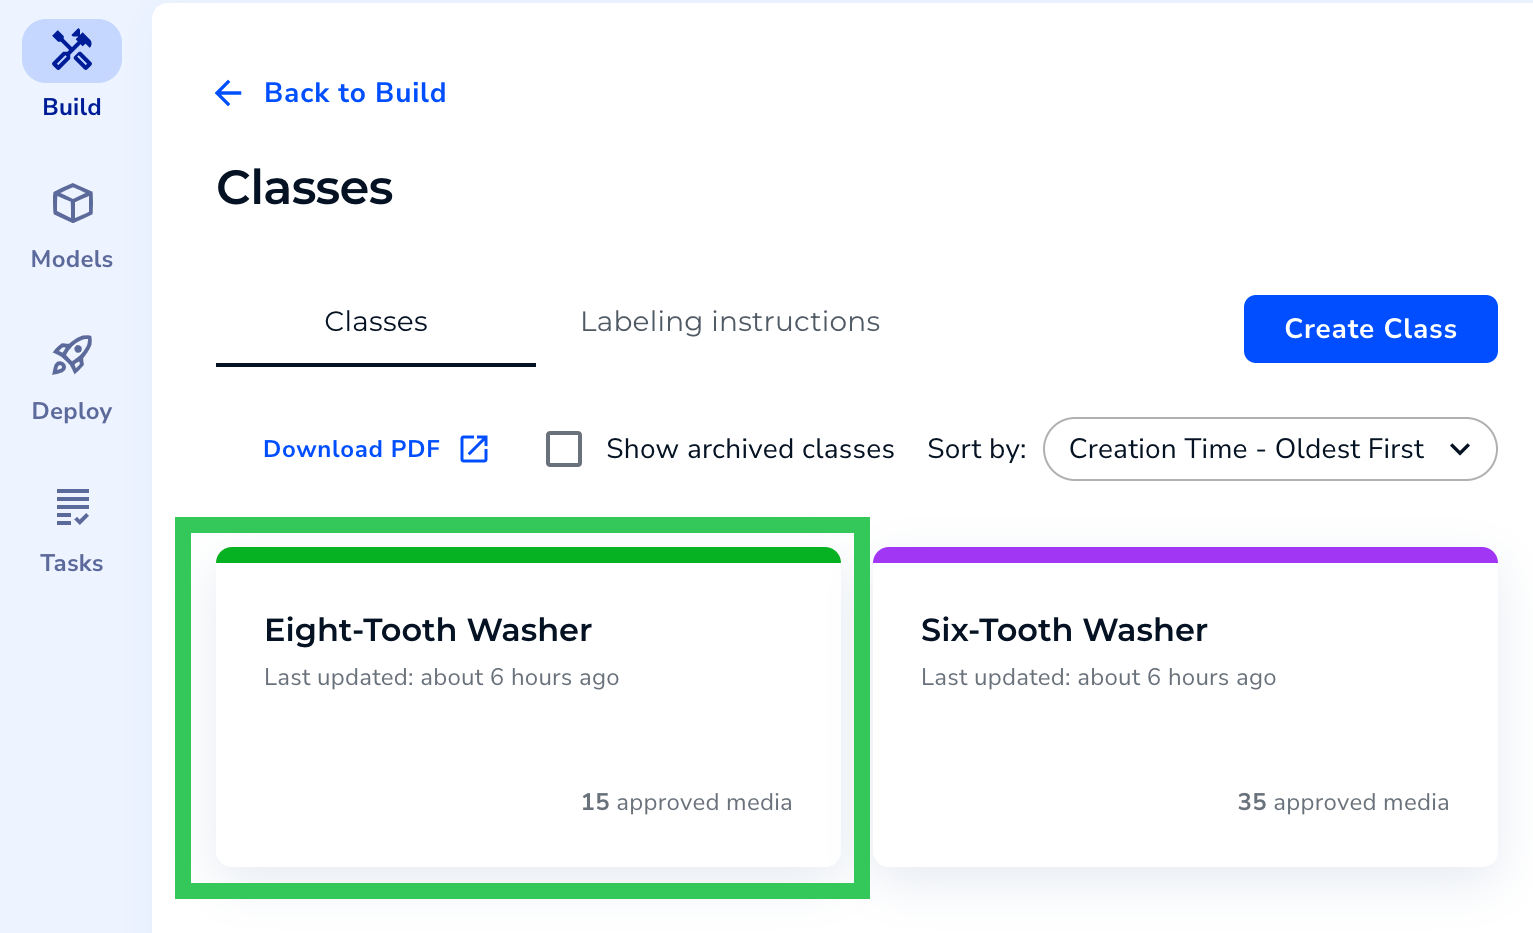
3. Click the Class you want to update.
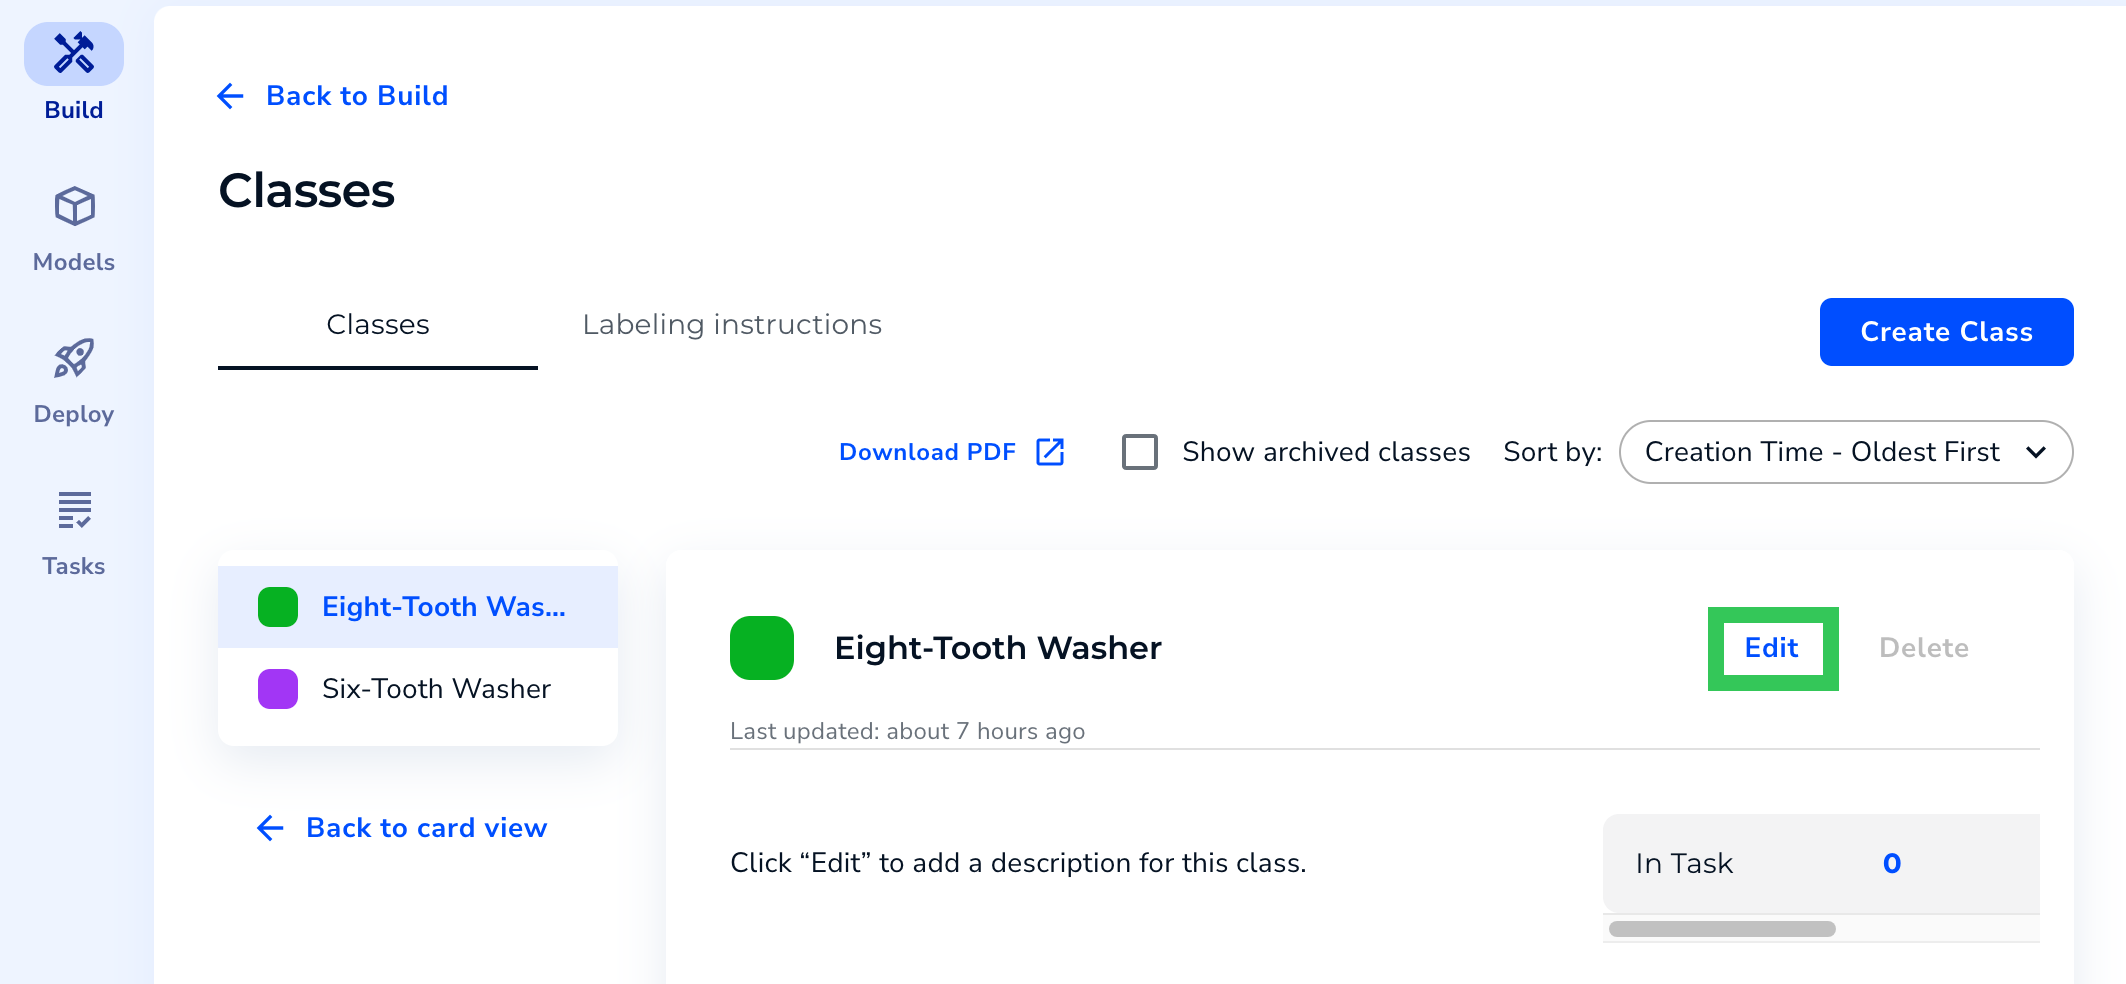
4. Click **Edit**.
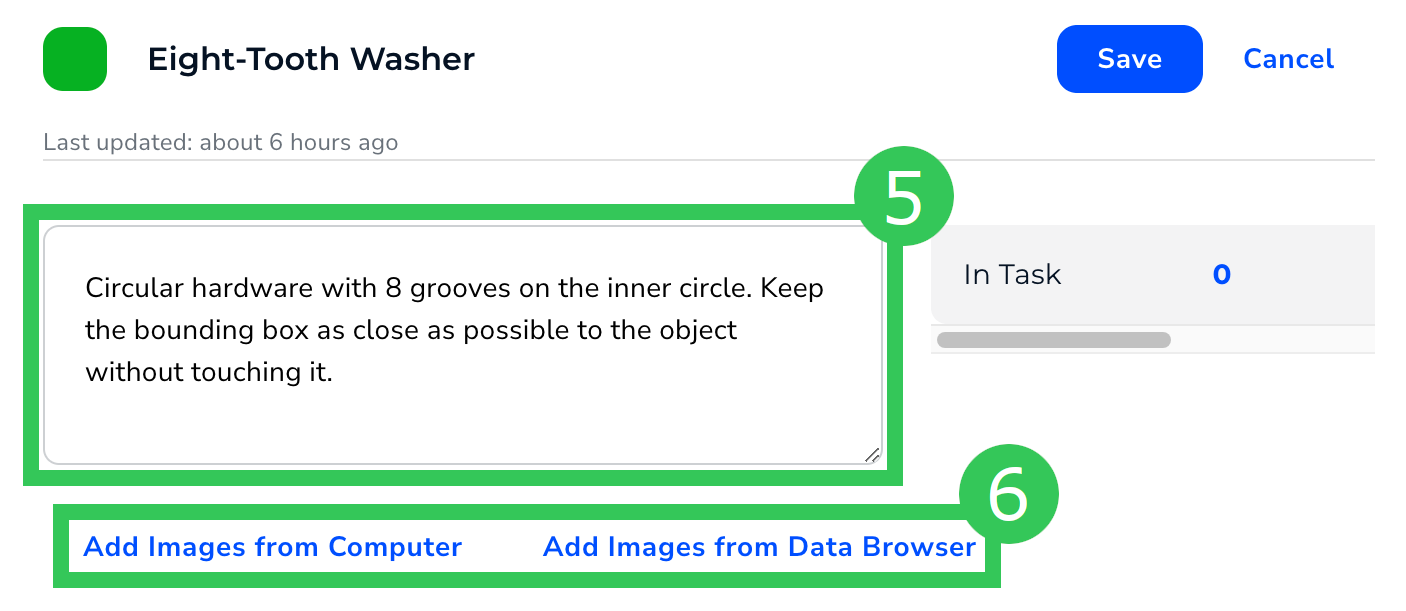
5. Enter a thorough description of the Class in the field provided.
6. Click an **Add Images option** to upload an example of the Class you are describing. For example, upload an image of this washer type if you are editing a description for a six-tooth washer.
7. You can update images as needed by hovering over the image and selecting the appropriate icon.
* **Delete**: Delete the image.
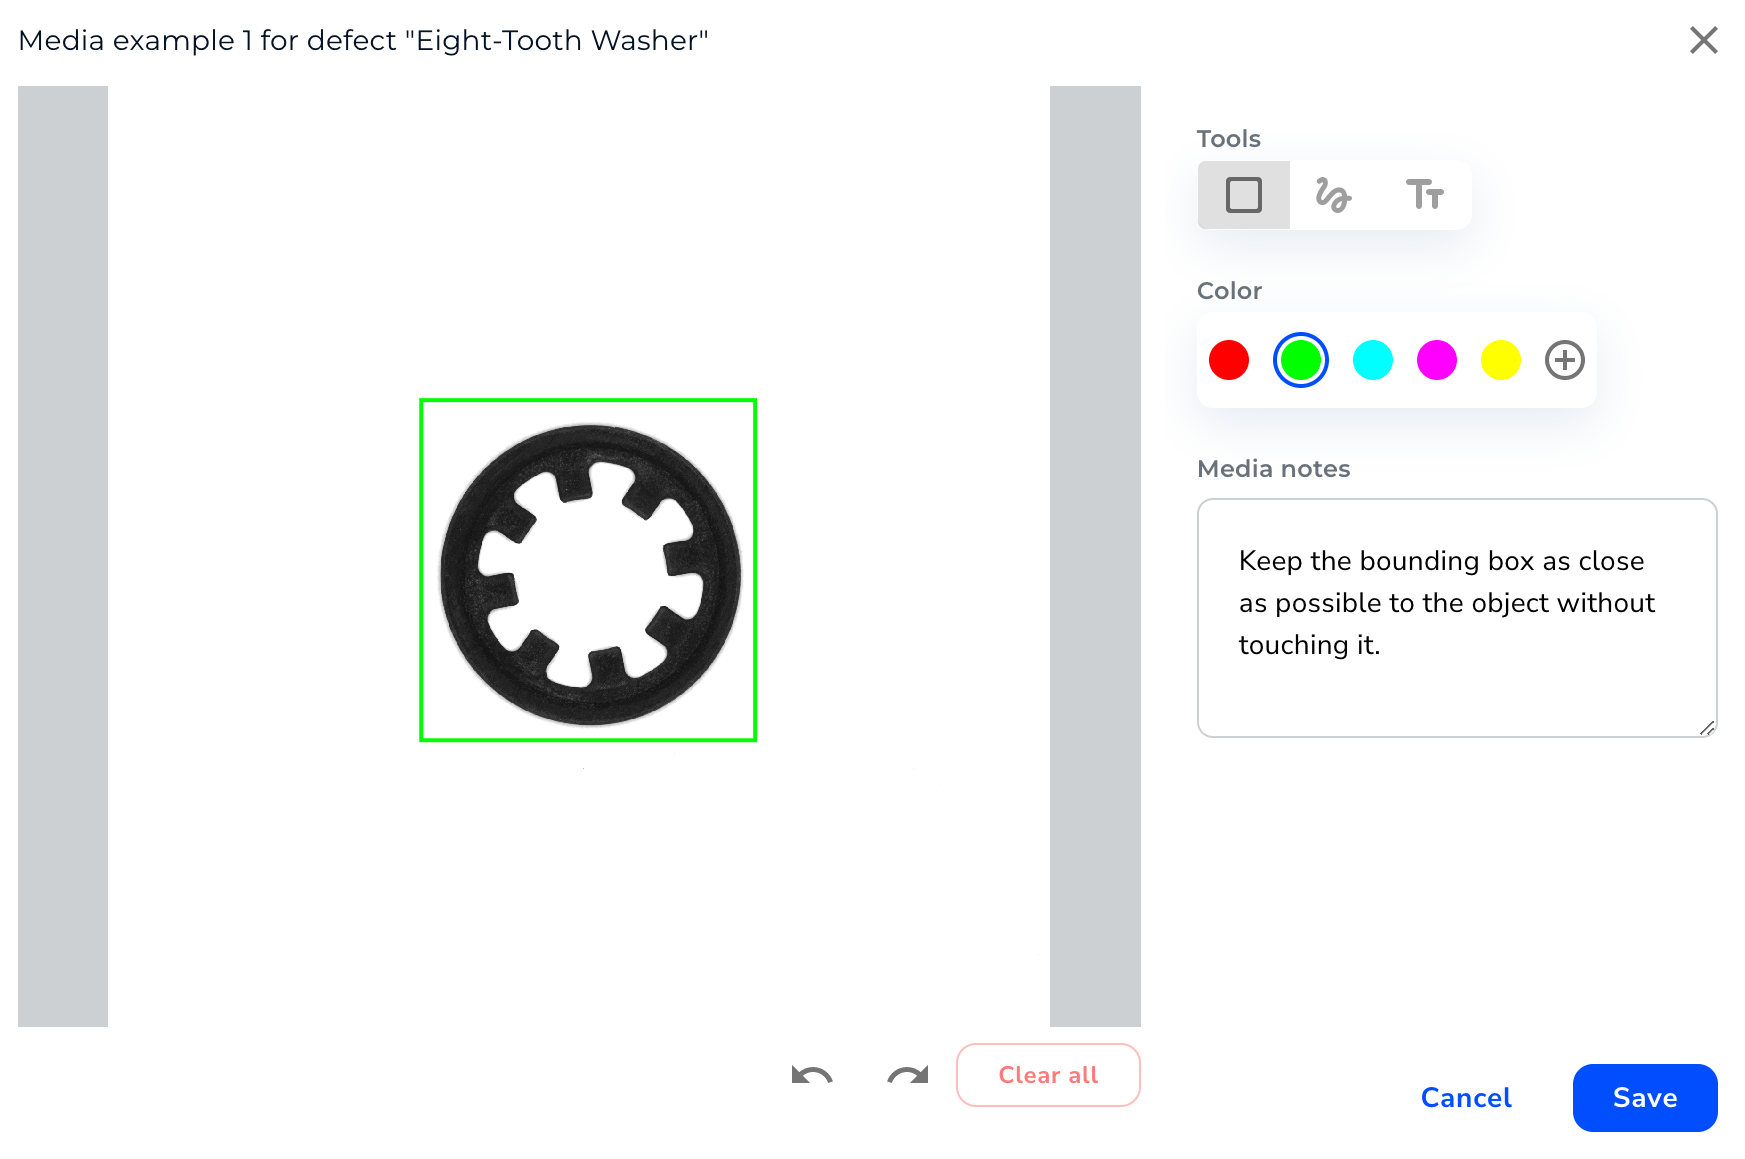
* **Edit**: You can add a label (like a bounding box) to the image. Then you can add a description of how to label objects.
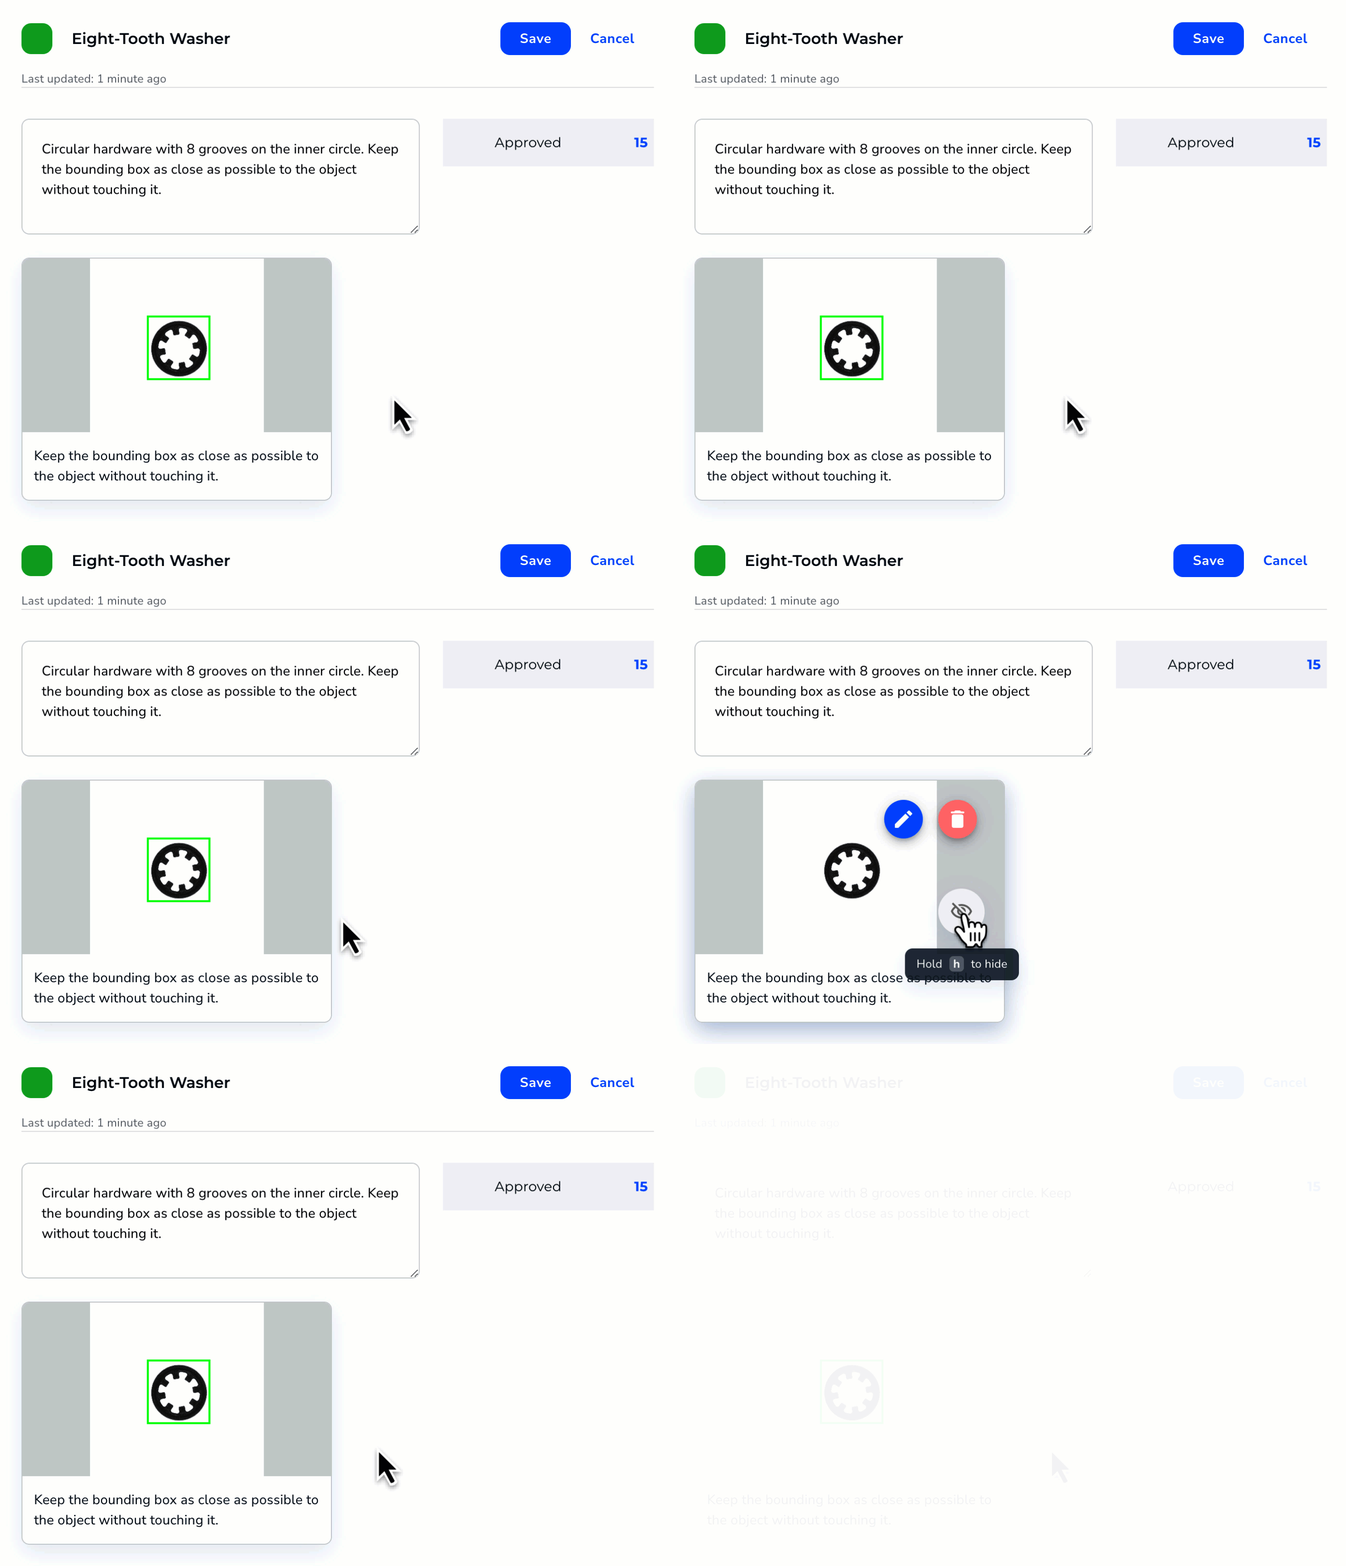
* **Hide**: If you've added labels to the image using the "Edit" feature, you can hide them by hovering over the "Hide" icon.
8. Click **Save**.
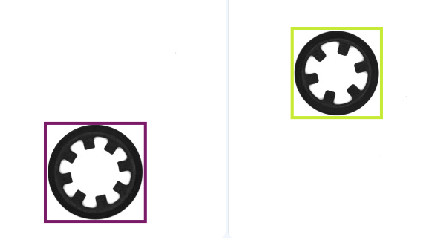 Since Labelers will be looking at two types of washers, it's important to describe each type thoroughly. For instance:
* (Left) Circular hardware with 8 grooves on the inner circle. Keep the bounding box as close as possible to the object without touching it.
* (Right) Circular hardware with 6 grooves on the inner circle. Keep the bounding box as close as possible to the object without touching it.
## Add Descriptions and Images to Classes
It's important to add descriptions and images to Classes. This information will be a reference point to ensure that all users label data similarly.
To add descriptions and images to Classes:
1. Open the Project you want to edit.
2. Click the **Actions** button (ellipses) and select **Manage Classes**.
Since Labelers will be looking at two types of washers, it's important to describe each type thoroughly. For instance:
* (Left) Circular hardware with 8 grooves on the inner circle. Keep the bounding box as close as possible to the object without touching it.
* (Right) Circular hardware with 6 grooves on the inner circle. Keep the bounding box as close as possible to the object without touching it.
## Add Descriptions and Images to Classes
It's important to add descriptions and images to Classes. This information will be a reference point to ensure that all users label data similarly.
To add descriptions and images to Classes:
1. Open the Project you want to edit.
2. Click the **Actions** button (ellipses) and select **Manage Classes**.
 3. Click the Class you want to update.
 4. Click **Edit**.
 5. Enter a thorough description of the Class in the field provided.
6. Click an **Add Images option** to upload an example of the Class you are describing. For example, upload an image of this washer type if you are editing a description for a six-tooth washer.
5. Enter a thorough description of the Class in the field provided.
6. Click an **Add Images option** to upload an example of the Class you are describing. For example, upload an image of this washer type if you are editing a description for a six-tooth washer.
 7. You can update images as needed by hovering over the image and selecting the appropriate icon.
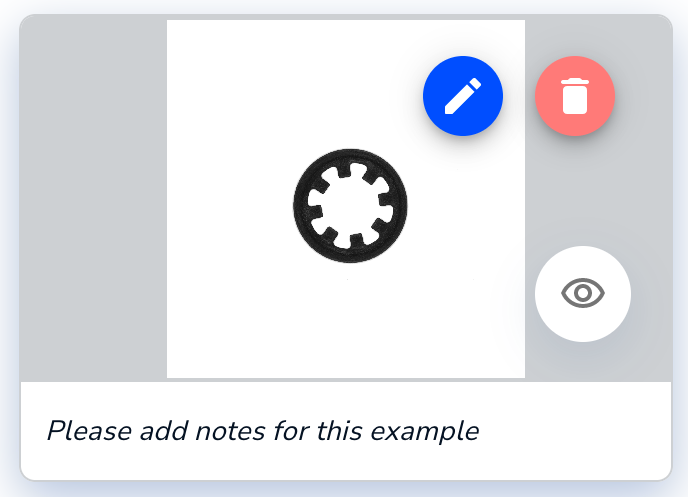 * **Delete**: Delete the image.
* **Edit**: You can add a label (like a bounding box) to the image. Then you can add a description of how to label objects.
* **Delete**: Delete the image.
* **Edit**: You can add a label (like a bounding box) to the image. Then you can add a description of how to label objects.
 * **Hide**: If you've added labels to the image using the "Edit" feature, you can hide them by hovering over the "Hide" icon.
 8. Click **Save**.