> ## Documentation Index
> Fetch the complete documentation index at: https://landinglens.docs.landing.ai/llms.txt
> Use this file to discover all available pages before exploring further.
# Upload Images to LandingLens without Running Inference
export const vp = 'Visual Prompting';
export const smartLabel = 'Smart Labeling';
export const productLL = 'LandingLens';
export const mi = 'Mobile Inference';
export const llsf = 'LandingLens on Snowflake';
export const companyName = 'LandingAI';
*This article applies to these versions of LandingLens:*
| LandingLens |
LandingLens on Snowflake |
| ✓ |
✓ |
You can use LandingEdge to upload images to a LandingLens project *without* running inference on those images. The images are uploaded to the Deploy page for the project in LandingLens. Images uploaded to the Deploy page can then be added to the project dataset.
This method is particularly helpful if you want to upload images directly from a camera into LandingLens. For example, if you have an industrial camera on a manufacturing line, you can set up an Inspection Point in LandingEdge to capture images from that camera. That way, you don’t need to first download images from the camera and then upload them into LandingLens.
To upload images using LandingEdge without running inference:
1. Open **LandingEdge**.
2. Open or create an Inspection Point.
3. Set up the **Image Source**, **Inspection Start**, and **Cloud Connection** sections. (LandingEdge must be running [online](./manage-inspection-points).)
4. Leave the **Model** section blank.
5. In the **Image Saving** section, select the **Upload Results to LandingLens** checkbox.
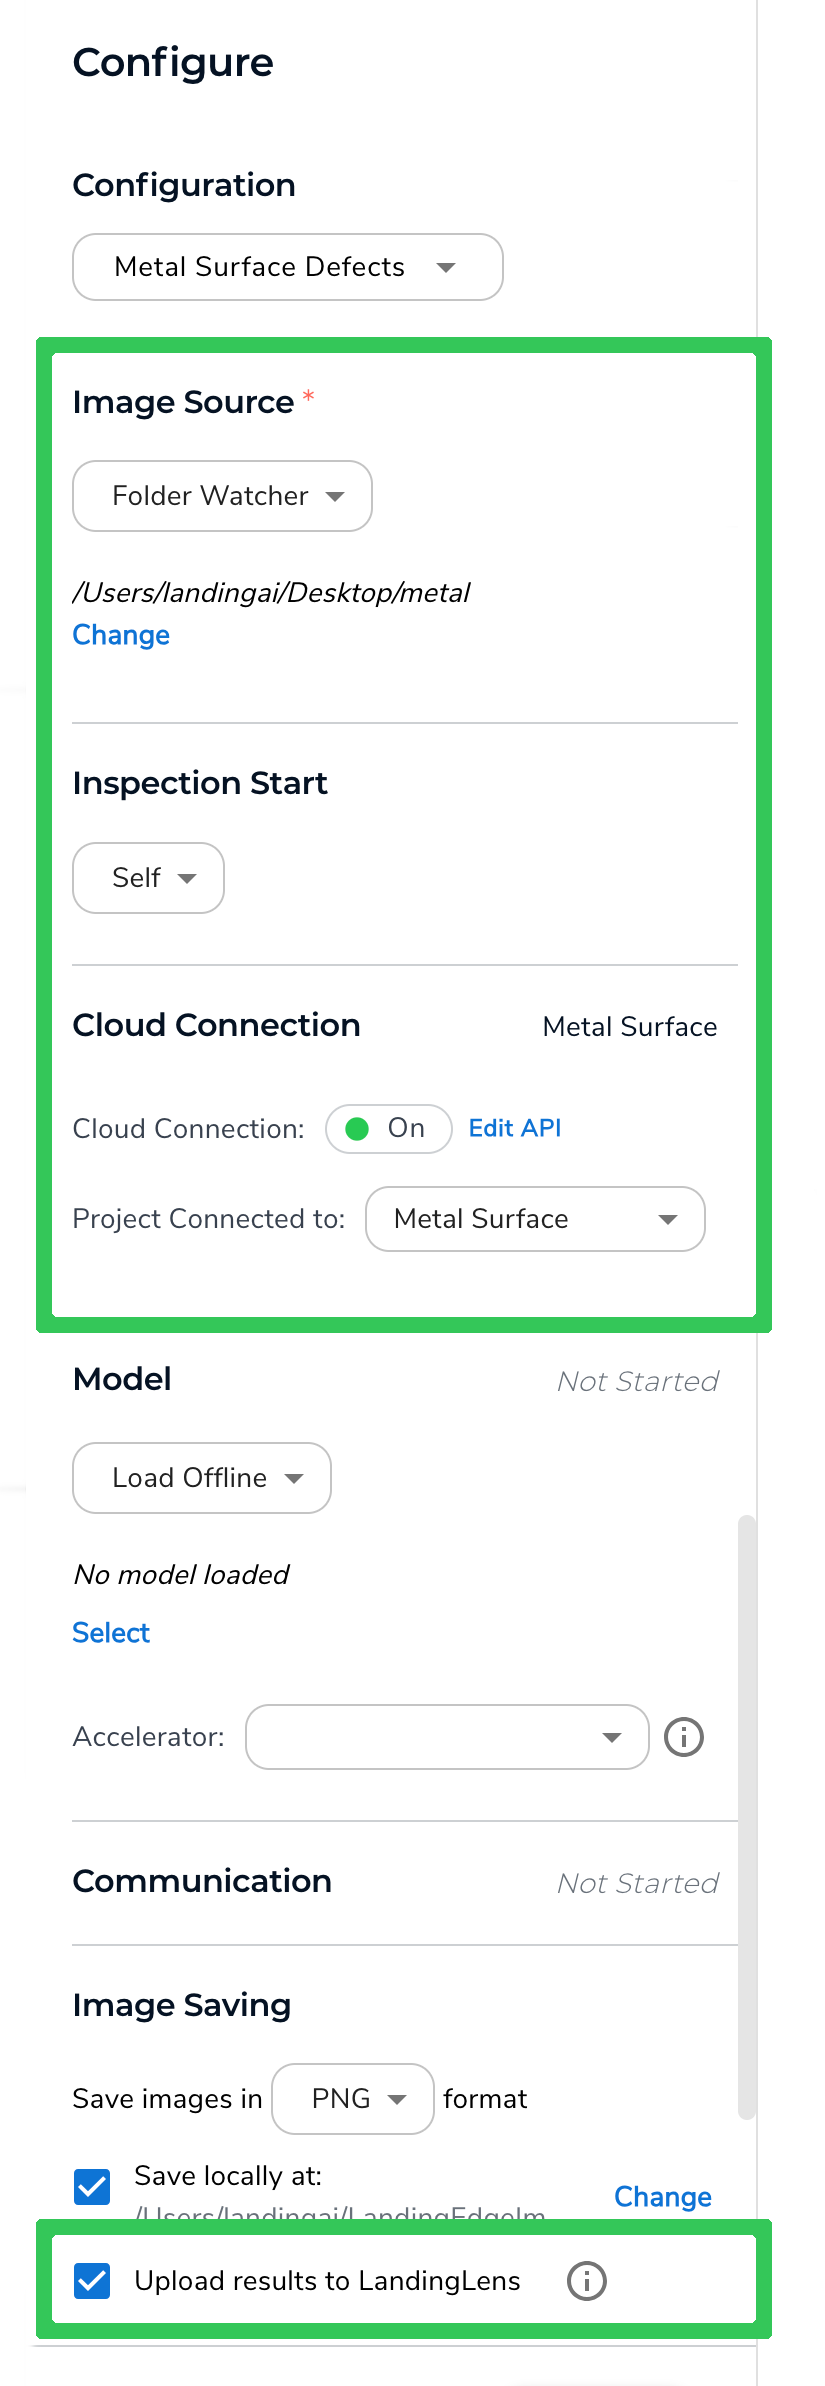 6. Click **Save Configuration**.
7. When you're ready to upload images, click **Run Now** and upload the images using the method you selected in the **Image Source** section. For example, if you selected **Folder Watcher**, move the images you want to upload to the folder you selected.
8. To see the images in LandingLens:
1. Open the project in **LandingLens**.
2. Click **Deploy**.
3. In the **Self-Hosted Deployment** section, click the name of the Inspection Point that you created in **LandingEdge**.
4. The images display.
6. Click **Save Configuration**.
7. When you're ready to upload images, click **Run Now** and upload the images using the method you selected in the **Image Source** section. For example, if you selected **Folder Watcher**, move the images you want to upload to the folder you selected.
8. To see the images in LandingLens:
1. Open the project in **LandingLens**.
2. Click **Deploy**.
3. In the **Self-Hosted Deployment** section, click the name of the Inspection Point that you created in **LandingEdge**.
4. The images display.
.png?fit=max&auto=format&n=TJ8p3AwYZ8yXbABY&q=85&s=cbf11f613ba875efa695daa0137970a4)