> ## Documentation Index
> Fetch the complete documentation index at: https://landinglens.docs.landing.ai/llms.txt
> Use this file to discover all available pages before exploring further.
# Manage Inspection Points
export const vp = 'Visual Prompting';
export const smartLabel = 'Smart Labeling';
export const productLL = 'LandingLens';
export const mi = 'Mobile Inference';
export const llsf = 'LandingLens on Snowflake';
export const companyName = 'LandingAI';
*This article applies to these versions of LandingLens:*
| LandingLens |
LandingLens on Snowflake |
| ✓ |
✓ (see exceptions below) |
## Inspection Point Overview
An **Inspection Point** is the set of information needed to deploy your model in LandingEdge. When you set up an Inspection Point, you identify the source of the images that you'll run inference on, the model that will run inference, and a few other settings.
This article guides you through the basic steps for creating an Inspection Point. Some use cases—like using PLCs—require additional or specific steps. Please read any of these articles that are relevant to your use case before setting up an Inspection Point:
* [Use LandingEdge with LandingLens on Snowflake](./landingedge-snowflake)
* [PLC Workflow](./plc-workflow)
* [GenICam and GigE Vision Cameras](./industrial-cameras)
* [GPUs and LandingEdge](./gpus-and-landingedge)
* [Custom Processing](./custom-processing)
LandingEdge doesn't deploy {vp} models. The only deployment option for {vp} is [Cloud Deployment](/cloud-deployment).
If you don't see a feature described in this article, you might be on an outdated version of LandingEdge. Install the current version to get the latest features.
## Create Inspection Points
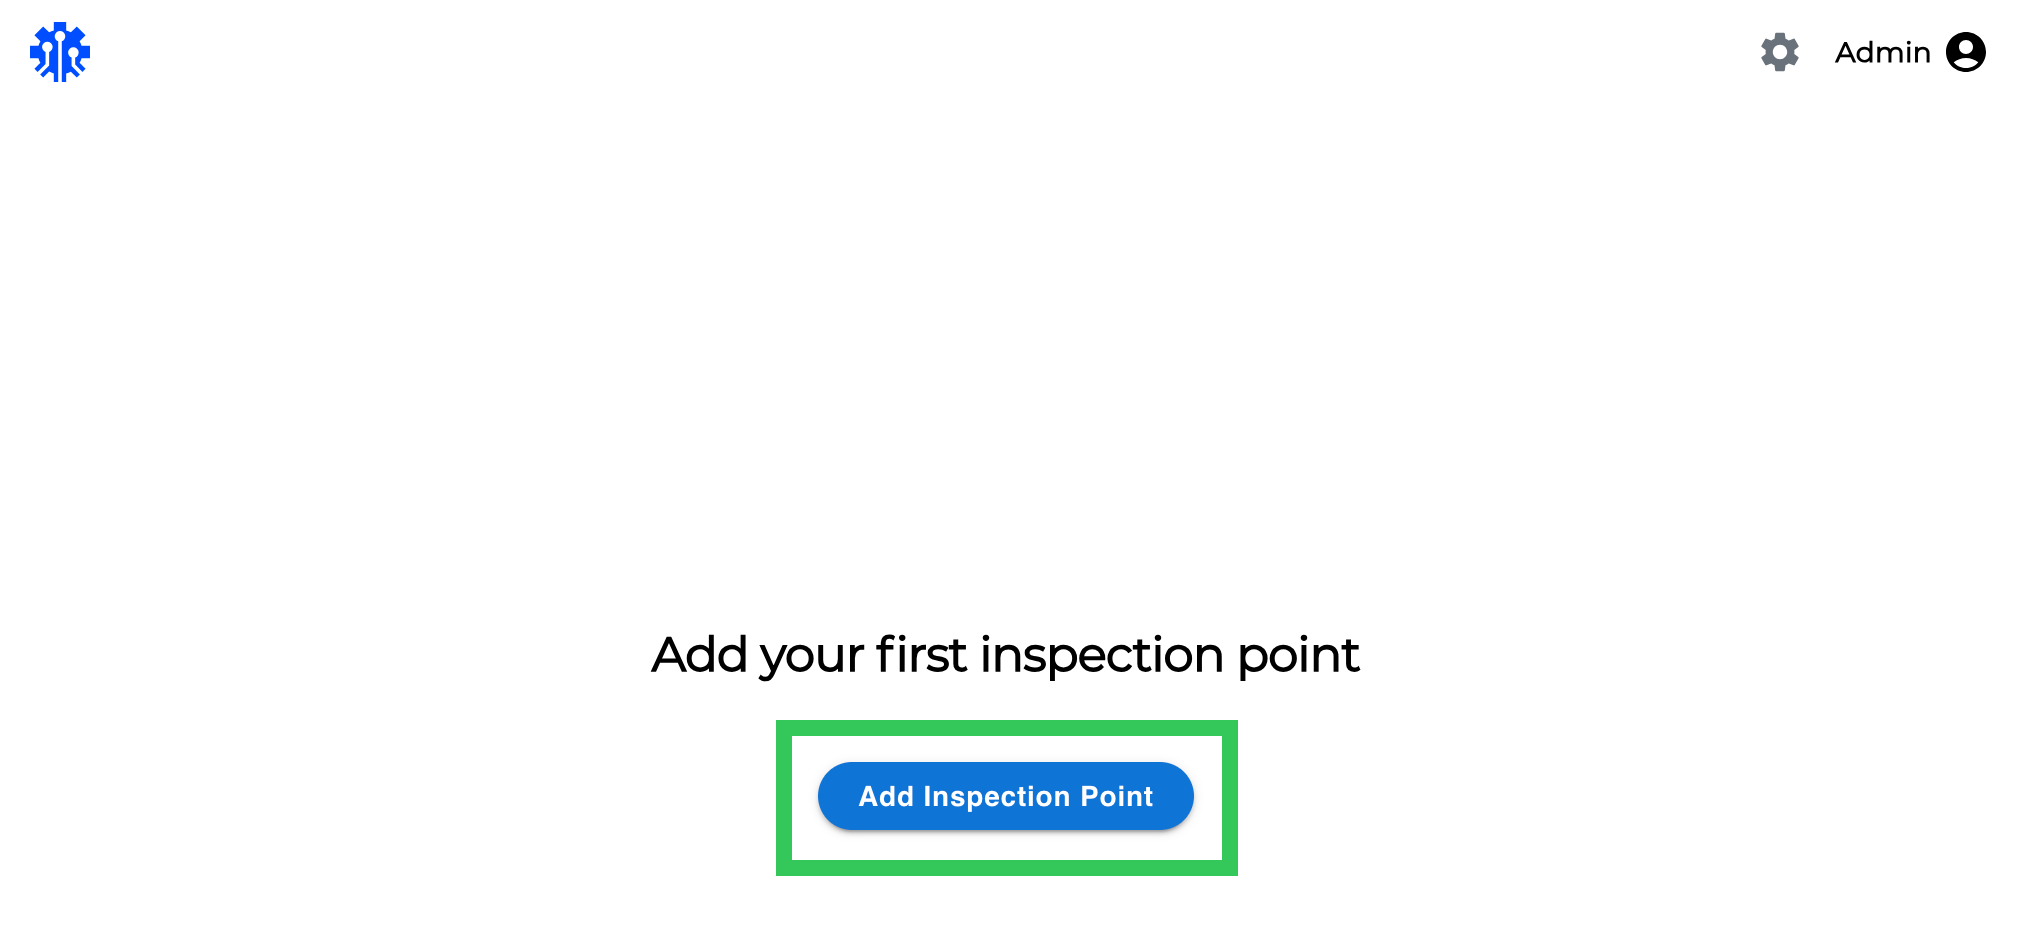
1. Click **Add Inspection Point**.
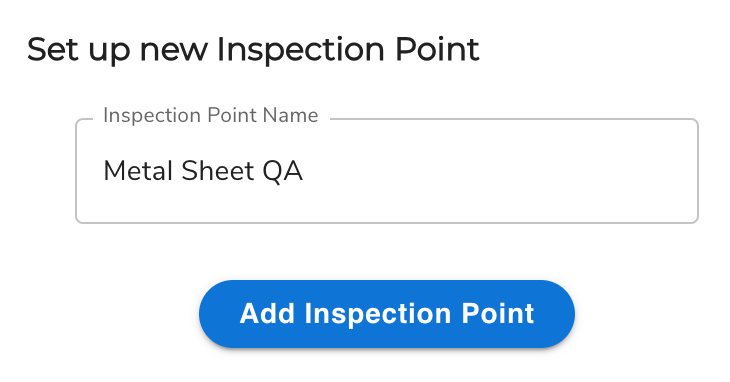
 2. Enter a short, descriptive name for the Inspection Point in the **Inspection Point Name** field.
3. Click **Add Inspection Point**.
2. Enter a short, descriptive name for the Inspection Point in the **Inspection Point Name** field.
3. Click **Add Inspection Point**.
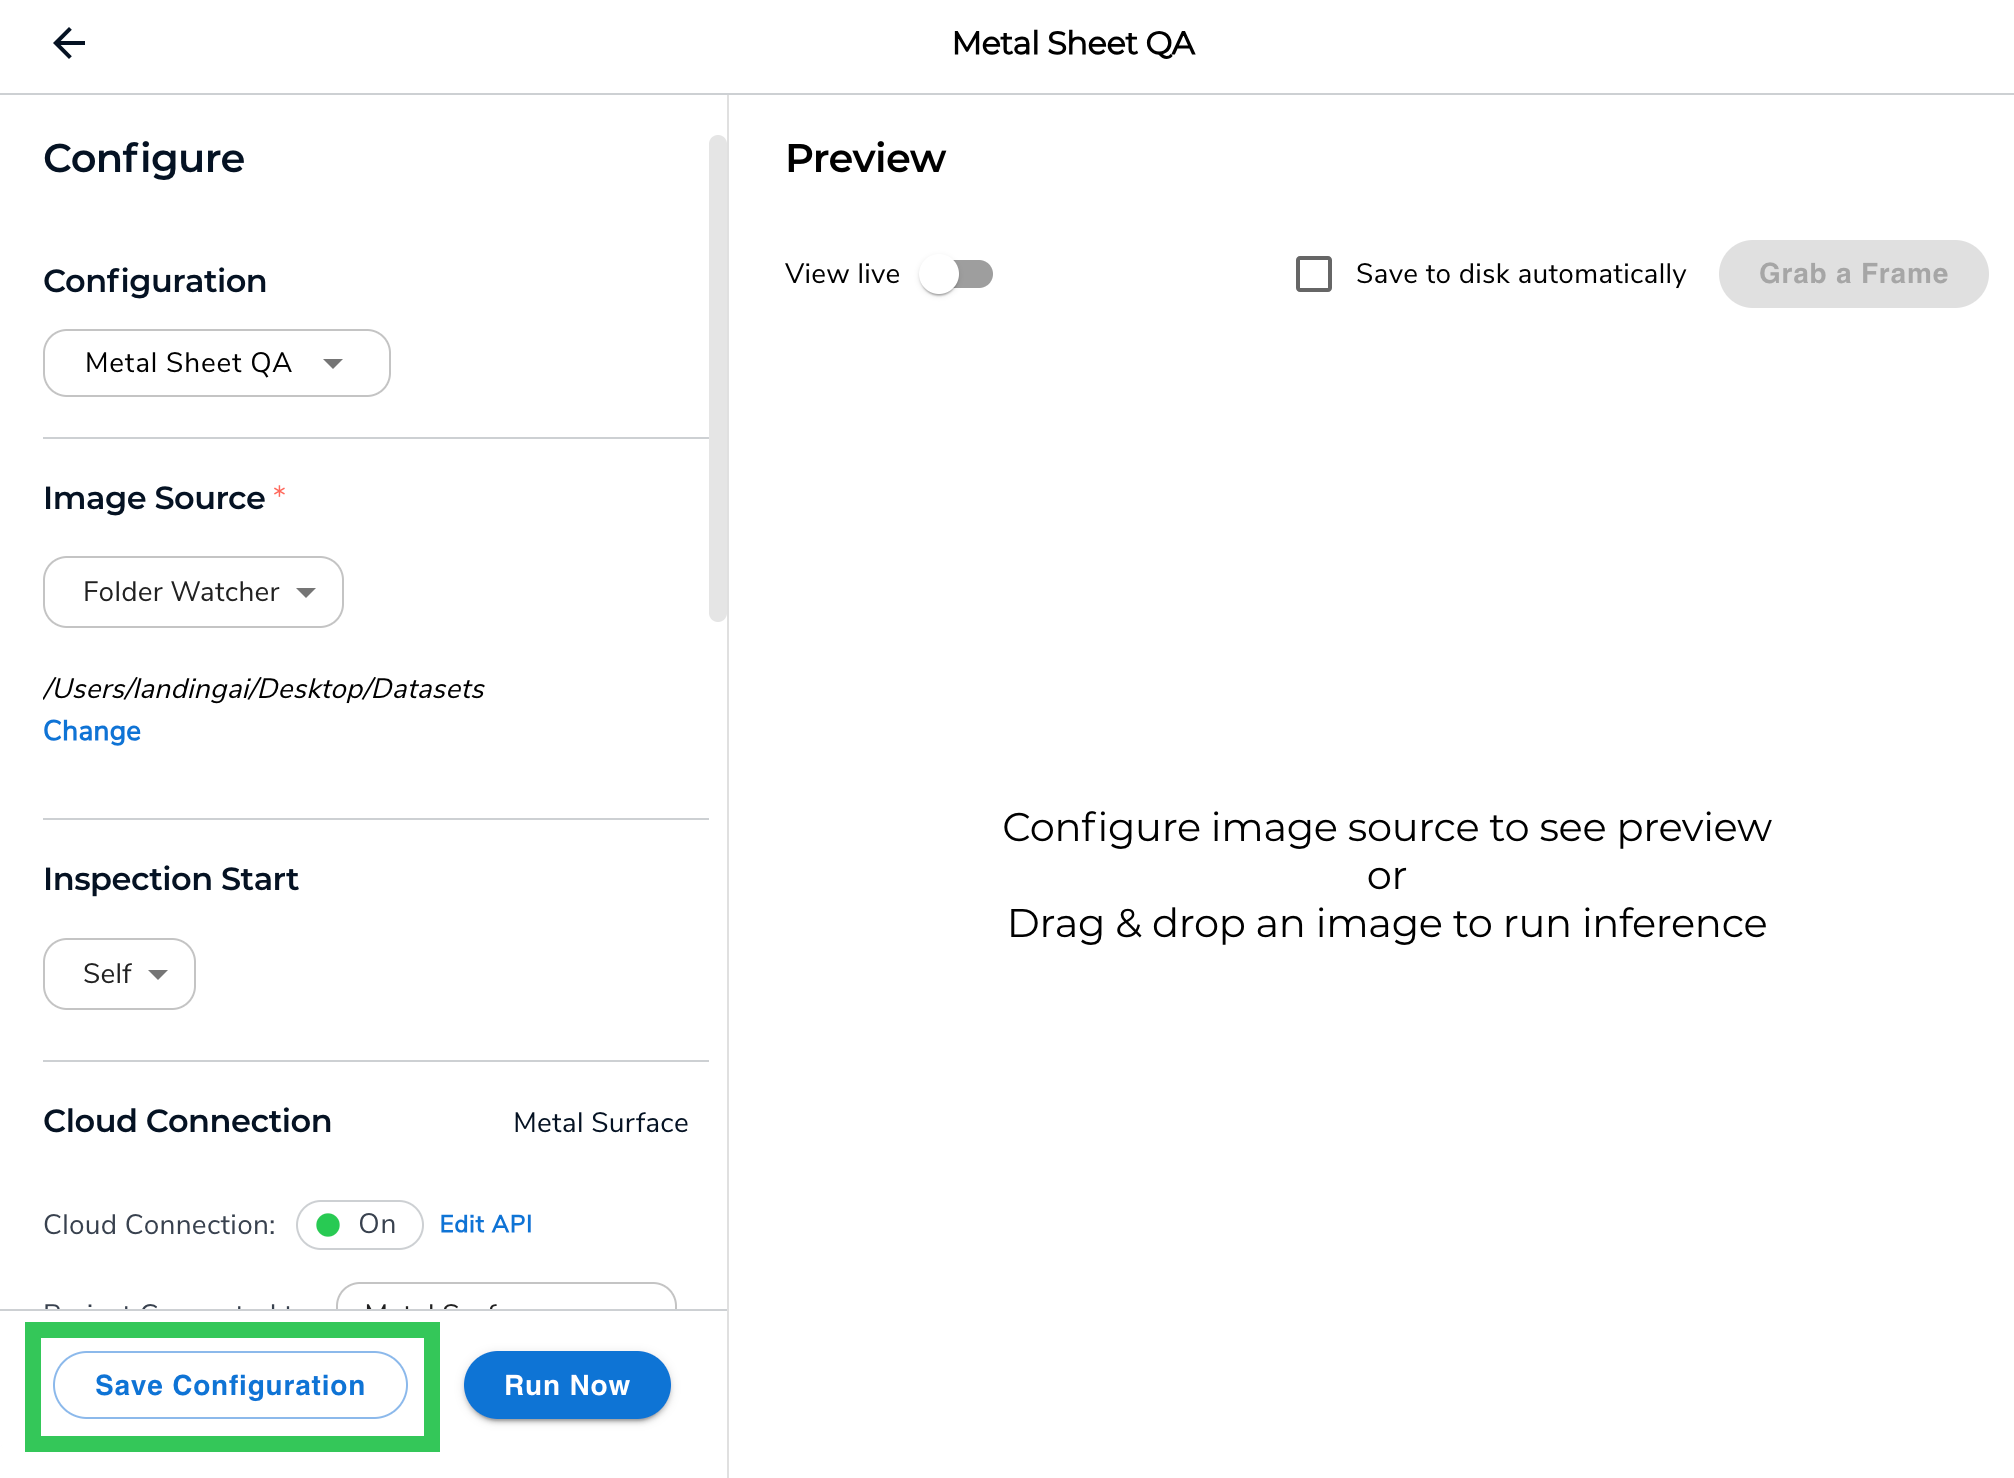
 4. Select an [Image Source](./manage-inspection-points#image-source), which is where LandingEdge will get images from.
5. Select an [Inspection Start](./manage-inspection-points#inspection-start), which determines when and how often LandingEdge gets images.
6. Use the [Cloud Connection and Model](./manage-inspection-points#cloud-connection-and-model-connect-to-a-landinglens-model) settings to select a LandingLens model.
7. Depending on your use case, you might need to set up these settings: [Communication](./manage-inspection-points#communication), [Image Saving](./manage-inspection-points#image-saving), [Other Settings](./manage-inspection-points#other-settings), and [Custom Processing](./custom-processing).
8. Click **Save Configuration**.
4. Select an [Image Source](./manage-inspection-points#image-source), which is where LandingEdge will get images from.
5. Select an [Inspection Start](./manage-inspection-points#inspection-start), which determines when and how often LandingEdge gets images.
6. Use the [Cloud Connection and Model](./manage-inspection-points#cloud-connection-and-model-connect-to-a-landinglens-model) settings to select a LandingLens model.
7. Depending on your use case, you might need to set up these settings: [Communication](./manage-inspection-points#communication), [Image Saving](./manage-inspection-points#image-saving), [Other Settings](./manage-inspection-points#other-settings), and [Custom Processing](./custom-processing).
8. Click **Save Configuration**.
 ## Inspection Point Settings
This section describes the Inspection Point settings:
* [Image Source](./manage-inspection-points#image-source)
* [Preview Settings](./manage-inspection-points#preview-settings)
* [Inspection Start](./manage-inspection-points#inspection-start)
* [Cloud Connection and Model](./manage-inspection-points#cloud-connection-and-model-connect-to-a-landinglens-model)
* [Communication](./manage-inspection-points#communication) (only applicable if using a PLC)
* [Image Saving](./manage-inspection-points#image-saving) (optional)
* [Other Settings](./manage-inspection-points#other-settings) (optional)
* [Custom Processing](./custom-processing) (optional)
### Image Source
LandingEdge does not support smart cameras.
Use the **Image Source** drop-down menu to select where you want LandingEdge to capture images from.
#### Web API
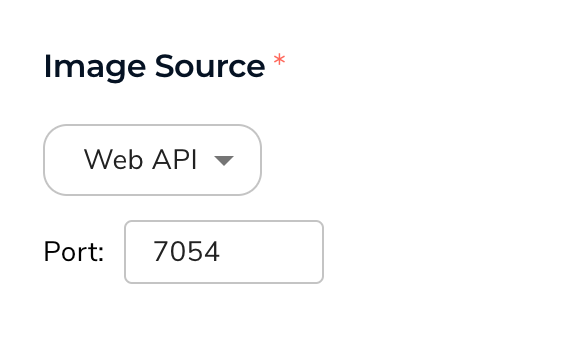
Select **Web API** from the **Image Source** drop-down menu to send images for inference via API. Enter any number from 7,000 to 8,000. This will be your port number for your API. LandingEdge will monitor this port number to receive images from your API call.
For detailed information about sending images for inference via API, go to [Run Inference with Web APIs](./landingedge-apis).
## Inspection Point Settings
This section describes the Inspection Point settings:
* [Image Source](./manage-inspection-points#image-source)
* [Preview Settings](./manage-inspection-points#preview-settings)
* [Inspection Start](./manage-inspection-points#inspection-start)
* [Cloud Connection and Model](./manage-inspection-points#cloud-connection-and-model-connect-to-a-landinglens-model)
* [Communication](./manage-inspection-points#communication) (only applicable if using a PLC)
* [Image Saving](./manage-inspection-points#image-saving) (optional)
* [Other Settings](./manage-inspection-points#other-settings) (optional)
* [Custom Processing](./custom-processing) (optional)
### Image Source
LandingEdge does not support smart cameras.
Use the **Image Source** drop-down menu to select where you want LandingEdge to capture images from.
#### Web API
Select **Web API** from the **Image Source** drop-down menu to send images for inference via API. Enter any number from 7,000 to 8,000. This will be your port number for your API. LandingEdge will monitor this port number to receive images from your API call.
For detailed information about sending images for inference via API, go to [Run Inference with Web APIs](./landingedge-apis).
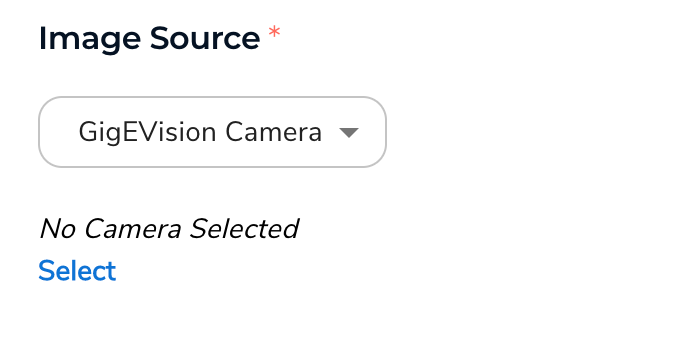
 #### GigE Vision Camera
Select **GigE Vision Camera** from the **Image Source** drop-down menu to capture images from an industrial camera using the [GigE Vision Camera](https://www.automate.org/vision/vision-standards/vision-standards-gige-vision) interface standard.
For detailed information about capturing images from industrial cameras, go to [GenICam and GigE Vision Cameras](./industrial-cameras).
#### GigE Vision Camera
Select **GigE Vision Camera** from the **Image Source** drop-down menu to capture images from an industrial camera using the [GigE Vision Camera](https://www.automate.org/vision/vision-standards/vision-standards-gige-vision) interface standard.
For detailed information about capturing images from industrial cameras, go to [GenICam and GigE Vision Cameras](./industrial-cameras).
 #### Video
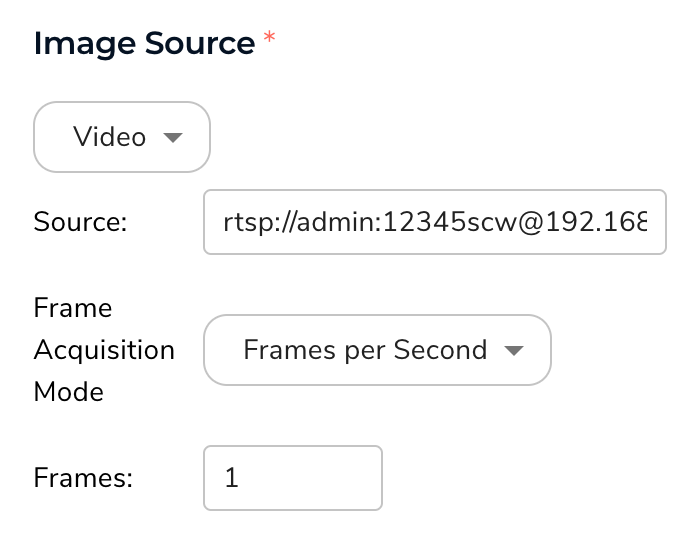
Select **Video** from the **Image Source** drop-down menu to tell LandingEdge to pull stills (individual frames) from a video and run inference on those images.
Configure these settings:
* **Source**: Enter the URL or RTSP address for the video you want to pull stills from.
* **Frame Acquisition Mode**: Select if you want **Frames per Second** (pulls the specified number of frames per second) or **Frame Interval** (pulls one frame out of the specified number of frames).
* **Frames / Sample Every #**: Select the number of frames for the selected **Frame Acquisition Mode**.
#### Video
Select **Video** from the **Image Source** drop-down menu to tell LandingEdge to pull stills (individual frames) from a video and run inference on those images.
Configure these settings:
* **Source**: Enter the URL or RTSP address for the video you want to pull stills from.
* **Frame Acquisition Mode**: Select if you want **Frames per Second** (pulls the specified number of frames per second) or **Frame Interval** (pulls one frame out of the specified number of frames).
* **Frames / Sample Every #**: Select the number of frames for the selected **Frame Acquisition Mode**.
 #### GenICam
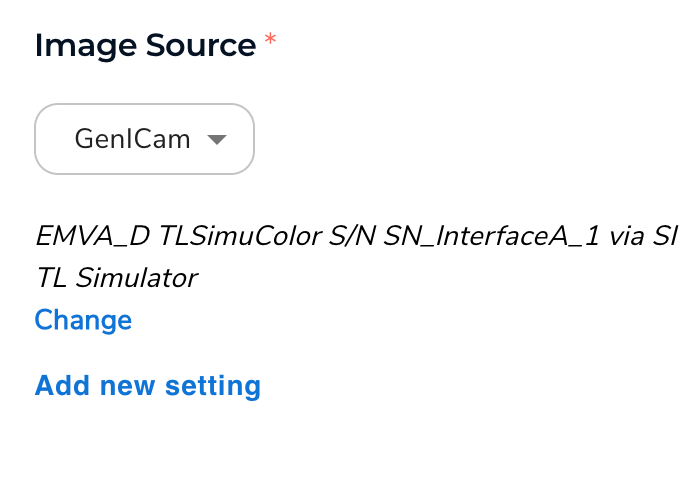
Select **GenICam** from the **Image Source** drop-down menu to capture images from an industrial camera using the [GenICam](https://www.emva.org/standards-technology/genicam/) interface standard.
For detailed information about capturing images from industrial cameras, go to [GenICam and GigE Vision Cameras](./industrial-cameras).
#### GenICam
Select **GenICam** from the **Image Source** drop-down menu to capture images from an industrial camera using the [GenICam](https://www.emva.org/standards-technology/genicam/) interface standard.
For detailed information about capturing images from industrial cameras, go to [GenICam and GigE Vision Cameras](./industrial-cameras).
 #### Folder Watcher
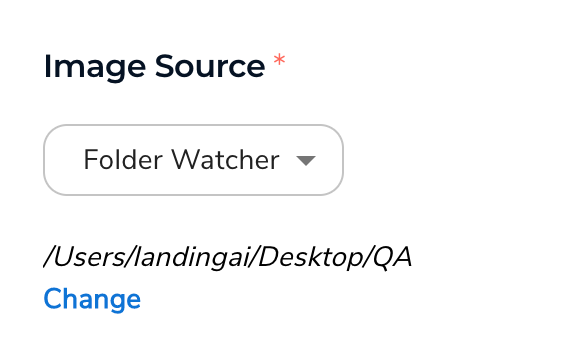
Select **Folder Watcher** from the **Image Source** drop-down menu to run inference on images added to a folder. Then, select the folder you want to pull images from.
LandingEdge only runs inference on images added to the folder after you click **Run Now**. It won't run inference on images already in the folder, or on images added when the Inspection Point isn't running.
#### Folder Watcher
Select **Folder Watcher** from the **Image Source** drop-down menu to run inference on images added to a folder. Then, select the folder you want to pull images from.
LandingEdge only runs inference on images added to the folder after you click **Run Now**. It won't run inference on images already in the folder, or on images added when the Inspection Point isn't running.
 ### Preview Settings
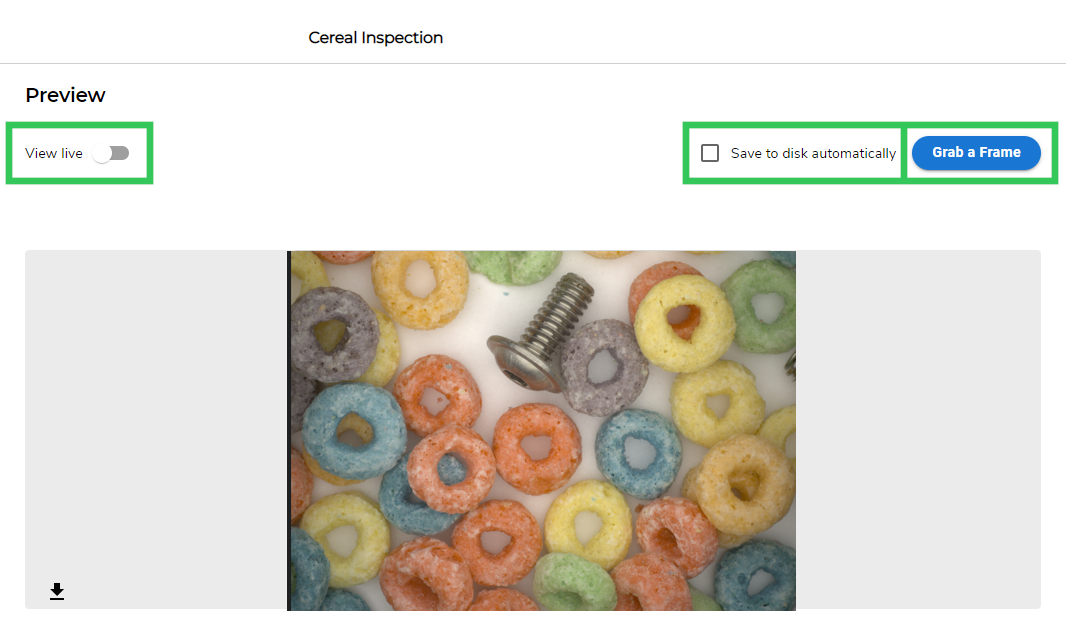
The **Preview** settings display after you have configured your [Image Source](./manage-inspection-points#image-source). They are only applicable to GenICam cameras. These are the settings:
* **View Live**: See a live feed of your camera's view. This is useful to check if the camera is in focus or facing the right direction, for example.
* **Grab a Frame**: Take a picture using the connected camera. This option does not work in View Live. This will run inference if you have a model loaded.
* **Save to Disk Automatically**: Automatically save images captured by the **Grab a Frame** setting. (This setting will not save images from View Live.)
### Preview Settings
The **Preview** settings display after you have configured your [Image Source](./manage-inspection-points#image-source). They are only applicable to GenICam cameras. These are the settings:
* **View Live**: See a live feed of your camera's view. This is useful to check if the camera is in focus or facing the right direction, for example.
* **Grab a Frame**: Take a picture using the connected camera. This option does not work in View Live. This will run inference if you have a model loaded.
* **Save to Disk Automatically**: Automatically save images captured by the **Grab a Frame** setting. (This setting will not save images from View Live.)
 ### Inspection Start
Select how often you want the camera to capture images from the **Inspection Start** drop-down menu:
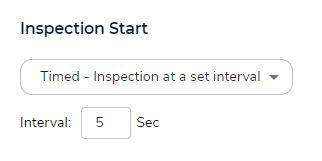
* **Timer**: Set the timed interval (in seconds) in which the camera will take a picture.
### Inspection Start
Select how often you want the camera to capture images from the **Inspection Start** drop-down menu:
* **Timer**: Set the timed interval (in seconds) in which the camera will take a picture.
 * **PLC**: Configure your Programmable Logic Controller ([PLC](https://en.wikipedia.org/wiki/Programmable_logic_controller)) to determine how often you want the camera to take a picture. For information about using a PLC with LandingEdge, go to [PLC Workflow](./plc-workflow).
* **Self**: Configure your camera or hardware device to trigger when the image will be taken. This is the only option for Web API, Video, and Folder Watcher.
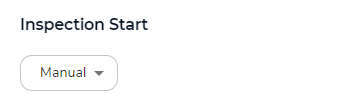
* **Manual**: In Manual mode, click the **Grab a Frame** button on the Monitor page to trigger the camera to capture the image.
* **PLC**: Configure your Programmable Logic Controller ([PLC](https://en.wikipedia.org/wiki/Programmable_logic_controller)) to determine how often you want the camera to take a picture. For information about using a PLC with LandingEdge, go to [PLC Workflow](./plc-workflow).
* **Self**: Configure your camera or hardware device to trigger when the image will be taken. This is the only option for Web API, Video, and Folder Watcher.
* **Manual**: In Manual mode, click the **Grab a Frame** button on the Monitor page to trigger the camera to capture the image.
 ### Cloud Connection and Model: Connect to a LandingLens Model
Use the **Cloud Connection** and **Model** settings to connect the Inspection Point to a model in LandingLens. You must [activate the project](/activate-projects) that has the model you want to run inference with *before* you can use it in LandingEdge, regardless if you will run the model online or offline.
The method you use for selecting a model depends on how you want to set up LandingEdge:
* **Online Use**: If you want to connect LandingEdge directly to LandingLens (via API credentials) and select the model directly in LandingEdge, go to [Select a LandingLens Model for Online Use](#select-a-landinglens-model-for-online-use). (If you're using {llsf}, go [here](./landingedge-snowflake) instead.)
* **Offline Use**: If you want to download your model from LandingLens and then load it to LandingEdge, go to [Select a LandingLens Model for Offline Use](#select-a-landinglens-model-for-offline-use). Offline use is helpful if your system doesn't have internet access or has limited bandwidth (which could make it difficult for LandingEdge to get the model directly from LandingLens).
#### Select a LandingLens Model for Online Use
If you're using {llsf}, go [here](./landingedge-snowflake) instead.
1. [Activate the project](/activate-projects) that you has the model you want to run inference with, if you haven't already.
2. Open your Inspection Point in LandingEdge.
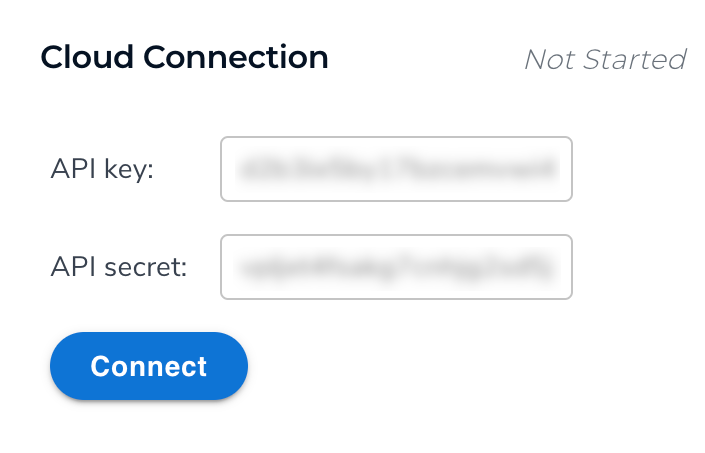
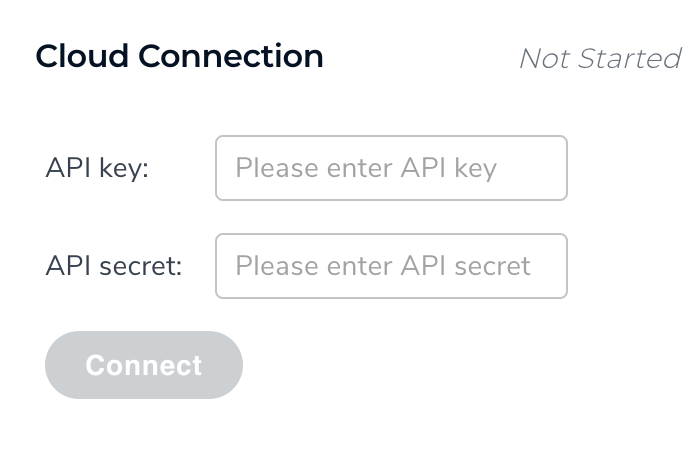
3. Go to the **Cloud Connection** section.
4. Enter your **API Key**. To generate this credential, go to [API Keys](/api-key).
5. If using LandingEdge v2.5.5 or later, leave the **API Secret** field blank. If using an earlier version, enter a minimum of one alphanumeric character in the **API Secret** field. For more information, go to [API Keys](/api-key).
6. Click **Connect**.
### Cloud Connection and Model: Connect to a LandingLens Model
Use the **Cloud Connection** and **Model** settings to connect the Inspection Point to a model in LandingLens. You must [activate the project](/activate-projects) that has the model you want to run inference with *before* you can use it in LandingEdge, regardless if you will run the model online or offline.
The method you use for selecting a model depends on how you want to set up LandingEdge:
* **Online Use**: If you want to connect LandingEdge directly to LandingLens (via API credentials) and select the model directly in LandingEdge, go to [Select a LandingLens Model for Online Use](#select-a-landinglens-model-for-online-use). (If you're using {llsf}, go [here](./landingedge-snowflake) instead.)
* **Offline Use**: If you want to download your model from LandingLens and then load it to LandingEdge, go to [Select a LandingLens Model for Offline Use](#select-a-landinglens-model-for-offline-use). Offline use is helpful if your system doesn't have internet access or has limited bandwidth (which could make it difficult for LandingEdge to get the model directly from LandingLens).
#### Select a LandingLens Model for Online Use
If you're using {llsf}, go [here](./landingedge-snowflake) instead.
1. [Activate the project](/activate-projects) that you has the model you want to run inference with, if you haven't already.
2. Open your Inspection Point in LandingEdge.
3. Go to the **Cloud Connection** section.
4. Enter your **API Key**. To generate this credential, go to [API Keys](/api-key).
5. If using LandingEdge v2.5.5 or later, leave the **API Secret** field blank. If using an earlier version, enter a minimum of one alphanumeric character in the **API Secret** field. For more information, go to [API Keys](/api-key).
6. Click **Connect**.
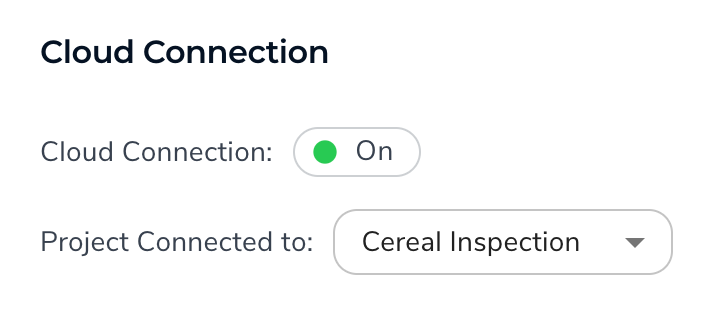
 7. The **Cloud Connection** is marked as **On**.
8. Select your **Project** from the drop-down menu.
7. The **Cloud Connection** is marked as **On**.
8. Select your **Project** from the drop-down menu.
 9. Go the **Model** section.
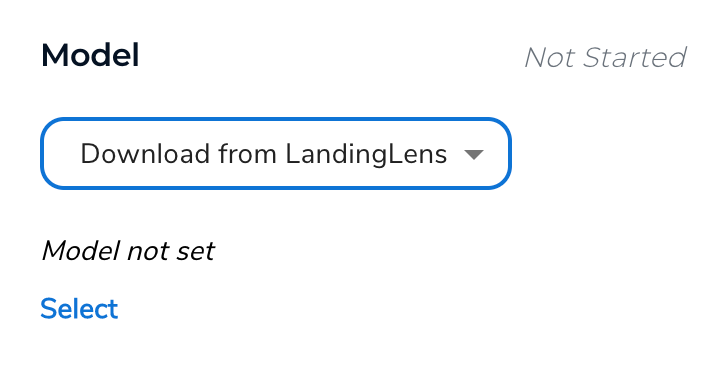
10. Select **Download from LandingLens**.
11. Click **Select**.
9. Go the **Model** section.
10. Select **Download from LandingLens**.
11. Click **Select**.
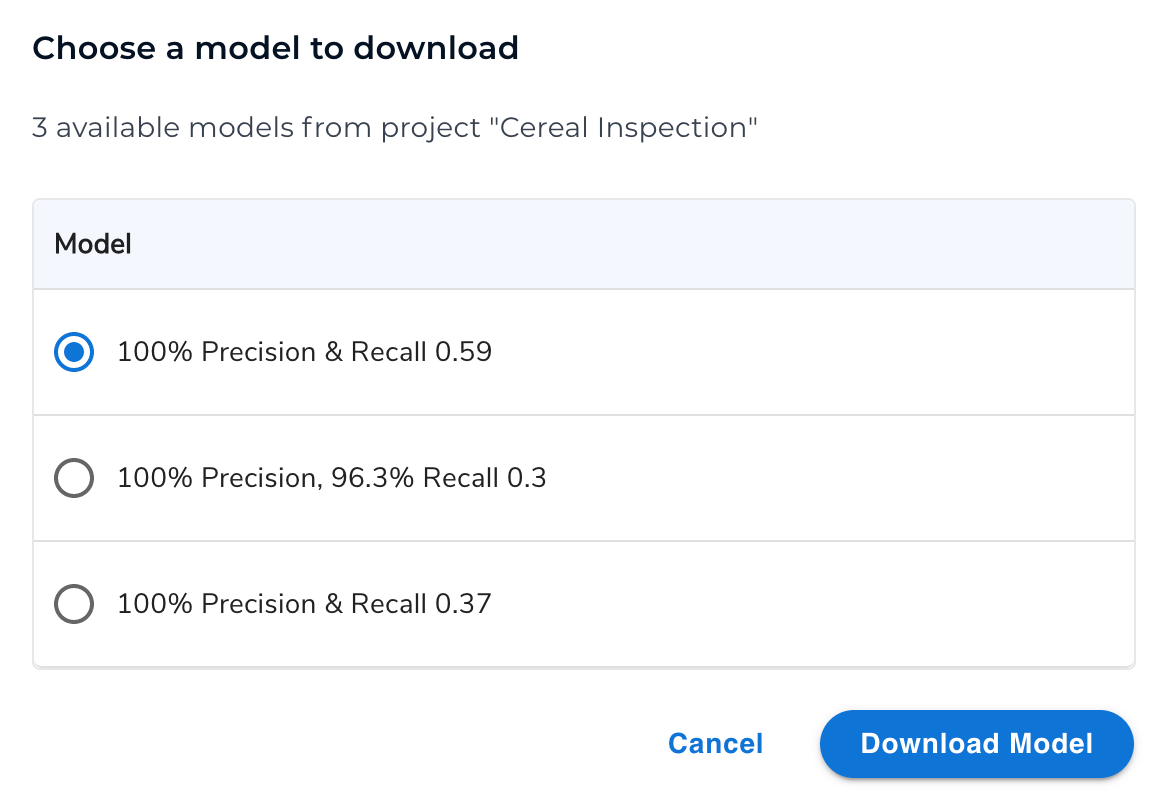
 12. Select the **Model** you want to use and click **Download Model**.
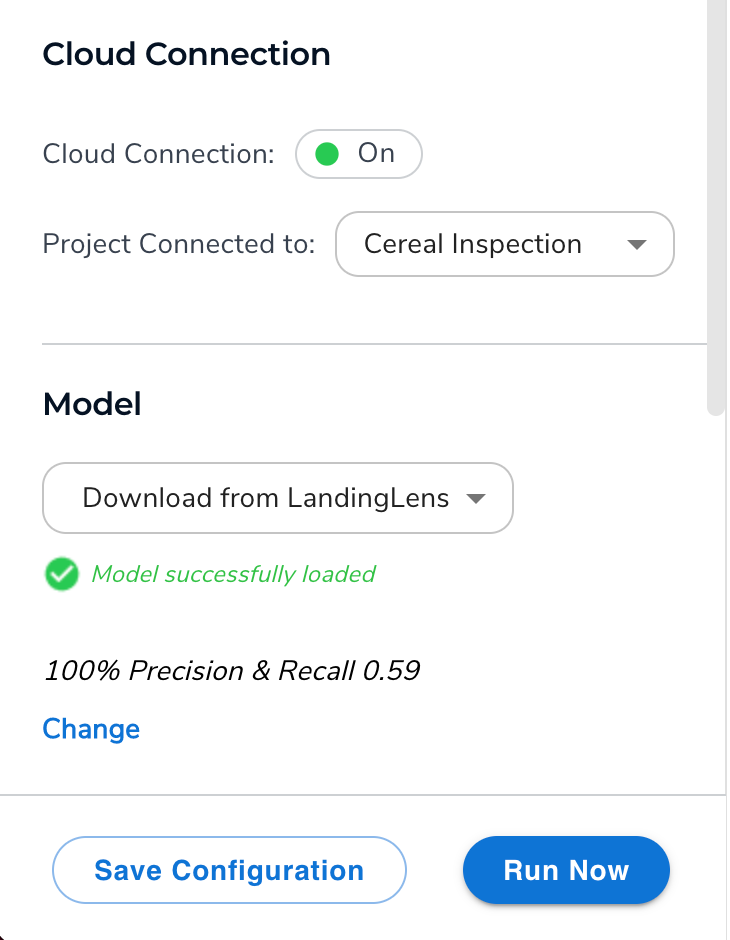
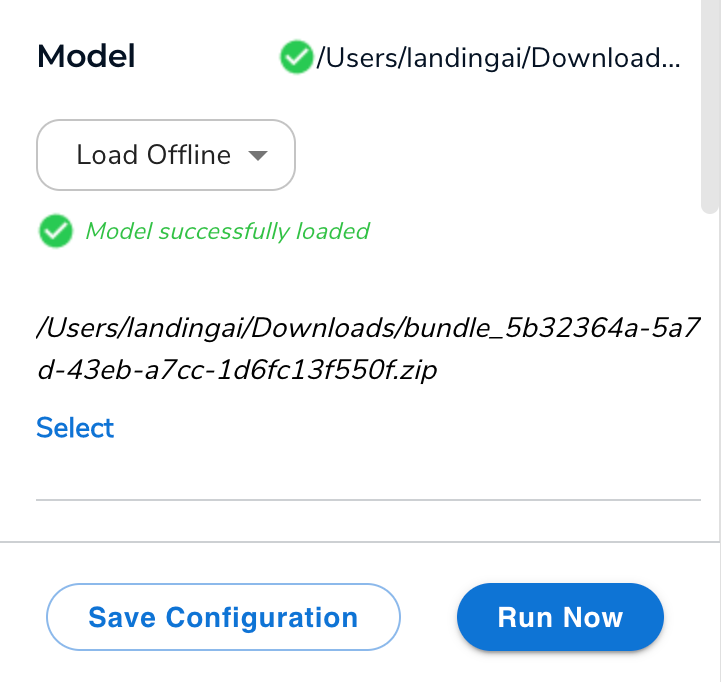
 LandingEdge loads the model. When this is complete, the **Model successfully loaded** message displays and the **Run Now** button becomes active.
 #### Select a LandingLens Model for Offline Use
1. [Activate the project](/activate-projects) that you has the model you want to run inference with, if you haven't already.
2. [Download your model](/download-models) from LandingLens, if you haven't already.
3. Open your Inspection Point in LandingEdge.
4. Leave the fields in the **Cloud Connection** section blank.
#### Select a LandingLens Model for Offline Use
1. [Activate the project](/activate-projects) that you has the model you want to run inference with, if you haven't already.
2. [Download your model](/download-models) from LandingLens, if you haven't already.
3. Open your Inspection Point in LandingEdge.
4. Leave the fields in the **Cloud Connection** section blank.
 5. Go to the **Model** section.
6. Select **Load Offline**.
7. Click **Select**.
5. Go to the **Model** section.
6. Select **Load Offline**.
7. Click **Select**.
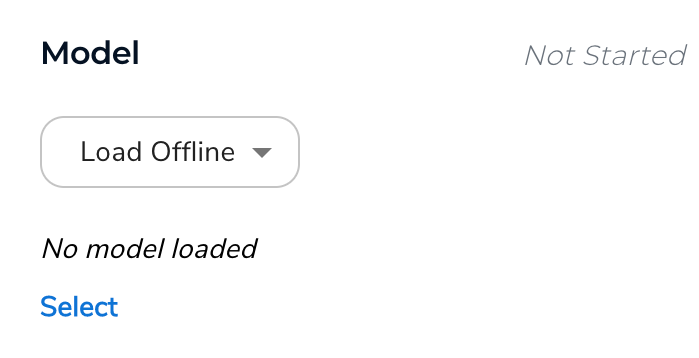 8. Navigate to the zipped model on your device and select it.LandingEdge loads the model. When this is complete, the **Model successfully loaded** message displays and the **Run Now** button becomes active.
 ### Communication
Fill out the Communication section only if you're using a PLC with LandingEdge. For detailed information, go to [PLC Workflow](./plc-workflow).
### Image Saving
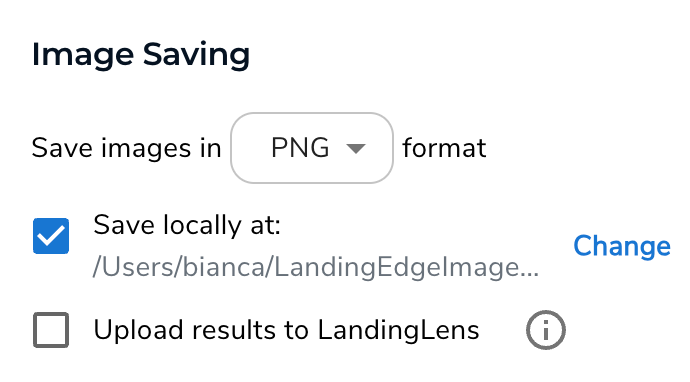
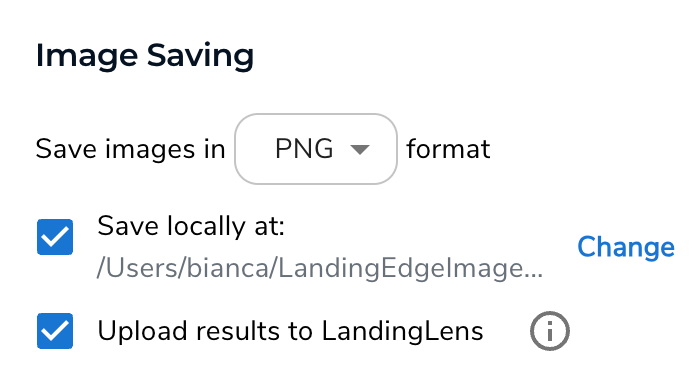
Use the **Image Saving** section to save images to your hard drive (Save Locally) and LandingLens.
#### Save Locally
You can save all images captures from LandingEdge to your hard drive using **Save Locally**. When this feature is enabled, all images from LandingEdge are saved to your hard drive until there is 5% storage space left.
To save images to your hard drive:
1. Select a file type (JPG or PNG).
2. Select the **Save Locally at** checkbox.
3. If you want to change the location where images are saved, click **Change** and select a new folder.
### Communication
Fill out the Communication section only if you're using a PLC with LandingEdge. For detailed information, go to [PLC Workflow](./plc-workflow).
### Image Saving
Use the **Image Saving** section to save images to your hard drive (Save Locally) and LandingLens.
#### Save Locally
You can save all images captures from LandingEdge to your hard drive using **Save Locally**. When this feature is enabled, all images from LandingEdge are saved to your hard drive until there is 5% storage space left.
To save images to your hard drive:
1. Select a file type (JPG or PNG).
2. Select the **Save Locally at** checkbox.
3. If you want to change the location where images are saved, click **Change** and select a new folder.
 #### Upload Results to LandingLens
If you're running LandingEdge [online](./manage-inspection-points#select-a-landinglens-model-for-online-use) and have enabled [Save Locally](./manage-inspection-points#save-locally), you can save images back to LandingLens. You can then load the images into your dataset, label them, and retrain your model. This process is called Continuous Learning.
To enable save images back to LandingLens, select the **Upload results to LandingLens** checkbox.
#### Upload Results to LandingLens
If you're running LandingEdge [online](./manage-inspection-points#select-a-landinglens-model-for-online-use) and have enabled [Save Locally](./manage-inspection-points#save-locally), you can save images back to LandingLens. You can then load the images into your dataset, label them, and retrain your model. This process is called Continuous Learning.
To enable save images back to LandingLens, select the **Upload results to LandingLens** checkbox.
 ### Other Settings
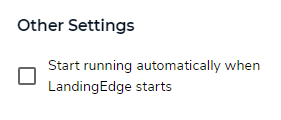
If you want to run the Inspection Point each time your Windows computer starts, select the **Start running automatically when LandingEdge starts** checkbox.
### Other Settings
If you want to run the Inspection Point each time your Windows computer starts, select the **Start running automatically when LandingEdge starts** checkbox.
 The Auto-Start setting is only supported on Windows computers.
### Custom Processing
For information about how to create and run custom scripts in LandingEdge, go to [Custom Processing](./custom-processing).
## Save Configuration / Run Now
After you have configured your Inspection Point, click **Save Configuration** to save your changes.
You can click **Run Now** to start automatically running inference. (You must save your Inspection Point before you can run inference.)
Indicates how certain the AI is that its Prediction is correct. For example, in the screenshot below, the AI is 0.94 (or 94%) confident that their Prediction is a screw.
The Auto-Start setting is only supported on Windows computers.
### Custom Processing
For information about how to create and run custom scripts in LandingEdge, go to [Custom Processing](./custom-processing).
## Save Configuration / Run Now
After you have configured your Inspection Point, click **Save Configuration** to save your changes.
You can click **Run Now** to start automatically running inference. (You must save your Inspection Point before you can run inference.)
Indicates how certain the AI is that its Prediction is correct. For example, in the screenshot below, the AI is 0.94 (or 94%) confident that their Prediction is a screw.