> ## Documentation Index
> Fetch the complete documentation index at: https://landinglens.docs.landing.ai/llms.txt
> Use this file to discover all available pages before exploring further.
# GenICam and GigE Vision Cameras
export const vp = 'Visual Prompting';
export const smartLabel = 'Smart Labeling';
export const productLL = 'LandingLens';
export const mi = 'Mobile Inference';
export const llsf = 'LandingLens on Snowflake';
export const companyName = 'LandingAI';
*This article applies to these versions of LandingLens:*
| LandingLens |
LandingLens on Snowflake |
| ✓ |
✓ |
You can run inference on images uploaded from [GenICam-compliant](https://www.emva.org/standards-technology/genicam/) and GigE Vision industrial cameras to LandingEdge.
If using a PLC (Programmable Logic Controller), you can configure the PLC to trigger image capture. To learn how to set up a PLC with LandingEdge, go to [PLC Workflow](./plc-workflow).
## Compare GenICam and GigE Vision Functionality in LandingEdge
When setting up an Inspection Point in LandingEdge, you use the [Image Source](./manage-inspection-points#image-source) setting to select what type of device will capture images. If using an industrial camera, you can select to connect the camera using either the **GenICam** or **GigE Vision** source.
The following table explains how the connection and functionality are different between these two image sources.
| **Feature** | GenICam | GigE Vision
|
| -------------------------------------------------------------------------------- | ---------------------------------------------------------------------------------- | ----------------- |
| Method or standard for connecting the camera to the computer running LandingEdge | Various methods, including USB 3.0 cables, CoaXPress, Camera Link, GigE (Ethernet) | GigE (Ethernet) |
| Capture images from multiple cameras simultaneously | ✖ | ✓ |
| Requires a [GenTL Producer](./industrial-cameras#gentl-producer) | ✓ | ✖ |
## GenTL Producer
If you select **GenICam** as your [Image Source](./manage-inspection-points#image-source) in LandingEdge, you must install a GenTL Producer in order for LandingEdge to communicate with the camera. A GenTL Producer is the transport layer interface that enables the camera and LandingEdge to communicate with each other.
The GenTL Producer is often included as part of your camera manufacturer's SDK, like the Basler Pylon SDK or Allied Vision Vimba SDK. If you're having trouble finding the GenTL Producer for your camera, try the SDK for your manufacturer.
## GigE Vision Camera Requirements
If you select **GigE Vision** as your [Image Source](./manage-inspection-points#image-source) in LandingEdge, LandingEdge doesn't require you to use third-party software.
However, if LandingEdge doesn’t recognize the GigE Vision camera, you may need to set the IP address and subnet mask for the camera using the software from the camera manufacturer (or a third-party software).
## Set Up LandingEdge to Use GenICam or GigE Vision Cameras
You can set up multiple *configurations* for each Inspection Point.
1. Create an Inspection Point.
2. Select either **GigEVision Camera** or **GenICam** from the **Image Source** drop-down menu.
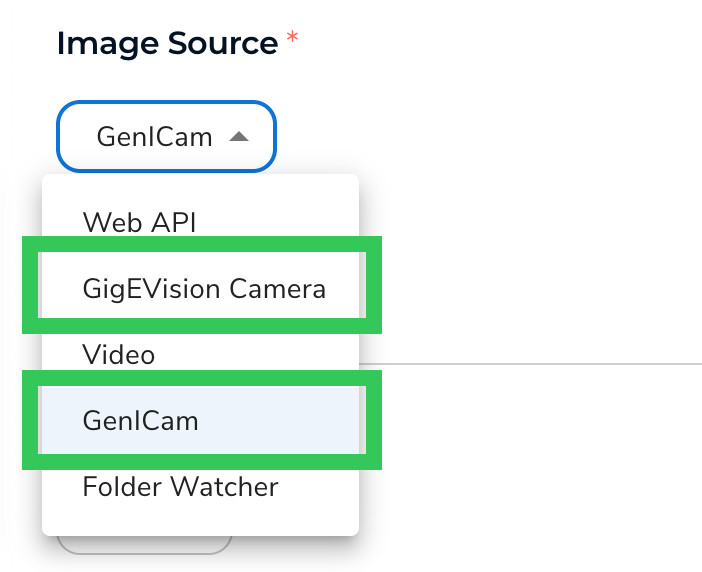 3. Click **Select**.
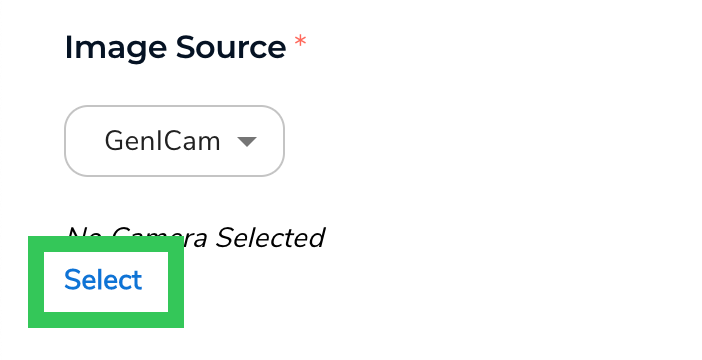 4. All the cameras that LandingEdge detects display in a pop-up window. Select your camera and click **Select**.
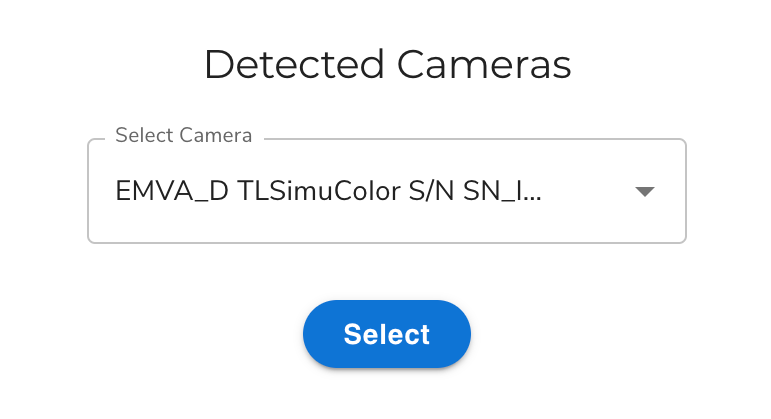 5. You can customize image capture settings, like by applying a crop to images. The available settings depend on your camera. If you want to customize these settings:1. Click **Add New Setting**.
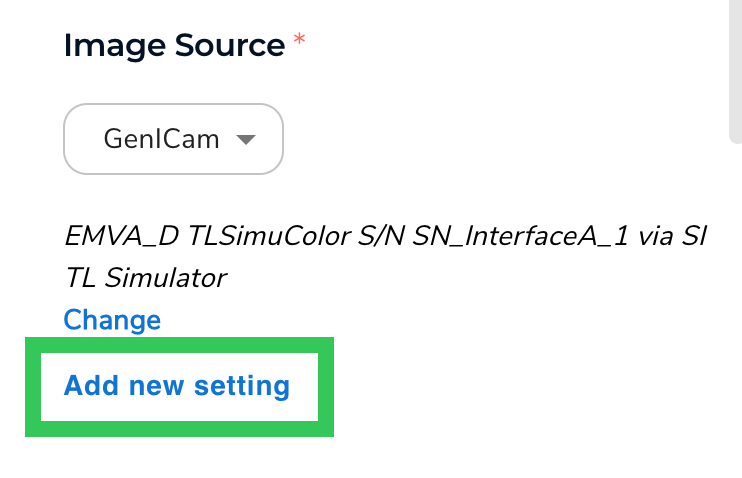 6. Select and configure the settings you want.
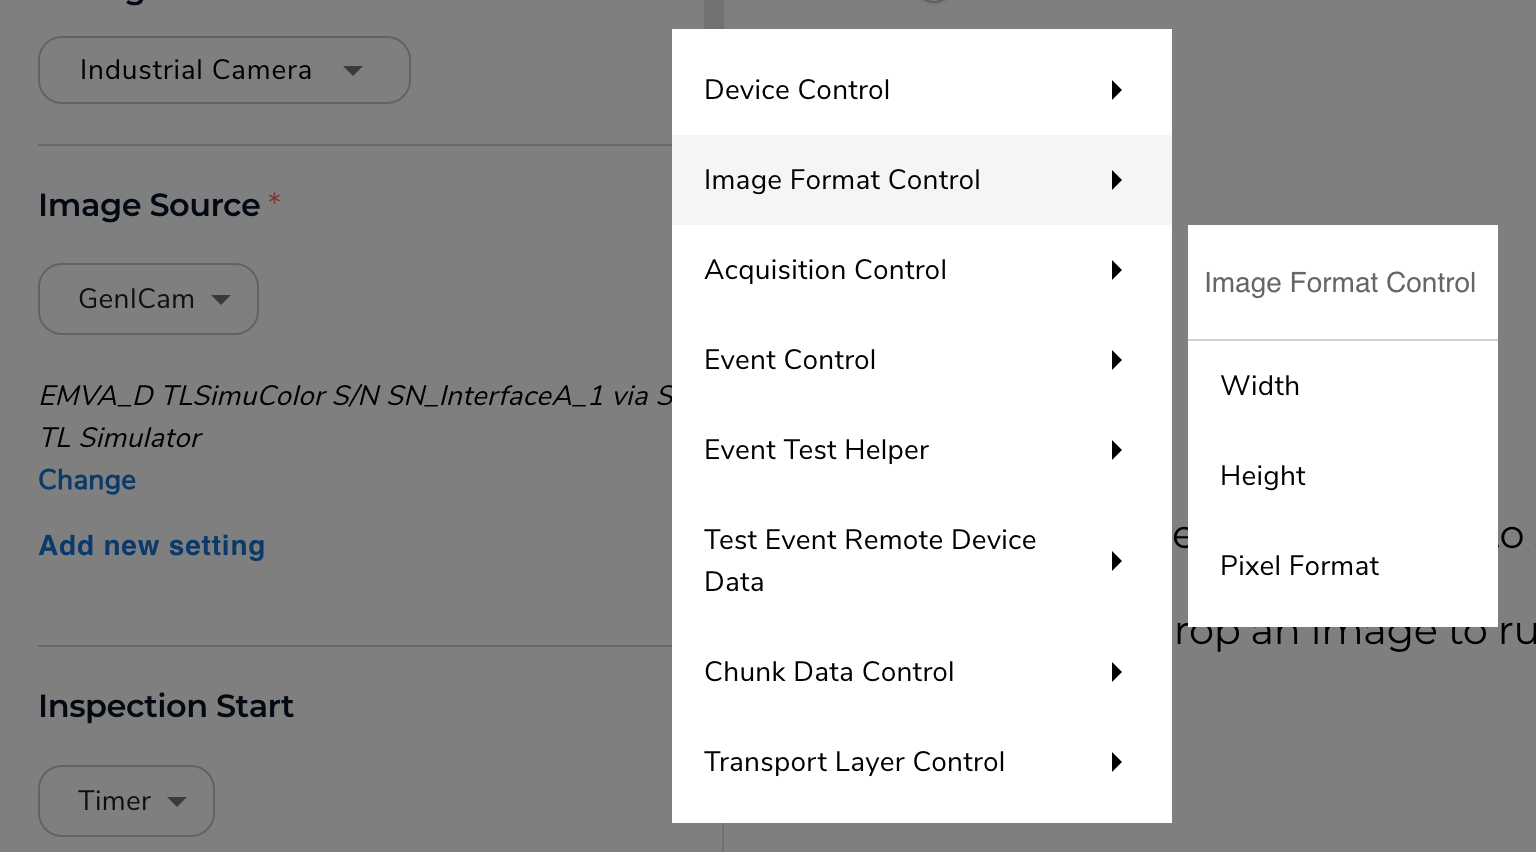 7. Select your [Inspection Start](./manage-inspection-points#inspection-start) method. (If using a PLC with the camera, ensure that you understand the [PLC Workflow](./plc-workflow).)
8. Set up the [Cloud Connection and Model](./manage-inspection-points#cloud-connection-and-model-connect-to-a-landinglens-model)settings.
9. Skip the **Communication** section.
10. (Optional) Set up [Image Saving](./manage-inspection-points#image-saving) settings.
11. (Optional) Set up [Other Settings](./manage-inspection-points#other-settings) settings.
12. (Optional) Set up [Custom Processing](./custom-processing).
13. Click **Save Configuration**.
## Setup Considerations
This section describes certain functionality to keep in mind when setting up cameras with LandingEdge and other applications.
### You Can Use the Same Camera for Multiple Inspection Points
You can use the same camera for multiple Inspection Points at once in LandingEdge. For example, you can use GenICam A in two Inspection Points.
### A Camera Can Connect via GenICam or GigE Vision, But Not as Both at the Same Time
When setting up an Inspection Point in LandingEdge, you select the source of image capture (see [Image Source](./manage-inspection-points#image-source)). Some cameras can be connected using either the **GenICam** or **GigE Vision** source. If using a specific camera in multiple Inspection Points, you must select the same Image Source for the camera in all Inspection Points.
For example, let's say you want to use GenICam A in two Inspection Points. You can connect to it as a GenICam in both, or a GigE Vision camera in both. You can't connect the camera as a GenICam in one, and as a GigE Vision camera in the other.
### Only One Application Can Use a Camera at a Time
Only one application can use a specific GenICam or GigE Vision camera at a time. For example, if a manufacturing software is using a specific camera, you must disconnect the camera from that application before using it with LandingEdge.
7. Select your [Inspection Start](./manage-inspection-points#inspection-start) method. (If using a PLC with the camera, ensure that you understand the [PLC Workflow](./plc-workflow).)
8. Set up the [Cloud Connection and Model](./manage-inspection-points#cloud-connection-and-model-connect-to-a-landinglens-model)settings.
9. Skip the **Communication** section.
10. (Optional) Set up [Image Saving](./manage-inspection-points#image-saving) settings.
11. (Optional) Set up [Other Settings](./manage-inspection-points#other-settings) settings.
12. (Optional) Set up [Custom Processing](./custom-processing).
13. Click **Save Configuration**.
## Setup Considerations
This section describes certain functionality to keep in mind when setting up cameras with LandingEdge and other applications.
### You Can Use the Same Camera for Multiple Inspection Points
You can use the same camera for multiple Inspection Points at once in LandingEdge. For example, you can use GenICam A in two Inspection Points.
### A Camera Can Connect via GenICam or GigE Vision, But Not as Both at the Same Time
When setting up an Inspection Point in LandingEdge, you select the source of image capture (see [Image Source](./manage-inspection-points#image-source)). Some cameras can be connected using either the **GenICam** or **GigE Vision** source. If using a specific camera in multiple Inspection Points, you must select the same Image Source for the camera in all Inspection Points.
For example, let's say you want to use GenICam A in two Inspection Points. You can connect to it as a GenICam in both, or a GigE Vision camera in both. You can't connect the camera as a GenICam in one, and as a GigE Vision camera in the other.
### Only One Application Can Use a Camera at a Time
Only one application can use a specific GenICam or GigE Vision camera at a time. For example, if a manufacturing software is using a specific camera, you must disconnect the camera from that application before using it with LandingEdge.