> ## Documentation Index
> Fetch the complete documentation index at: https://landinglens.docs.landing.ai/llms.txt
> Use this file to discover all available pages before exploring further.
# Snowflake Credit Management
export const vp = 'Visual Prompting';
export const smartLabel = 'Smart Labeling';
export const productLL = 'LandingLens';
export const mi = 'Mobile Inference';
export const llsf = 'LandingLens on Snowflake';
export const companyName = 'LandingAI';
*This article applies to these versions of LandingLens:*
| LandingLens |
LandingLens on Snowflake |
| ✖ |
✓ |
Snowflake [credits](https://docs.snowflake.com/en/user-guide/cost-understanding-compute) are used to pay for the consumption of resources on Snowflake. Like other apps and functions in Snowflake, running {llsf} consumes credits.
The {companyName} team has streamlined functionality to minimize credit consumption and is continuing to optimize {llsf} to use credits more efficiently.
To manage credit usage, use the [LandingLens Configs](./credit-management#access-the-cpu-and-gpu-settings-landinglens-configs) section in Snowsight to update the CPU and GPU resources used by LandingLens. You can also [suspend](./credit-management#suspend-the-app) the LandingLens app if needed.
 ## Access the CPU and GPU Settings (LandingLens Configs)
1. Open Snowsight.
2. Go to **Data Products** > **Apps** > **LandingLens Visual AI Platform**.
3. Click **Launch App**.
## Access the CPU and GPU Settings (LandingLens Configs)
1. Open Snowsight.
2. Go to **Data Products** > **Apps** > **LandingLens Visual AI Platform**.
3. Click **Launch App**.
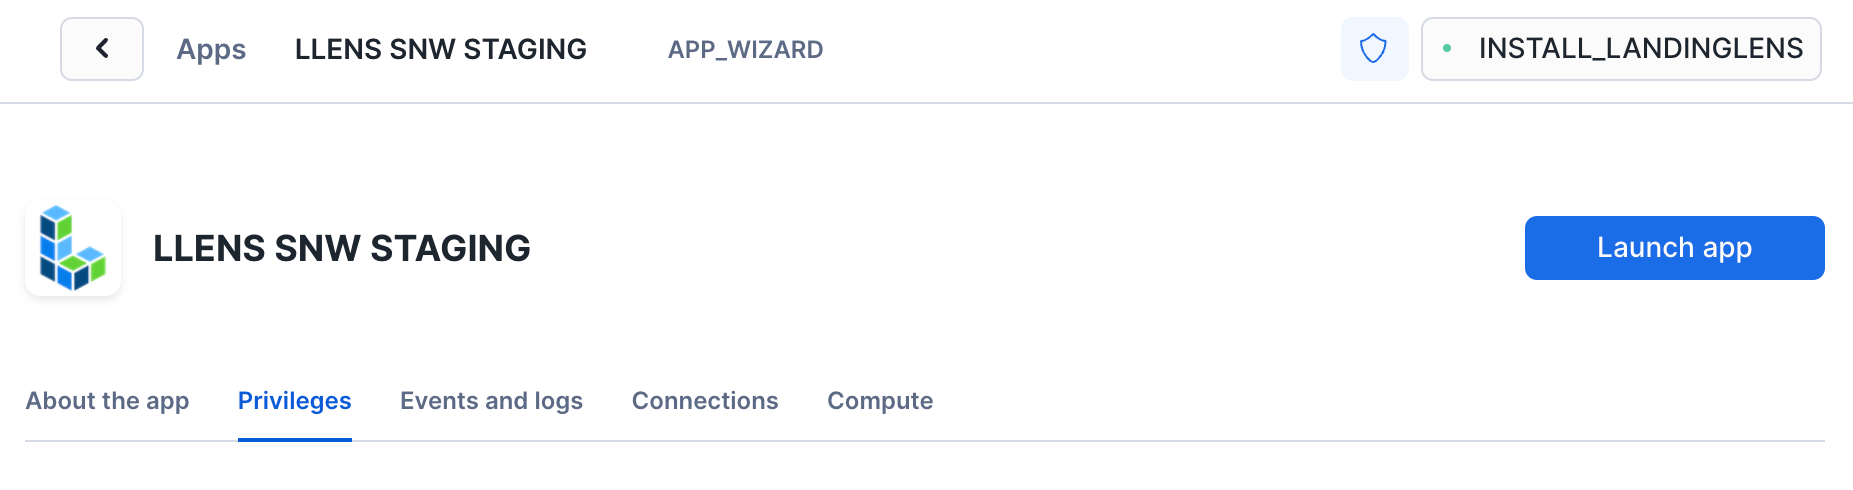 4. Click **APP\_WIZARD**.
5. Click **Settings**.
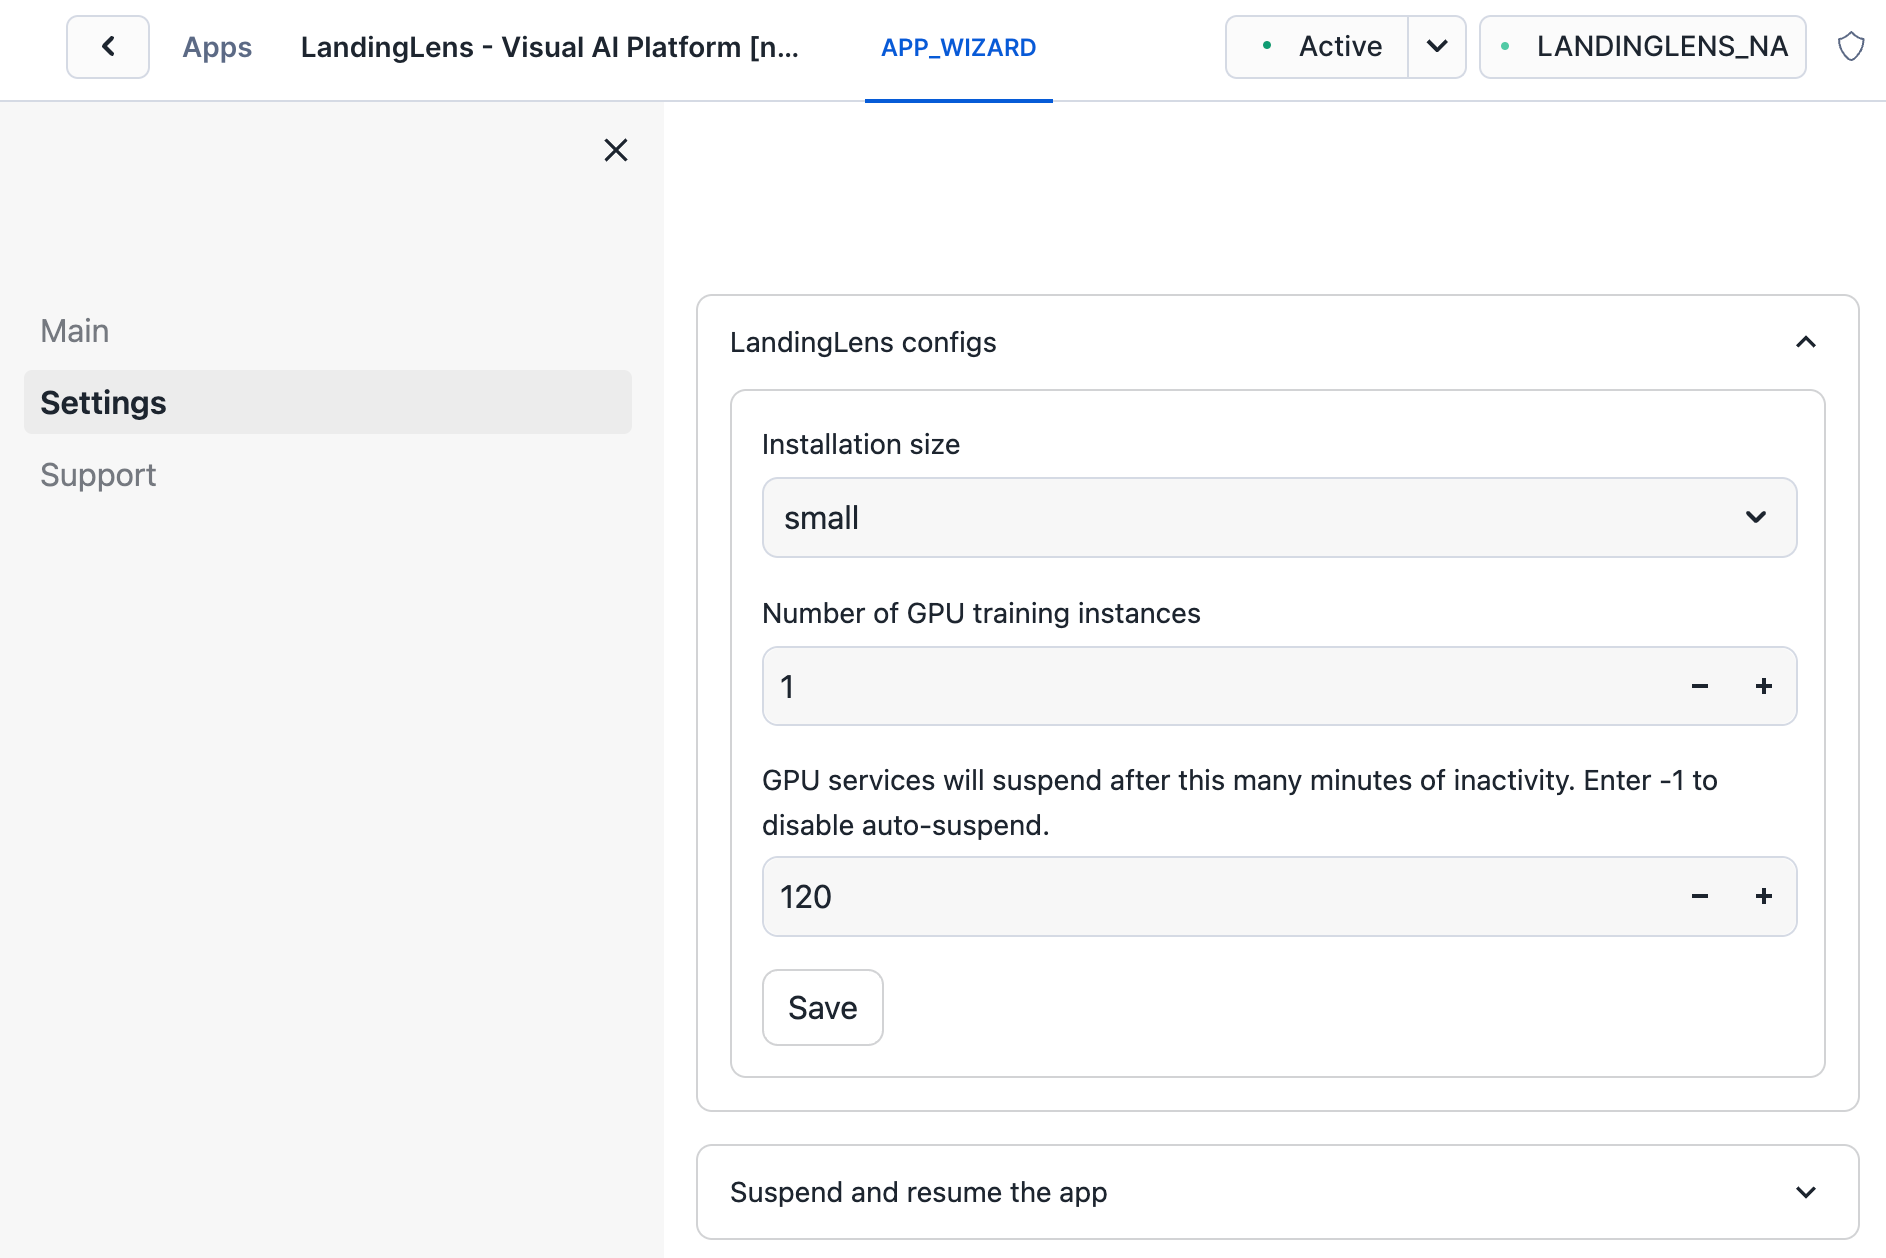
6. Expand the **LandingLens Configs** section.
7. If needed, update the [Installation Size](./credit-management#set-the-installation-size-cpu-resources), [Number of GPUs](./credit-management#set-the-number-of-gpu-training-instances), and [Auto-Suspend GPU](./credit-management#autosuspend-gpu) settings.
8. Click **Save**.
9. Click **Main**.
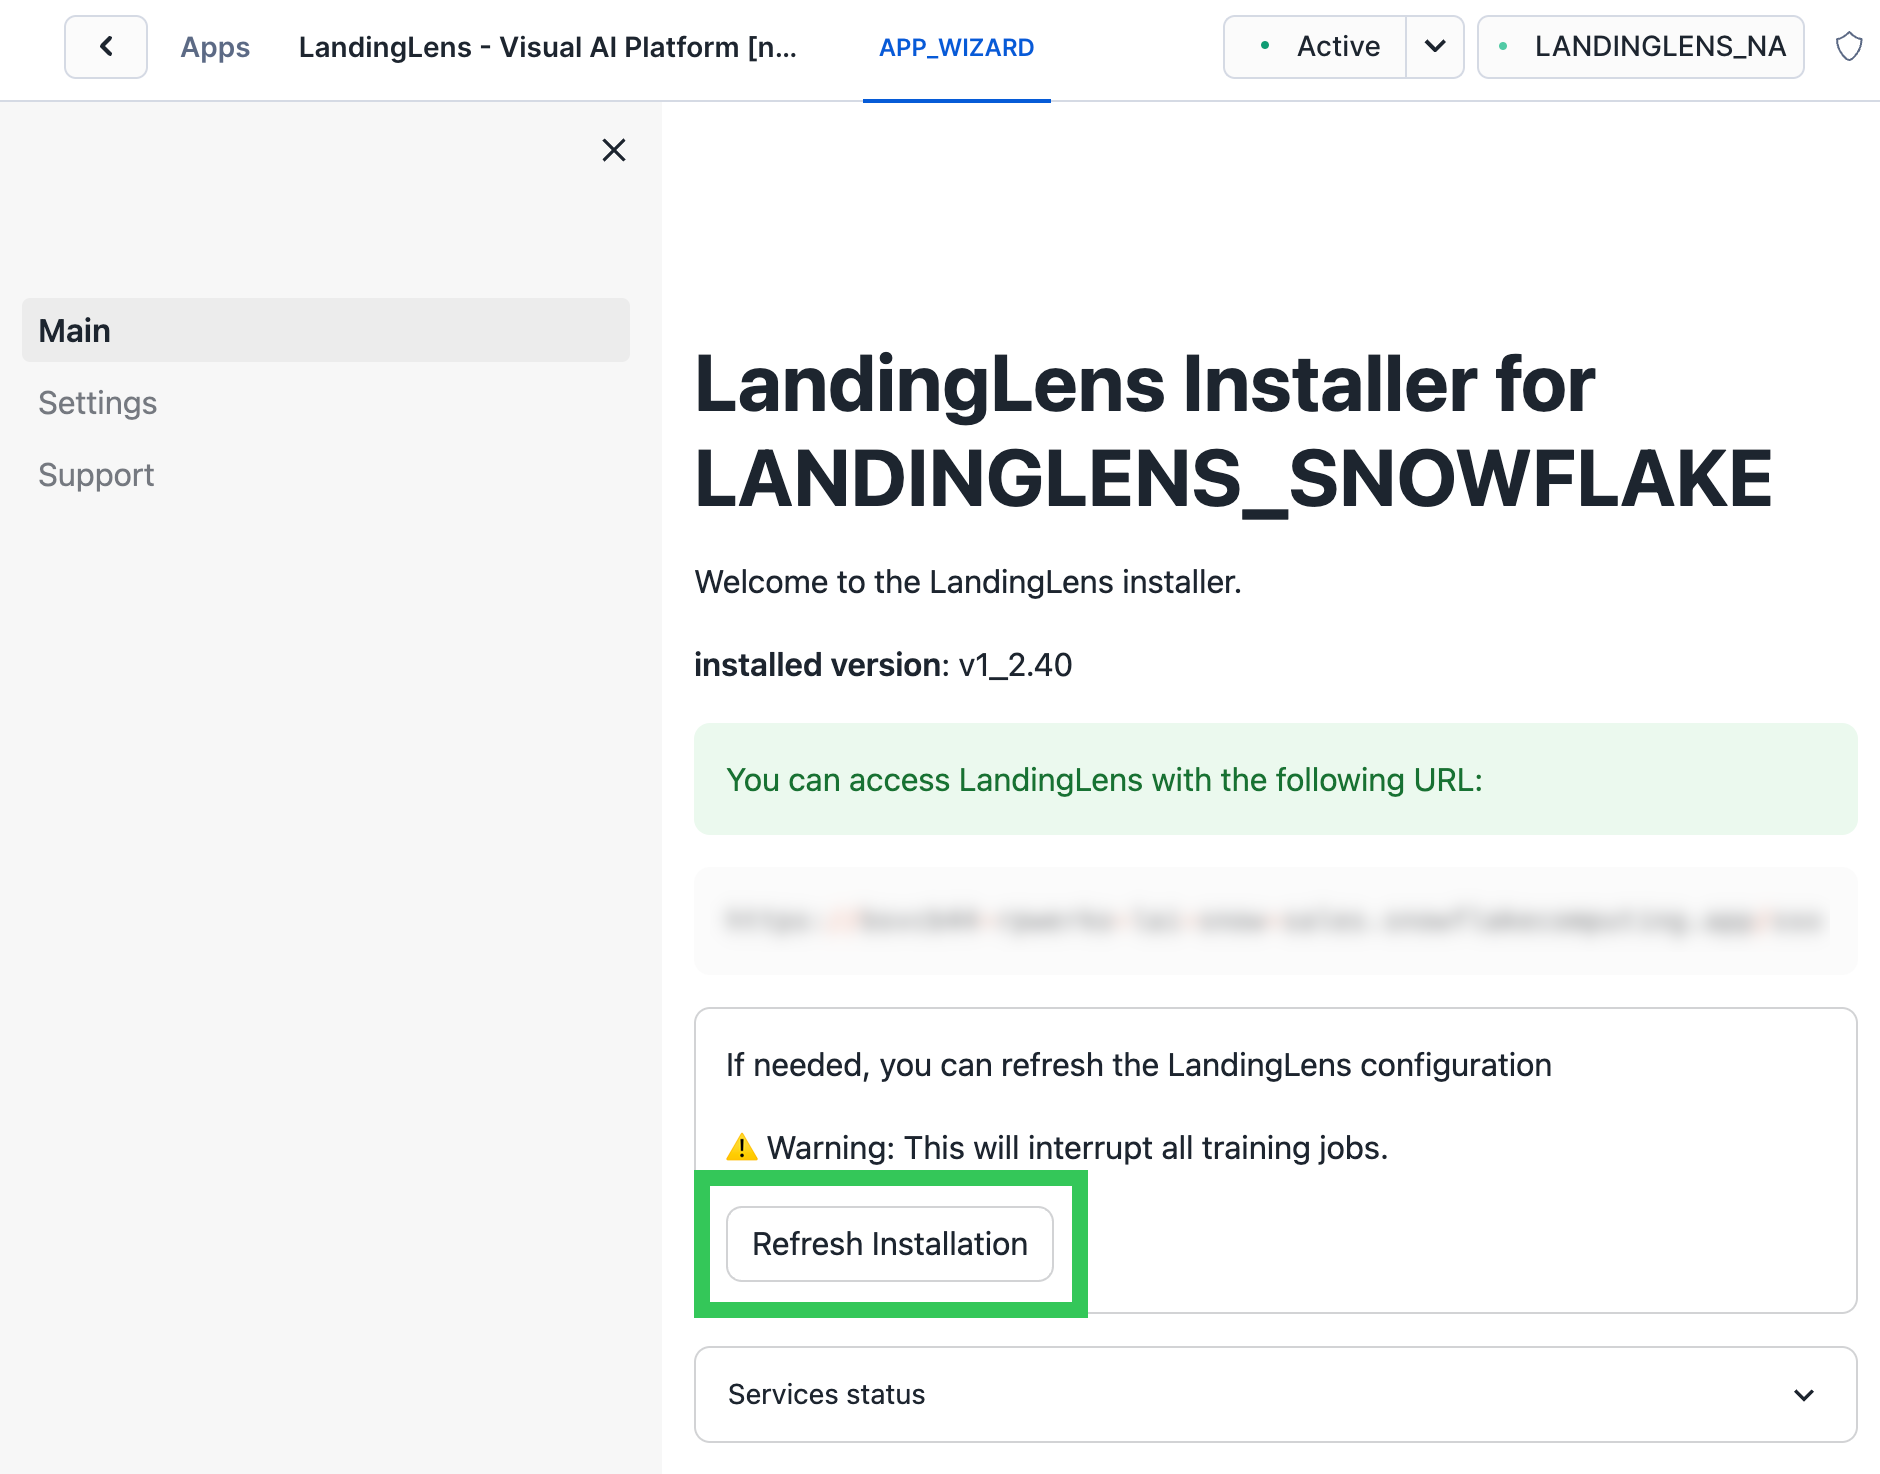
10. Click **Refresh Installation**. The installation must be refreshed for the changes to go into effect.
4. Click **APP\_WIZARD**.
5. Click **Settings**.
6. Expand the **LandingLens Configs** section.
7. If needed, update the [Installation Size](./credit-management#set-the-installation-size-cpu-resources), [Number of GPUs](./credit-management#set-the-number-of-gpu-training-instances), and [Auto-Suspend GPU](./credit-management#autosuspend-gpu) settings.
8. Click **Save**.
9. Click **Main**.
10. Click **Refresh Installation**. The installation must be refreshed for the changes to go into effect.
 ## Set the Installation Size (CPU Resources)
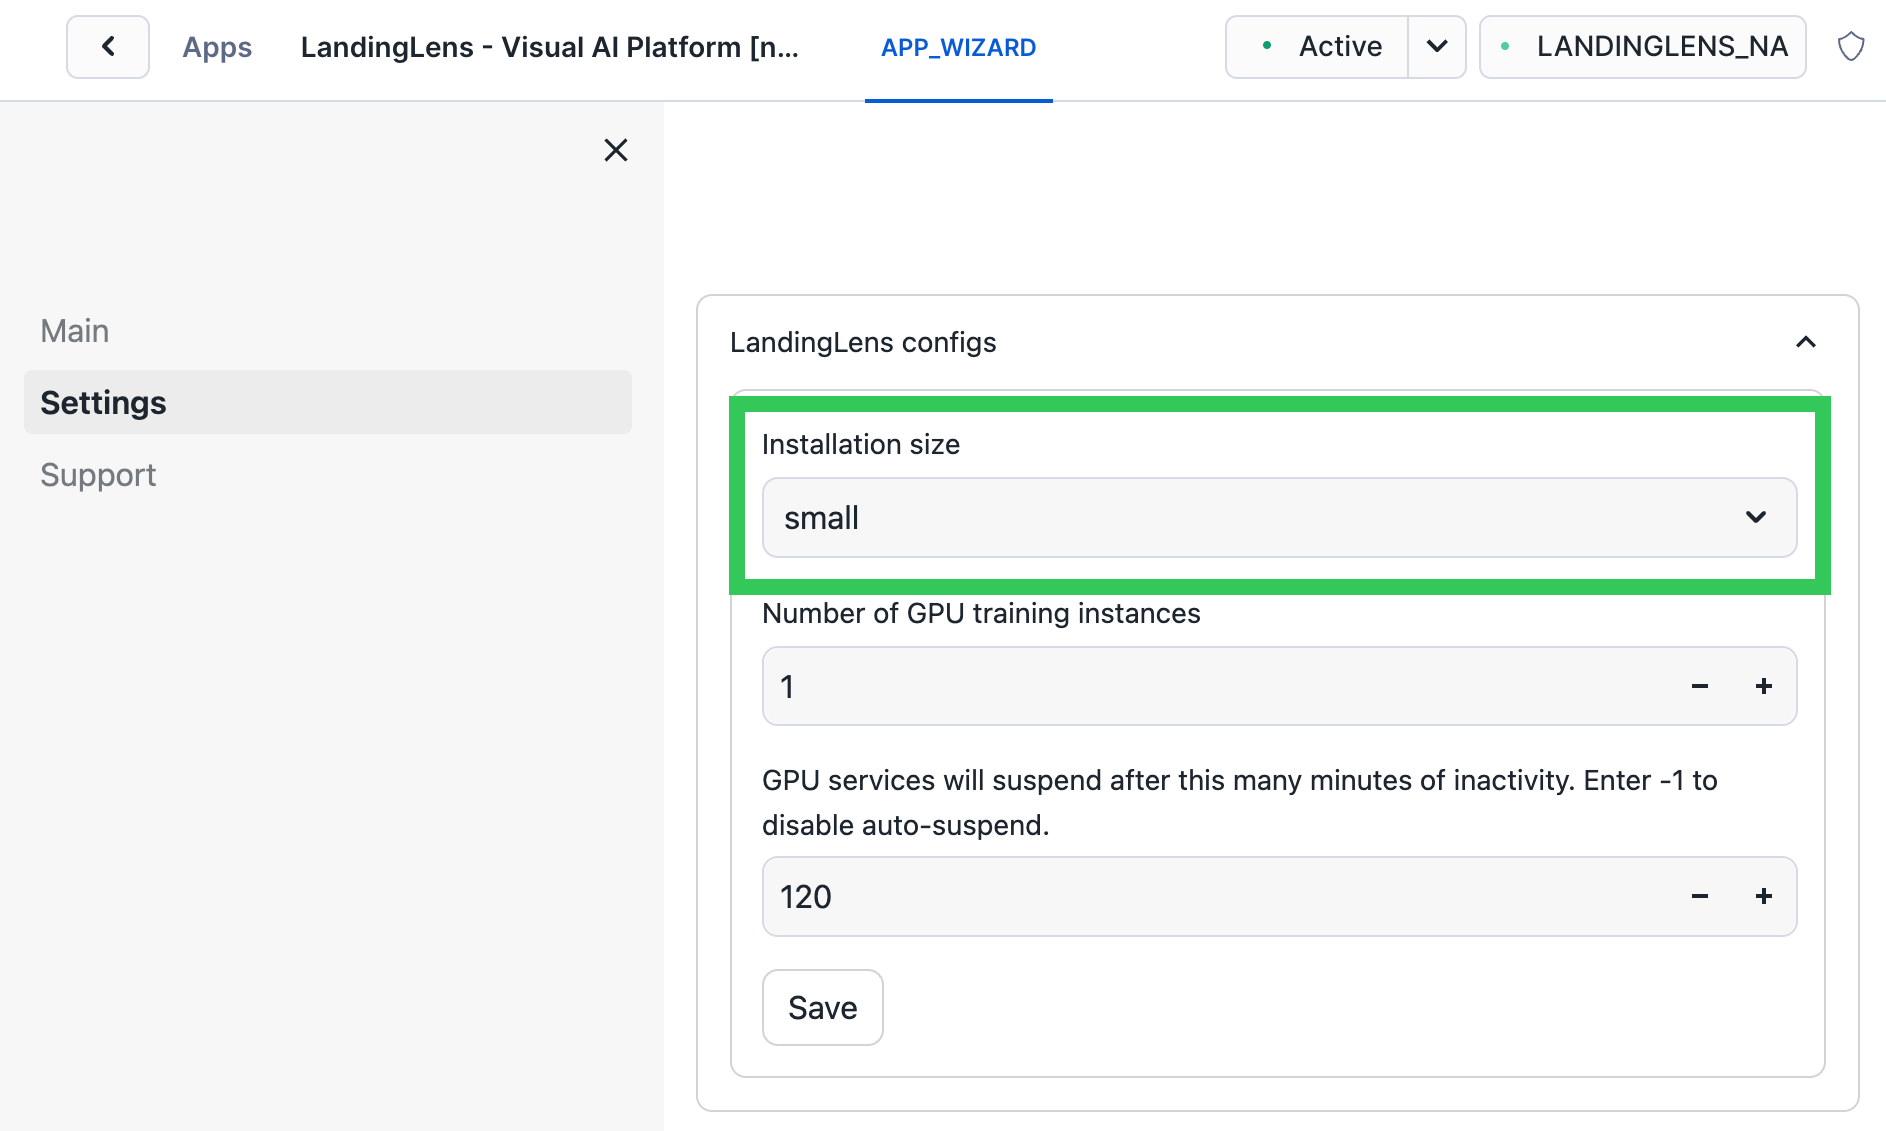
In the [LandingLens Configs](./credit-management#access-the-cpu-and-gpu-settings-landinglens-configs), you can configure the **Installation Size** of the LandingLens app, which is the number of CPU machines and service replicas used by the app.
The sizes are all relative to the smallest size, which is the POC (the proof-of-concept) size.
Typically, using a smaller size leads to the consumption of fewer credits. We recommend increasing the size if you notice the app working slowly or if you have many users simultaneously using the app, running training, or running inference. If running LandingLens in production, consider using the Medium or Large size.
If you change this setting, you must refresh the installation for the changes to go into effect (click **Main** > **Refresh Installation**).
## Set the Installation Size (CPU Resources)
In the [LandingLens Configs](./credit-management#access-the-cpu-and-gpu-settings-landinglens-configs), you can configure the **Installation Size** of the LandingLens app, which is the number of CPU machines and service replicas used by the app.
The sizes are all relative to the smallest size, which is the POC (the proof-of-concept) size.
Typically, using a smaller size leads to the consumption of fewer credits. We recommend increasing the size if you notice the app working slowly or if you have many users simultaneously using the app, running training, or running inference. If running LandingLens in production, consider using the Medium or Large size.
If you change this setting, you must refresh the installation for the changes to go into effect (click **Main** > **Refresh Installation**).
 | Installation Size | Description |
| ----------------- | ------------------------------------------------------------------------------------------------------------------------------------------- |
| POC | This is the "proof of concept" setting, which is designed for users who want to learn how to use LandingLens and perform small-scale tests. |
| Small | This is 2x the size of POC. |
| Medium | This is 3x the size of POC, and is the default size when LandingLens is installed. |
| Large | This is 4x the size of POC. |
| Xlarge | This is 5x the size of POC.
| Installation Size | Description |
| ----------------- | ------------------------------------------------------------------------------------------------------------------------------------------- |
| POC | This is the "proof of concept" setting, which is designed for users who want to learn how to use LandingLens and perform small-scale tests. |
| Small | This is 2x the size of POC. |
| Medium | This is 3x the size of POC, and is the default size when LandingLens is installed. |
| Large | This is 4x the size of POC. |
| Xlarge | This is 5x the size of POC.
|
## Set the Number of GPU Training Instances
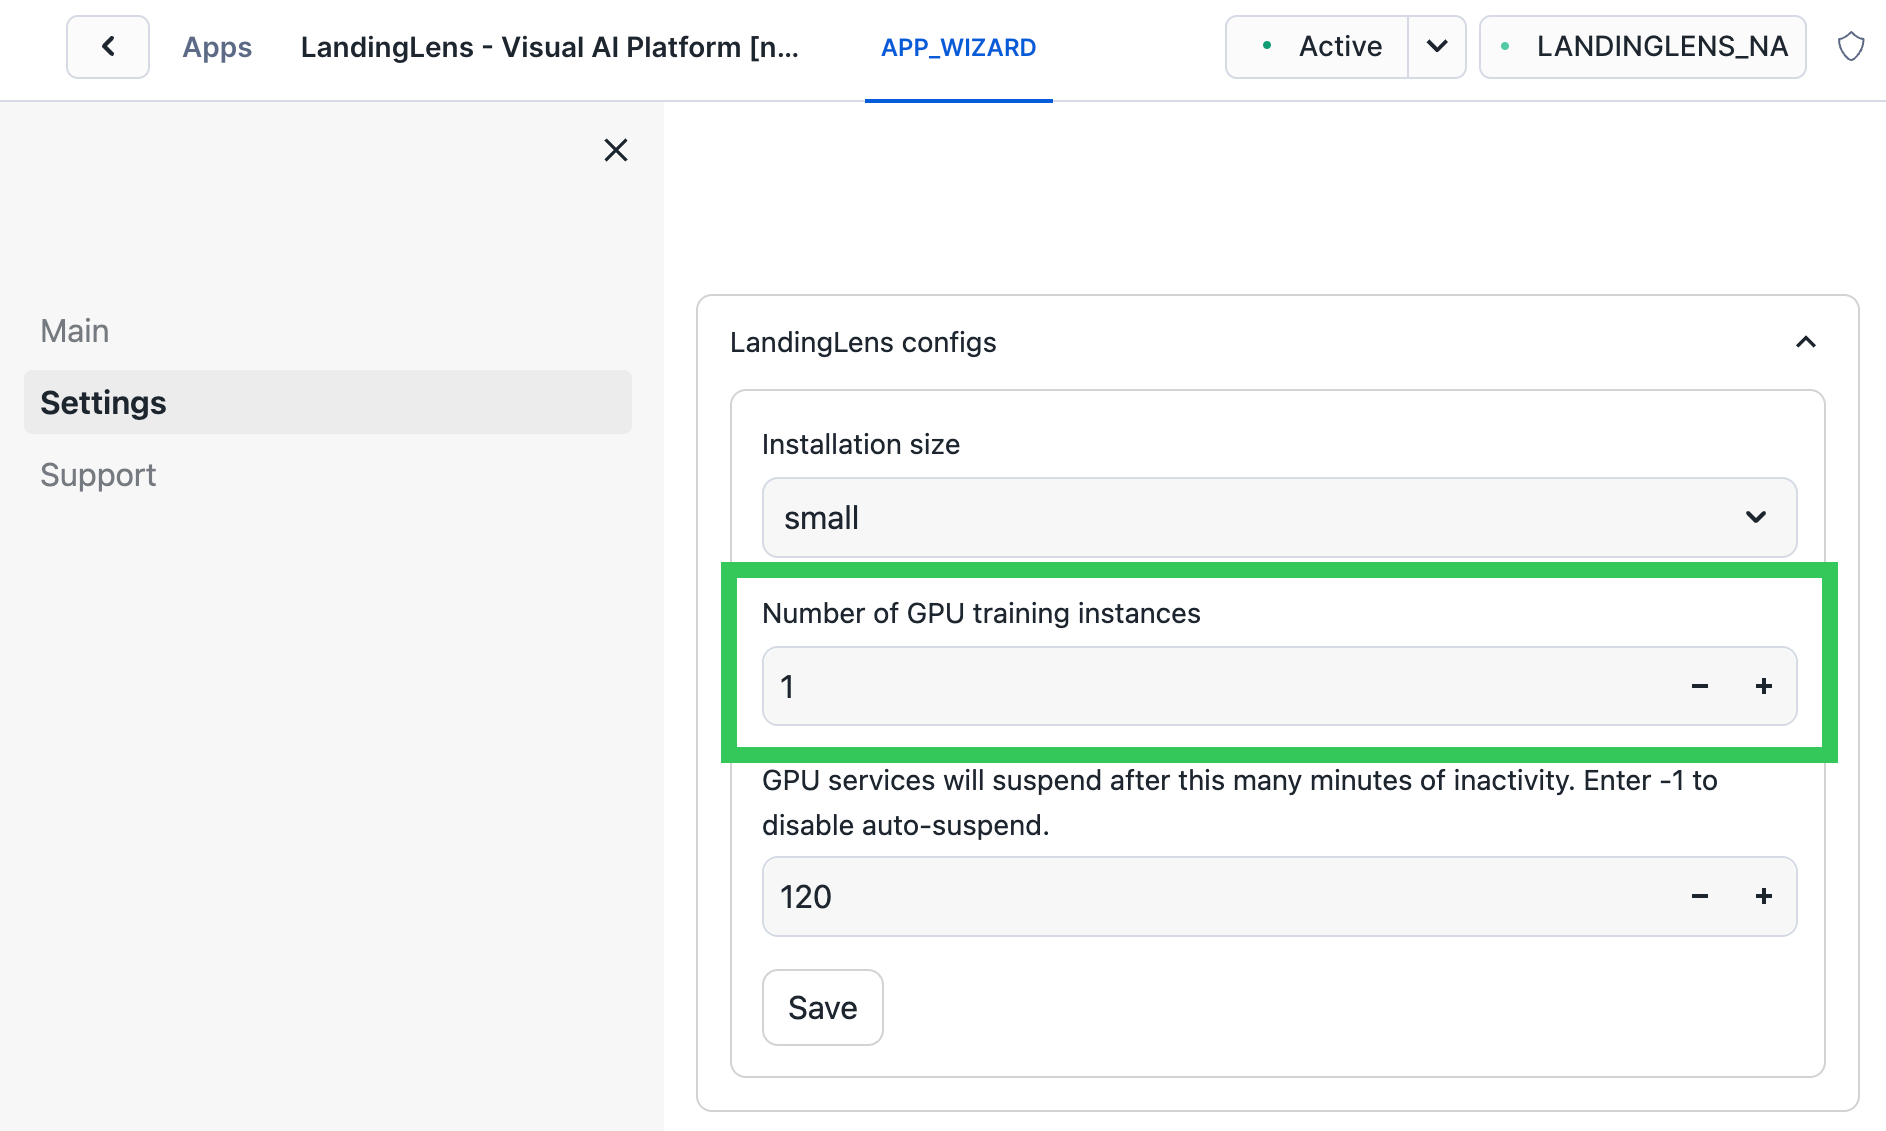
LandingLens uses GPUs during the model training process. By default, one GPU node is allocated for model training, but you can increase the number of GPU nodes in the [LandingLens Configs](./credit-management#access-the-cpu-and-gpu-settings-landinglens-configs). The maximum number of GPU nodes is five. Typically, increasing the number of GPU nodes increases the rate of credit consumption.
To change the number of allocated GPU nodes, update the **Number of GPU training instances** field. If more than one GPU node is allocated, [Auto-Suspend GPU](./credit-management#autosuspend-gpu) cannot be enabled.
If you change this setting, you must refresh the installation for the changes to go into effect (click **Main** > **Refresh Installation**).
 ## Auto-Suspend GPU
You can configure the app's **Auto-Suspend GPU** setting to automatically suspend a GPU node after the period of inactivity that you specify. Typically, suspending a GPU node decreases credit consumption when you're not using the app.
Consider the following before configuring Auto-Suspend GPU:
* Auto-Suspend GPU is avaible only when one GPU node is allocated via the [Number of GPU training instances](./credit-management#set-the-number-of-gpu-training-instances) setting.
* Using Auto-Suspend GPU does not suspend any warehouses or compute pools.
* If the GPU node is suspended and you train a model, it will take about 6 minutes for the GPU node to re-activate.
* Turning on Auto-Suspend GPU when a GPU node is in use will not interrupt the service using it. GPU nodes will only auto-suspend after the GPU services are idle for the period of time you specify.
### Turn On Configure Auto-Suspend GPU
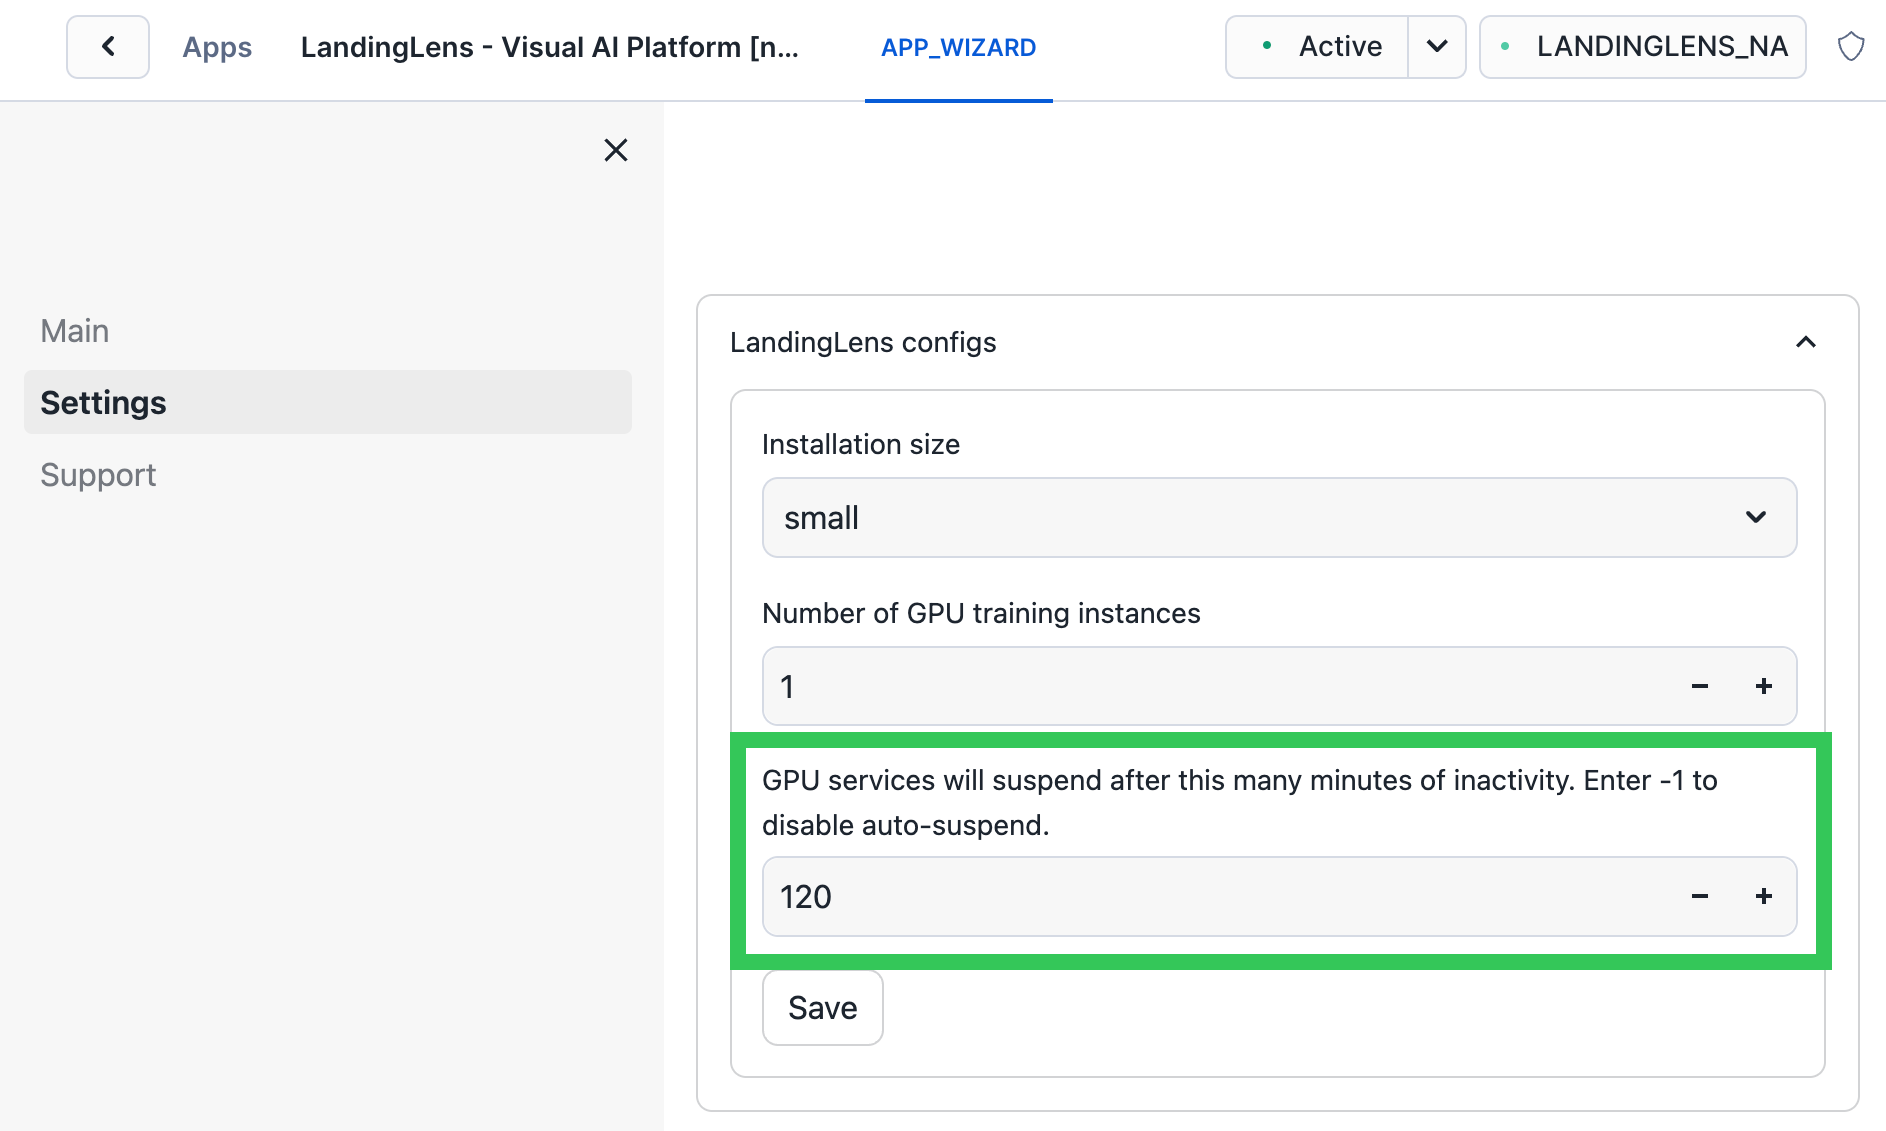
In the **GPU Services Will Suspend** field, enter the number of minutes of inactivity after which GPU services will automatically suspend. For example, if you enter **5**, GPU nodes will suspend after 5 minutes of inactivity.
To turn off Auto-Suspend GPU, enter **-1**. (This is the default setting.)
If you change this setting, you must refresh the installation for the changes to go into effect (click **Main** > **Refresh Installation**).
## Auto-Suspend GPU
You can configure the app's **Auto-Suspend GPU** setting to automatically suspend a GPU node after the period of inactivity that you specify. Typically, suspending a GPU node decreases credit consumption when you're not using the app.
Consider the following before configuring Auto-Suspend GPU:
* Auto-Suspend GPU is avaible only when one GPU node is allocated via the [Number of GPU training instances](./credit-management#set-the-number-of-gpu-training-instances) setting.
* Using Auto-Suspend GPU does not suspend any warehouses or compute pools.
* If the GPU node is suspended and you train a model, it will take about 6 minutes for the GPU node to re-activate.
* Turning on Auto-Suspend GPU when a GPU node is in use will not interrupt the service using it. GPU nodes will only auto-suspend after the GPU services are idle for the period of time you specify.
### Turn On Configure Auto-Suspend GPU
In the **GPU Services Will Suspend** field, enter the number of minutes of inactivity after which GPU services will automatically suspend. For example, if you enter **5**, GPU nodes will suspend after 5 minutes of inactivity.
To turn off Auto-Suspend GPU, enter **-1**. (This is the default setting.)
If you change this setting, you must refresh the installation for the changes to go into effect (click **Main** > **Refresh Installation**).
 ## Suspend LandingLens
You can run a SQL command to suspend the LandingLens app. Suspending the app suspends the underlying compute pools.
When the app is suspended, you can then run another SQL command to resume it. Resuming the app takes about 15 minutes.
Make sure that there are no active model training jobs or file syncs when you suspend an app. Otherwise, those processes will fail.
You can use [Snowflake tasks](https://docs.snowflake.com/en/sql-reference/sql/create-task) to schedule the suspend and resume tasks to run at specific times.
### Prerequisites
* You must be granted the [LLENS\_PUBLIC application role](./llens-public-application-role) to run this function.
* The inference function requires the name of your LandingLens instance (`APP_NAME`). To locate the name, go to [Name of LandingLens Instance](./app-name).
### Suspend the App
Run the following SQL command to suspend the app, where `APP_NAME` is the name of your LandingLens instance. To locate the name, go to [Name of LandingLens Instance](./app-name).
```bash theme={null}
CALL APP_NAME.core.suspend_services('APP_NAME');
```
### Resume the App
Run the following SQL command to resume the app, where `APP_NAME` is the name of your LandingLens instance. To locate the name, go to [Name of LandingLens Instance](./app-name).
```bash theme={null}
CALL APP_NAME.core.resume_services('APP_NAME');
```
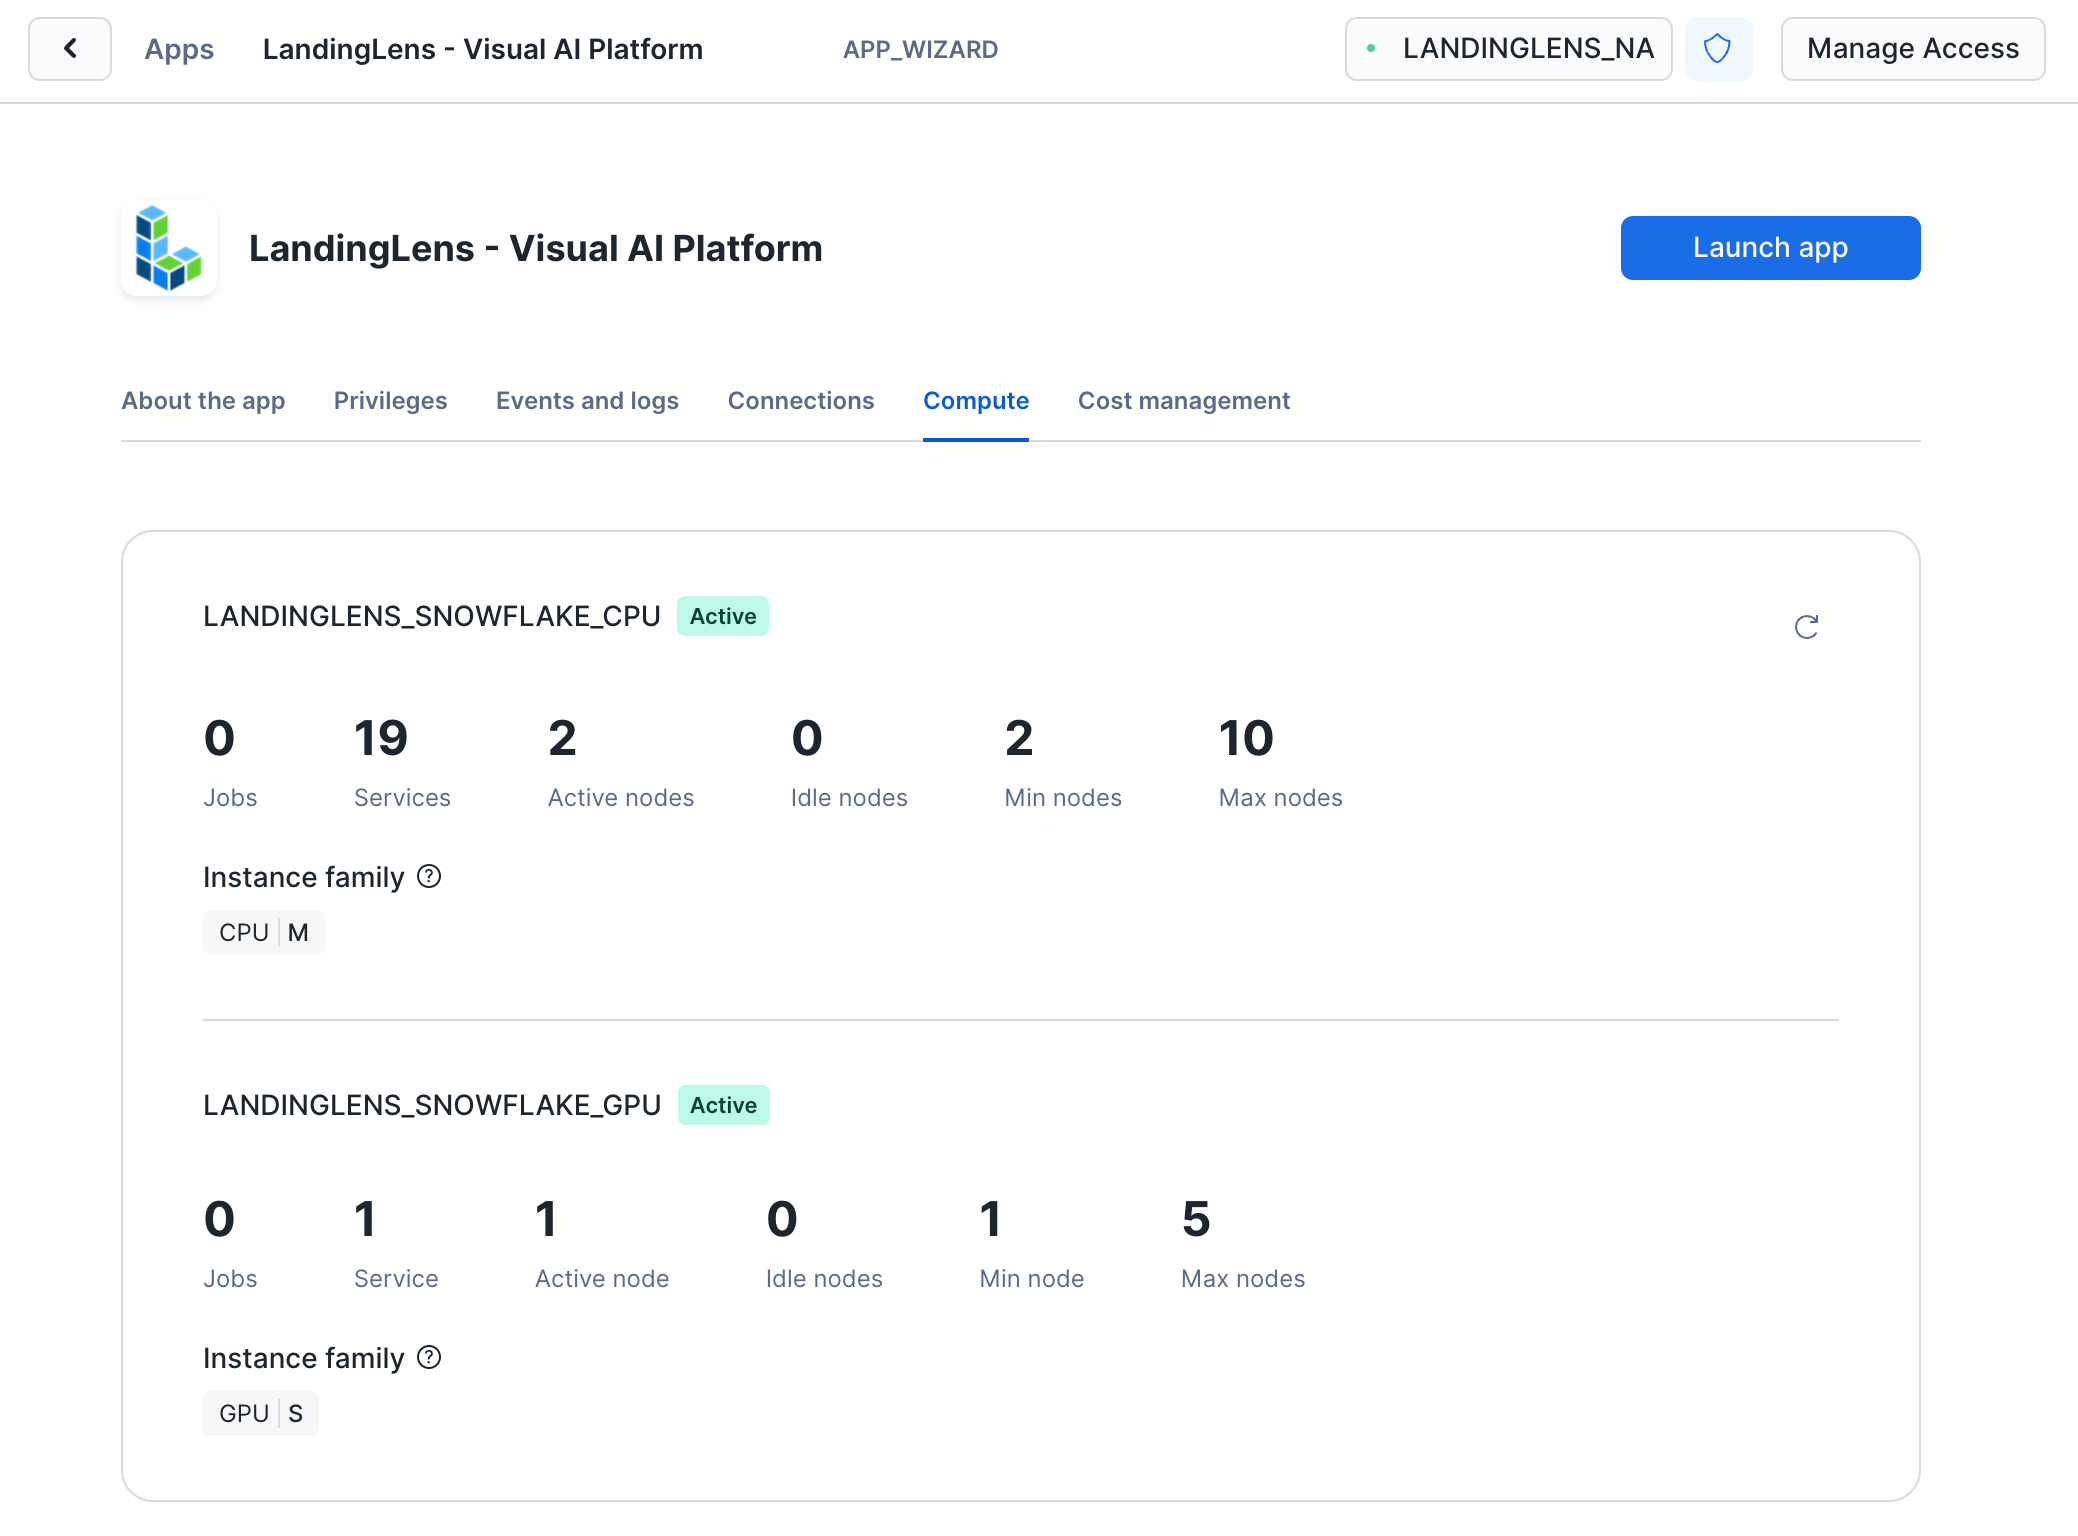
## Check Compute Resources
To check the CPU and GPU resources used by the LandingLens app:
1. Open Snowsight.
2. Go to **Data Products** > **Apps** > **LandingLens Visual AI Platform**.
3. Click **Compute**. The CPU and GPU resources display (LANDINGLENS\_SNOWFLAKE\_CPU and LANDINGLENS\_SNOWFLAKE\_GPU).
## Suspend LandingLens
You can run a SQL command to suspend the LandingLens app. Suspending the app suspends the underlying compute pools.
When the app is suspended, you can then run another SQL command to resume it. Resuming the app takes about 15 minutes.
Make sure that there are no active model training jobs or file syncs when you suspend an app. Otherwise, those processes will fail.
You can use [Snowflake tasks](https://docs.snowflake.com/en/sql-reference/sql/create-task) to schedule the suspend and resume tasks to run at specific times.
### Prerequisites
* You must be granted the [LLENS\_PUBLIC application role](./llens-public-application-role) to run this function.
* The inference function requires the name of your LandingLens instance (`APP_NAME`). To locate the name, go to [Name of LandingLens Instance](./app-name).
### Suspend the App
Run the following SQL command to suspend the app, where `APP_NAME` is the name of your LandingLens instance. To locate the name, go to [Name of LandingLens Instance](./app-name).
```bash theme={null}
CALL APP_NAME.core.suspend_services('APP_NAME');
```
### Resume the App
Run the following SQL command to resume the app, where `APP_NAME` is the name of your LandingLens instance. To locate the name, go to [Name of LandingLens Instance](./app-name).
```bash theme={null}
CALL APP_NAME.core.resume_services('APP_NAME');
```
## Check Compute Resources
To check the CPU and GPU resources used by the LandingLens app:
1. Open Snowsight.
2. Go to **Data Products** > **Apps** > **LandingLens Visual AI Platform**.
3. Click **Compute**. The CPU and GPU resources display (LANDINGLENS\_SNOWFLAKE\_CPU and LANDINGLENS\_SNOWFLAKE\_GPU).