> ## Documentation Index
> Fetch the complete documentation index at: https://landinglens.docs.landing.ai/llms.txt
> Use this file to discover all available pages before exploring further.
# Classification
export const vp = 'Visual Prompting';
export const smartLabel = 'Smart Labeling';
export const productLL = 'LandingLens';
export const mi = 'Mobile Inference';
export const llsf = 'LandingLens on Snowflake';
export const companyName = 'LandingAI';
*This article applies to these versions of LandingLens:*
LandingLens
LandingLens on Snowflake
✓
✓ (see exceptions below)
**Classification** is used to categorize (or classify) the contents of an image as a whole. This project type is useful for distinguishing one object from another or trying to identify global characteristics or patterns of an image. For example: blurry or clear, dark or light, and plaid or striped.
Images for this project type should typically be more consistent and localized as the whole image is used as input for training the model.
## Classification Upload Methods
When you upload images to a Classification project, you are prompted to choose one of these methods for uploading and labeling images:
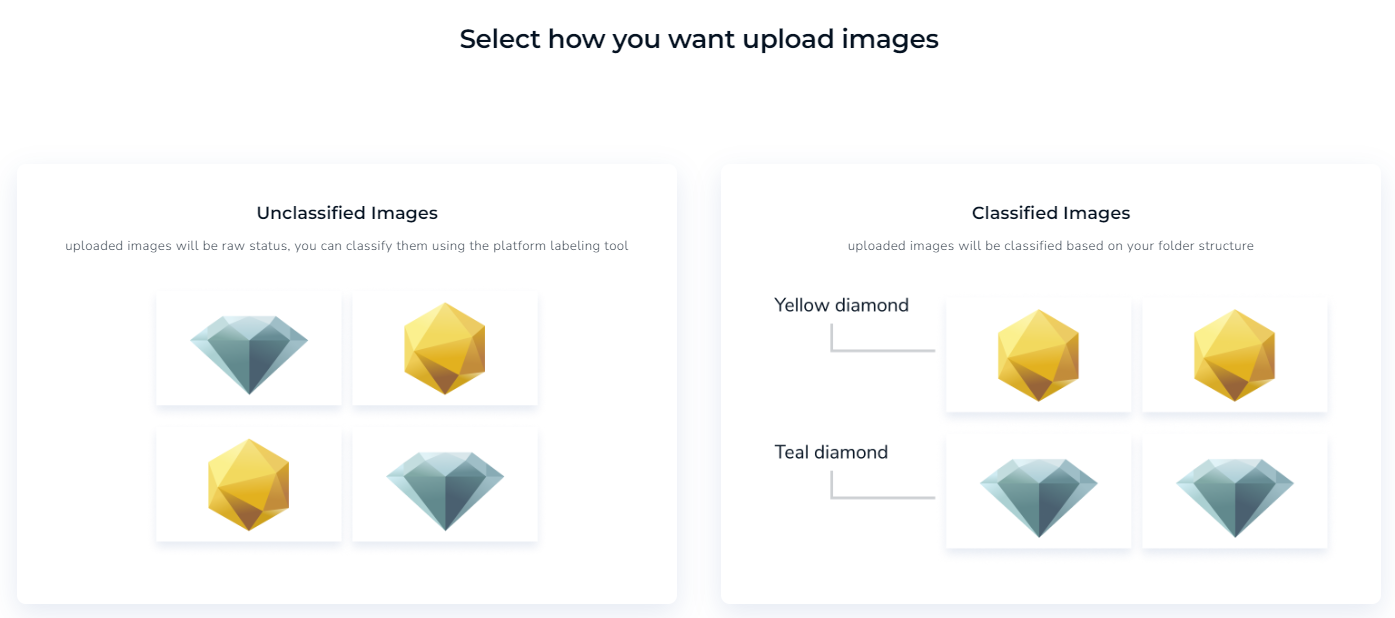
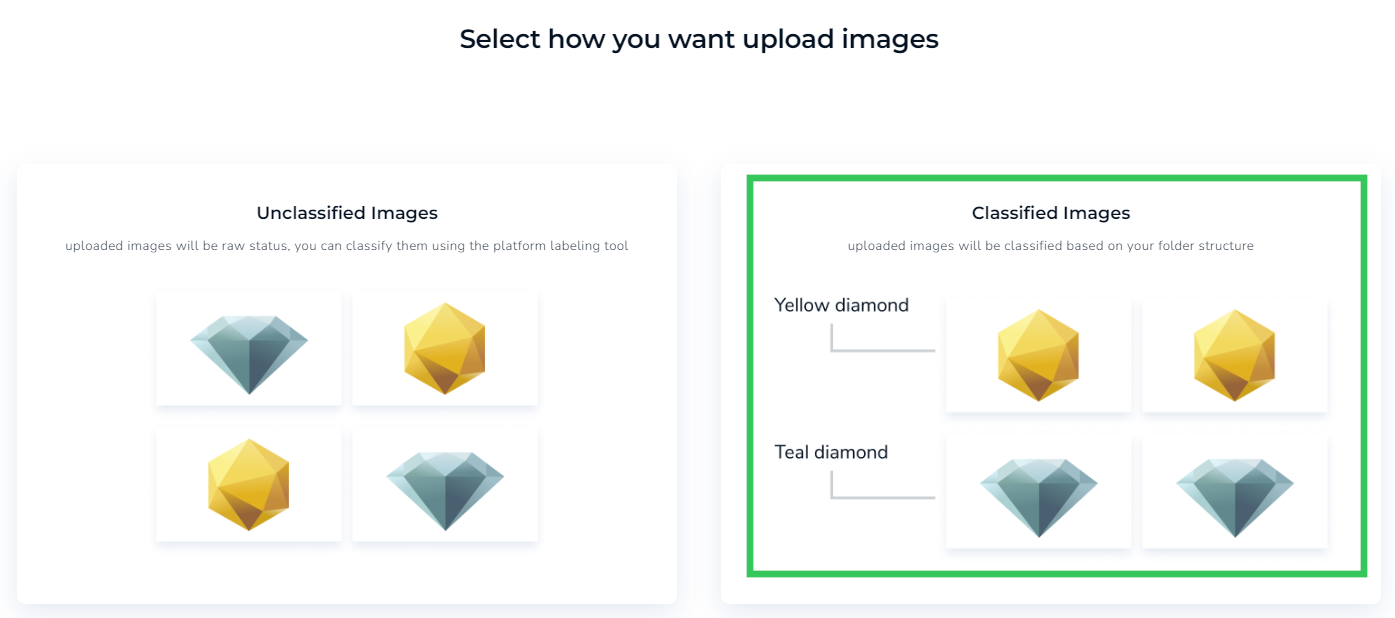
* [Classified Images](#upload-classified-images): Organize images by class in separate folders *before* you upload them. When you upload folders, the images will automatically be classified based on the titles of your folders.
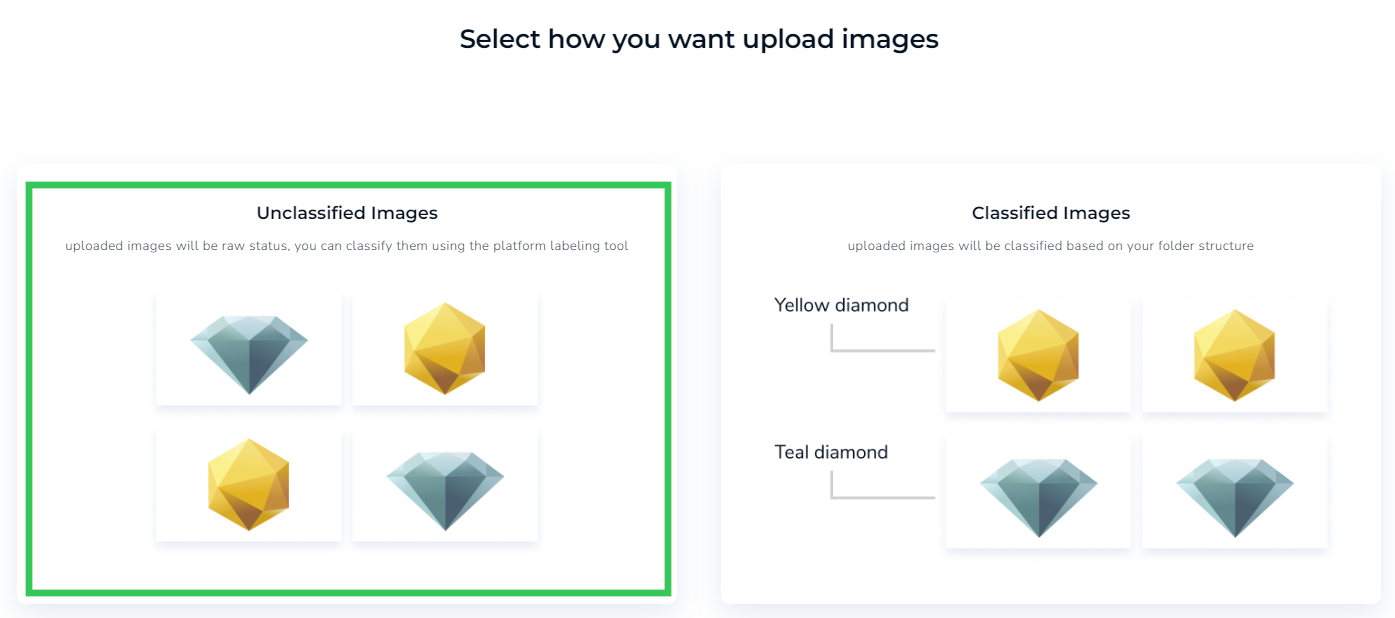
* [Unclassified Images](#upload-unclassified-images): Label the images *after* you upload them, just as you would for other projects.
### Upload Classified Images
If you're using {llsf} and want to load and classify images from a Snowflake stage, go to [Load Images from Snowflake into LandingLens](./load-images-from-snowflake).
If you have images separated into different folders in your computer's directory according to their class, this method is for you. When you upload folders, the images will automatically be classified based on the titles of your folders.
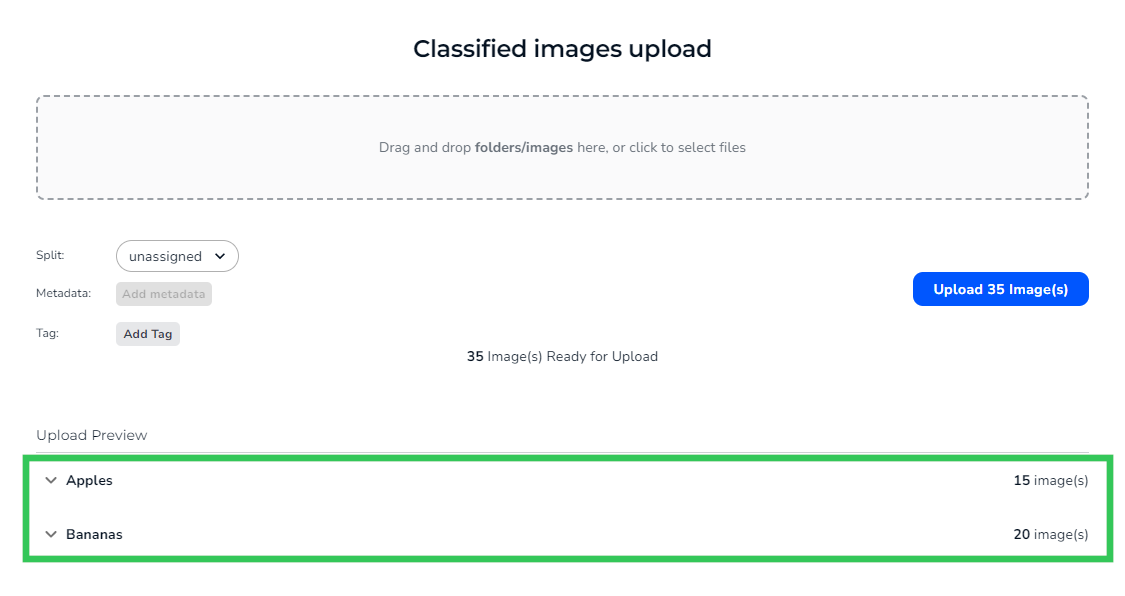
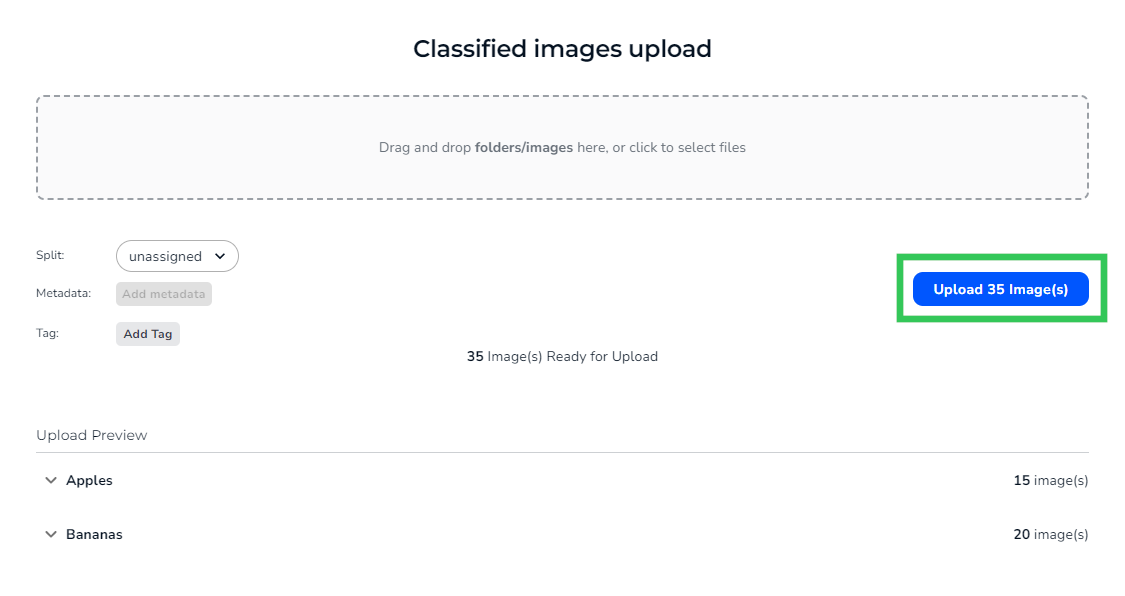
For example, let’s say you want to distinguish apples from bananas. You can create these folders: **Apples** and **Bananas**.
When you upload these folders, the images from each folder will automatically be classified based on the titles of the folders. The Classified Images method is preferred because you can organize your images first and not have to worry about labeling these images after upload.
Before you upload folders of images with the Classified method, ensure that the folder titles reflect the classes you want to create.Before uploading images to LandingLens, ensure that you’ve selected the Classified Images option. Otherwise, images won’t be labeled during the upload process. For example, the drag-and-drop method will use the Unclassified method, not the Classified option.
To upload classified images:
1. Open the classification project you want to upload images to.
2. Perform one of the following actions:
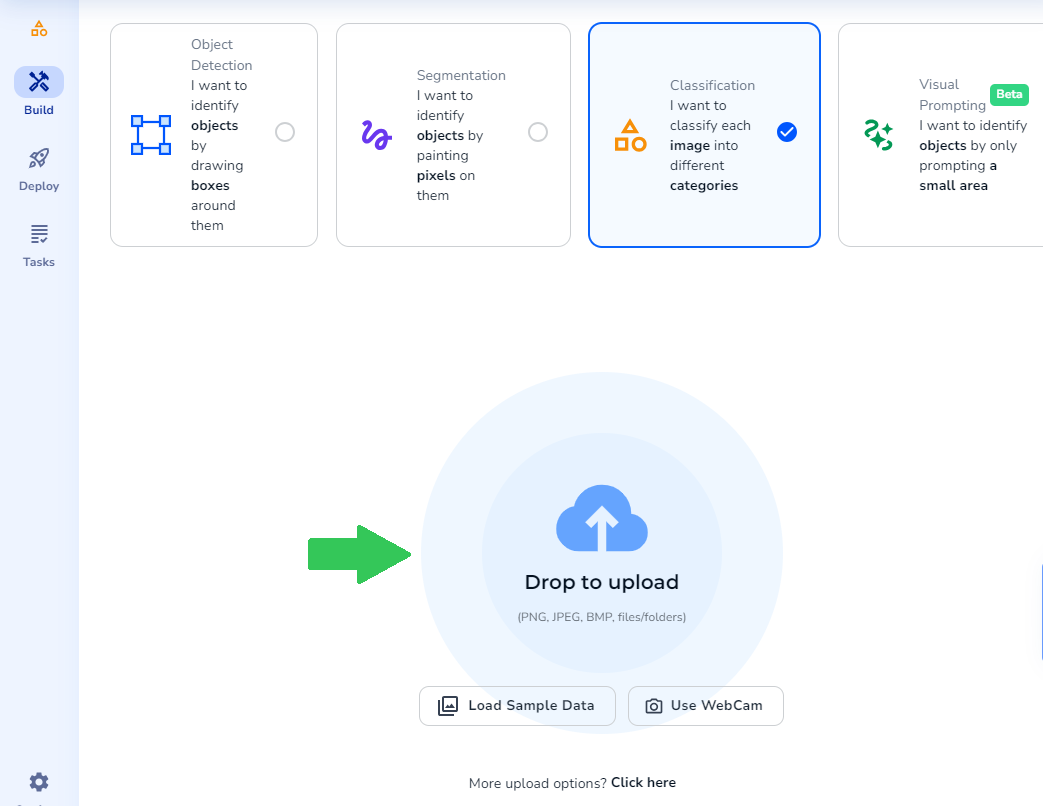
* If you do *not* have any images already uploaded to your project, click the **Drop to Upload** area.
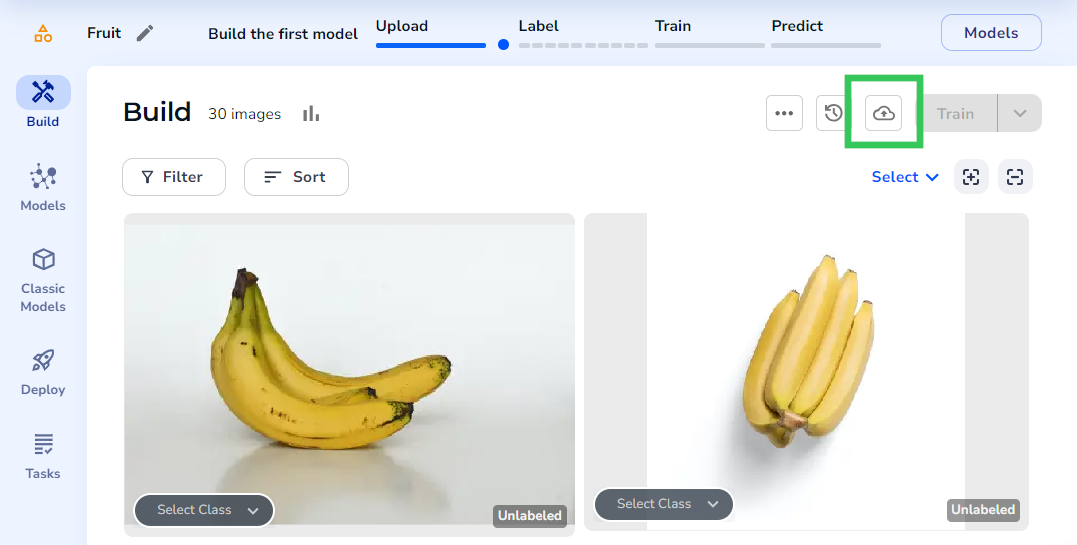
* If you already have images uploaded to your project, click the **Upload** icon.
3. Click **Classified Images**. This step is important as it's the only way to upload classified images.
4. Upload your folders to the **Classified Images Upload** area. LandingLens displays a preview of the images and their respective classes.
5. Click **Upload**. LandingLens uploads the images and classifies them according to their folder titles.
### Upload Unclassified Images
If your images are *not *already separated into different folders in your computer’s directory, you can use the** Unclassified Images\*\* method. When you upload images this way, you’ll need to assign classes to images afterward.
This option is fine if you don’t have many images. However, if you have several images, try to organize them into folders and use the [Classified Images](./classification#upload-classified-images) option.
To upload unclassified images
1. Open the classification project you want to upload images to.
2. Perform one of the following actions:
* If you do *not* have any images already uploaded to your project, drag and drop the images you want to upload to the **Drop to Upload** area. LandingLens automatically uploads the images to your project.
* If you already have images uploaded to your project, click the **Upload** icon.
3. Click **Unclassified Images**.
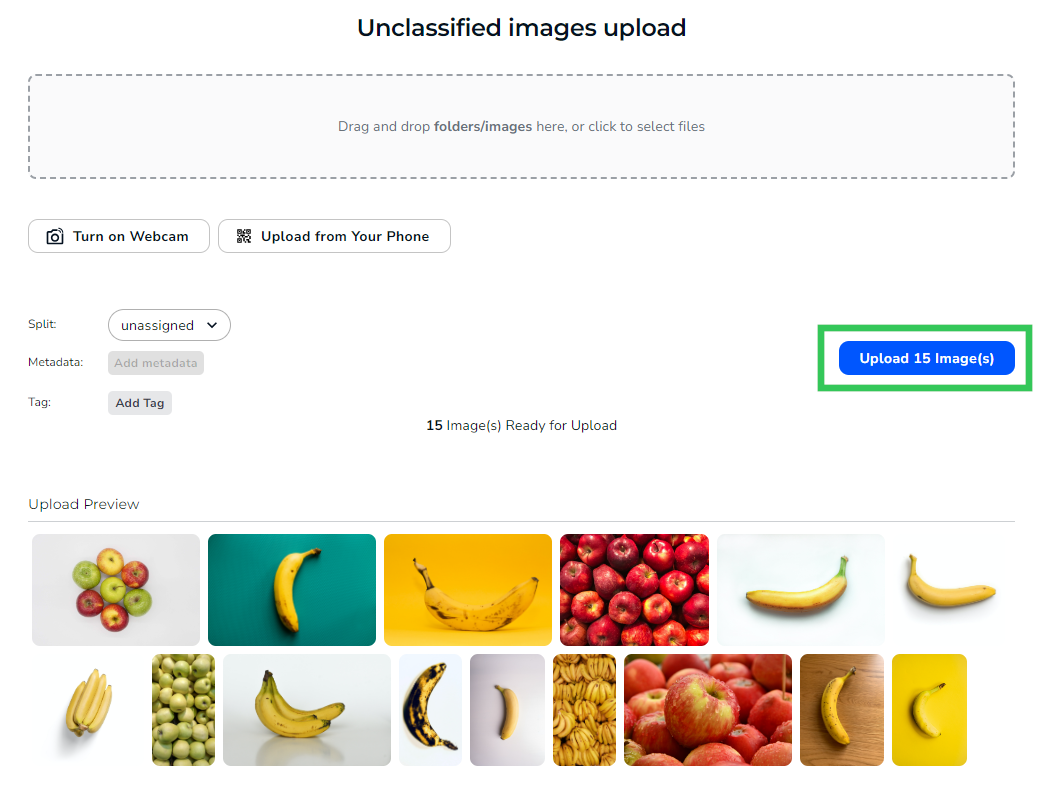
4. Upload the images to the **Unclassified Images Upload** area. LandingLens displays a preview of the images.
5. Click **Upload**.
## Add Labels to Images in Classification Projects
If you have already uploaded images using the [Unclassified](./classification#upload-unclassified-images) method, you will need to add labels to your images manually. There are two options for adding labels to images in classification projects:
* On the **Build** page, you can create or select a class from the **Select Class** drop-down menu for each image accordingly. (The video below has no sound.)Your browser does not support the audio element.
* Click to open an image. Create or select a class from the **Select Class** drop-down menu for each image accordingly.Your browser does not support the audio element.
 ### Upload Classified Images
 When you upload these folders, the images from each folder will automatically be classified based on the titles of the folders. The Classified Images method is preferred because you can organize your images first and not have to worry about labeling these images after upload.
 * If you already have images uploaded to your project, click the **Upload** icon.
 3. Click **Classified Images**. This step is important as it's the only way to upload classified images.
 4. Upload your folders to the **Classified Images Upload** area. LandingLens displays a preview of the images and their respective classes.
5. Click **Upload**. LandingLens uploads the images and classifies them according to their folder titles.
4. Upload your folders to the **Classified Images Upload** area. LandingLens displays a preview of the images and their respective classes.
5. Click **Upload**. LandingLens uploads the images and classifies them according to their folder titles.
 ### Upload Unclassified Images
If your images are *not *already separated into different folders in your computer’s directory, you can use the** Unclassified Images\*\* method. When you upload images this way, you’ll need to assign classes to images afterward.
This option is fine if you don’t have many images. However, if you have several images, try to organize them into folders and use the [Classified Images](./classification#upload-classified-images) option.
To upload unclassified images
1. Open the classification project you want to upload images to.
2. Perform one of the following actions:
* If you do *not* have any images already uploaded to your project, drag and drop the images you want to upload to the **Drop to Upload** area. LandingLens automatically uploads the images to your project.
### Upload Unclassified Images
If your images are *not *already separated into different folders in your computer’s directory, you can use the** Unclassified Images\*\* method. When you upload images this way, you’ll need to assign classes to images afterward.
This option is fine if you don’t have many images. However, if you have several images, try to organize them into folders and use the [Classified Images](./classification#upload-classified-images) option.
To upload unclassified images
1. Open the classification project you want to upload images to.
2. Perform one of the following actions:
* If you do *not* have any images already uploaded to your project, drag and drop the images you want to upload to the **Drop to Upload** area. LandingLens automatically uploads the images to your project.
 4. Upload the images to the **Unclassified Images Upload** area. LandingLens displays a preview of the images.
5. Click **Upload**.
4. Upload the images to the **Unclassified Images Upload** area. LandingLens displays a preview of the images.
5. Click **Upload**.
 ## Add Labels to Images in Classification Projects
If you have already uploaded images using the [Unclassified](./classification#upload-unclassified-images) method, you will need to add labels to your images manually. There are two options for adding labels to images in classification projects:
* On the **Build** page, you can create or select a class from the **Select Class** drop-down menu for each image accordingly. (The video below has no sound.)Your browser does not support the audio element.
* Click to open an image. Create or select a class from the **Select Class** drop-down menu for each image accordingly.Your browser does not support the audio element.
## Add Labels to Images in Classification Projects
If you have already uploaded images using the [Unclassified](./classification#upload-unclassified-images) method, you will need to add labels to your images manually. There are two options for adding labels to images in classification projects:
* On the **Build** page, you can create or select a class from the **Select Class** drop-down menu for each image accordingly. (The video below has no sound.)Your browser does not support the audio element.
* Click to open an image. Create or select a class from the **Select Class** drop-down menu for each image accordingly.Your browser does not support the audio element.